Introduction
Installing a garden hose is one of the simplest yet most essential tasks for any homeowner or gardener looking to maintain a healthy outdoor space. Whether you’re setting up a new garden watering system or replacing an old hose, understanding how to install a garden hose properly saves water, prevents leaks, and ensures durability. This guide covers everything from choosing the right garden hose type to the step-by-step installation process, troubleshooting common problems, and maintaining your hose for long-term use.
You’ll also learn about key factors like hose length measurement and diameter selection, tools required for installation, and environmentally friendly watering practices inspired by EPA WaterSense and advice from the University of California Agriculture and Natural Resources. By the end, you’ll be equipped with practical tips, including how to avoid common pitfalls and comply with local water regulations.
Types of Garden Hoses and Their Uses
Choosing the right type of garden hose is fundamental to a successful installation. Garden hoses vary by material, flexibility, diameter, and purpose.
- Rubber hoses are durable and resistant to cracking, ideal for heavy-duty use.
- Vinyl hoses are lightweight and affordable but less durable.
- Expandable hoses save space and are easy to store but can be prone to leaks if not handled carefully.
Diameter is equally important: common sizes are 5/8 inch, which balances water flow and ease of handling, and 1/2 inch hoses, better for lighter watering. Larger diameters increase flow but can be heavier and harder to maneuver.
Understanding the type of garden hose you need helps avoid mismatched fittings and ensures efficient water delivery.
Tools and Materials Needed for Installation
Before beginning your garden hose installation, gather the right tools and materials to streamline the process.
- Garden hose of appropriate length and diameter
- Garden hose connectors (preferably brass or reinforced plastic for longevity)
- Rubber washers to prevent leaks
- Adjustable wrench (for tightening fittings without damage)
- Tape measure to measure hose length and garden layout
- Scissors or utility knife to cut hose if needed
- Teflon tape for sealing threaded connections
Having these tools at hand prevents delays and reduces the risk of leaks or damage during installation.
Step-by-Step Installation Process
Installing your garden hose correctly can be done in a few straightforward steps:
- Measure your garden area: Use a tape measure to determine the distance from your outdoor water supply to the farthest point you want to reach.
- Select the right hose length and diameter: Avoid buying excessively long hoses to minimize pressure loss.
- Turn off the water supply: Always shut off the outdoor faucet before connecting or disconnecting hoses.
- Attach a rubber washer inside the hose connector: This prevents leaks at the connection point.
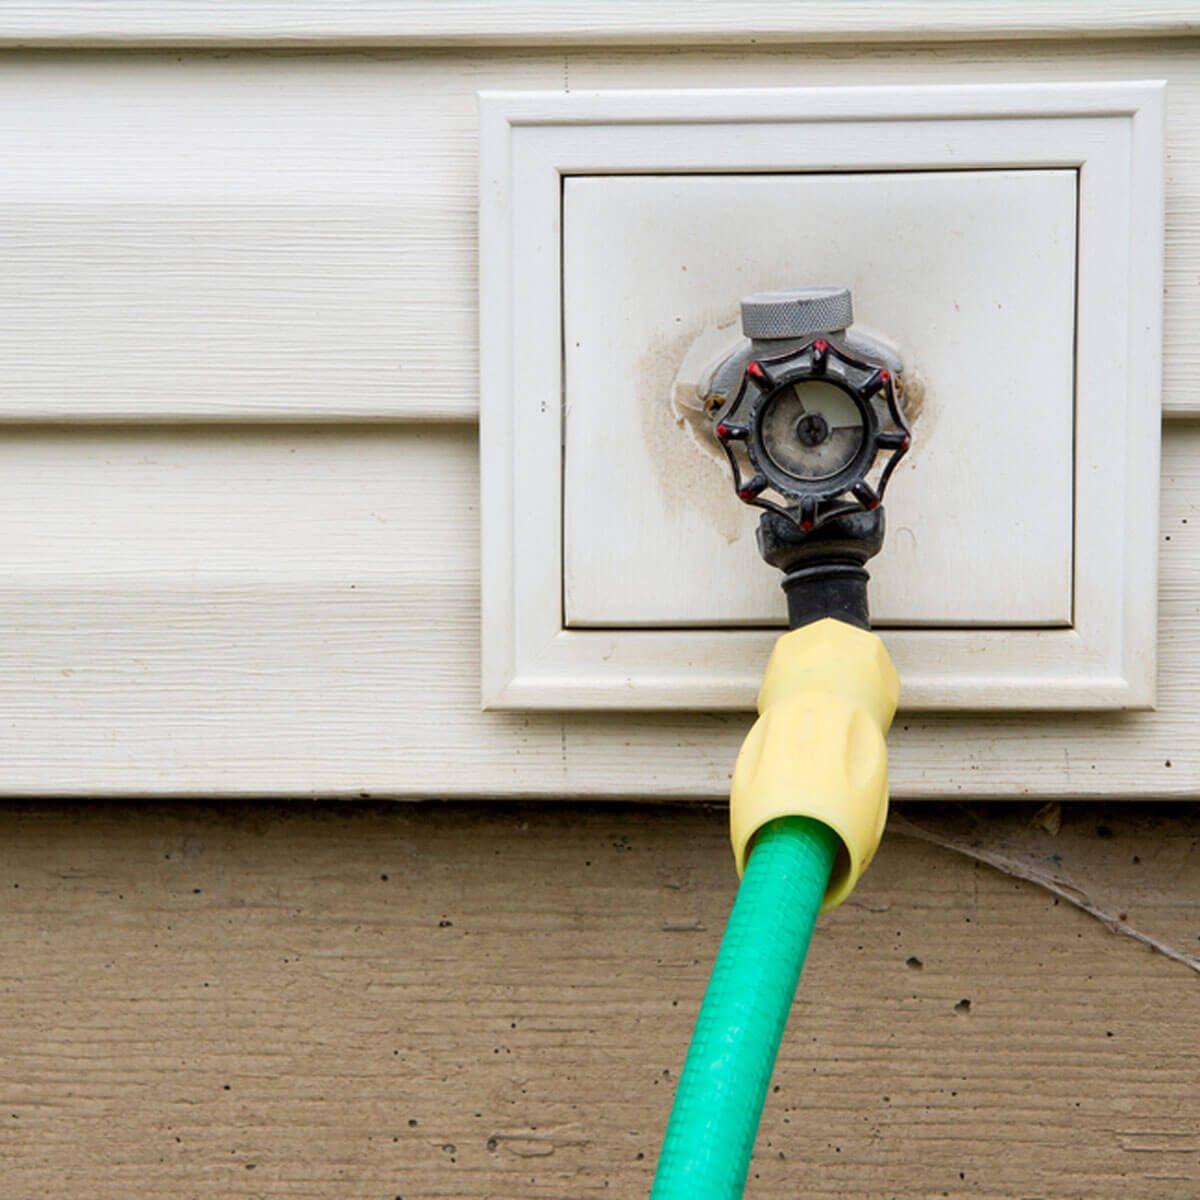
- Connect the hose to the outdoor faucet: Screw the garden hose connector onto the faucet by hand. Use an adjustable wrench to snug it, but do not overtighten.
- Lay the hose out carefully: Avoid kinks or sharp bends by unrolling the hose gently.
- Test the connection: Turn on the water slowly to check for leaks. Tighten fittings slightly if needed.
Following these steps ensures a secure, leak-free water hose setup.
Common Installation Problems and Troubleshooting
Even with careful installation, some issues may arise:
- Leaks at connectors: Usually caused by missing or damaged washers. Replace washers and avoid overtightening.
- Kinks restricting water flow: Straighten hose sections and avoid sharp bends.
- Low water pressure: Check hose diameter and length; longer or narrower hoses reduce pressure.
- Hard-to-connect fittings: Use Teflon tape on threaded areas for a smoother seal.
Addressing these common pitfalls early preserves your garden watering system’s efficiency.
Maintenance Tips for Garden Hoses
Regular maintenance extends the life of your garden hose and supports water conservation efforts endorsed by organizations like the American Society of Landscape Architects.
- Drain water from the hose after use to prevent freezing and cracking.
- Store hoses in a shaded, cool area to avoid UV damage.
- Inspect connectors and washers regularly for wear.
- Clean the hose exterior to reduce dirt buildup.
- Avoid dragging the hose over rough surfaces.
Good hose maintenance lowers repair costs and supports an environmentally friendly watering routine.
Choosing the Right Hose Length and Diameter
Measuring your garden space accurately is critical. Overestimating hose length can cause unnecessary water pressure loss, while an undersized hose limits reach.
- Use the tape measure to map the longest run from the water source.
- Add extra length for flexibility around corners or garden beds.
- Select a diameter that balances water flow and ease of handling (5/8 inch is a common all-purpose size).
Proper measurement and selection optimize your water hose setup.
Local Water Regulations and Environmental Considerations
Many regions encourage water conservation through regulations and incentives, such as the EPA WaterSense program promoting efficient outdoor water use. Before installation, check local rules about:
- Maximum allowable hose lengths
- Required use of water-efficient connectors or timers
- Restrictions on watering times
Integrating garden irrigation tools like timers and drip systems can complement your garden hose installation for sustainable watering.
How I’d Do It: Expert DIY Installation Tips
Having installed dozens of garden hoses, I find that preparation is key. I always start by measuring my garden carefully and selecting a rubber hose with brass connectors for durability. I avoid overtightening fittings—hand-tight plus a quarter turn with a wrench is enough. To prevent leaks, I replace washers yearly and store hoses on reels to avoid kinks. Finally, I incorporate a simple timer to automate watering, saving water and time.
Common Pitfalls to Avoid
- Using incorrect hose diameter for your water supply
- Forgetting washers inside connectors
- Overtightening fittings causing thread damage
- Ignoring hose storage leading to cracks and leaks
- Kinking hose during installation or use
Essential Checklist for Garden Hose Installation
- Measure garden area accurately
- Choose hose with appropriate length and diameter
- Gather tools: wrench, tape measure, connectors, washers
- Turn off water supply before installation
- Use rubber washers and Teflon tape
- Avoid overtightening connectors
- Test for leaks and pressure
- Store hose properly after use
Tools and Metrics for Success
- Tape measure: for hose length and garden layout
- Adjustable wrench: to tighten connectors without damage
- Teflon tape: seals threaded fittings
- Utility knife: cuts hose cleanly if needed
- Hose reel or hanger: for proper storage
FAQs
How do I prevent leaks in my garden hose installation?
Always use good-quality rubber washers inside hose connectors and avoid overtightening fittings. Replace washers annually or at the first sign of wear. Applying Teflon tape on threaded connections can also improve the seal and prevent leaks.
What is the best garden hose material for durability?
Rubber hoses are generally the most durable, resistant to cracking, and suitable for heavy-duty use. Vinyl hoses are cheaper but less long-lasting. Expandable hoses save space but require careful handling to avoid leaks.
How do I measure the right hose length for my garden?
Use a tape measure to find the distance from your outdoor faucet to the farthest watering point. Add 10-15 feet extra to allow for maneuvering around garden features. Avoid buying a hose that is unnecessarily long to prevent pressure loss.
Can I install a garden hose without tools?
It’s possible to hand-tighten connectors, but using an adjustable wrench ensures a tighter, leak-free fit without damaging fittings. Additionally, tools like tape measures and utility knives simplify measurement and cutting tasks.
Are there environmental benefits to proper garden hose installation?
Yes, correct installation and maintenance reduce water waste by preventing leaks and optimizing flow. Following guidelines from EPA WaterSense and using water-efficient connectors support sustainable gardening and local water conservation efforts.
Key Takeaways
Proper garden hose installation starts with selecting the right hose type and size based on your garden’s layout. Gathering quality tools and connectors, measuring accurately, and following a careful step-by-step installation prevent leaks and kinks. Regular maintenance extends hose life and supports water conservation. Finally, understanding local water regulations and adopting environmentally friendly watering practices ensure your garden stays healthy and sustainable.
References
- EPA WaterSense. (n.d.). Outdoor Water Use. https://www.epa.gov/watersense/outdoor-water-use
- University of California Agriculture and Natural Resources. (n.d.). Gardening Tips. https://ucanr.edu/sites/gardenweb/Gardening_Tips/
- American Society of Landscape Architects. (n.d.). Water-Efficient Landscaping. https://www.asla.org/water-efficient-landscaping.aspx
With these insights, you’re ready to install or replace your garden hose confidently. Happy gardening and watering!
