Starting a garden from seeds is one of the most rewarding and cost-effective ways to grow your own plants. Whether you want vibrant flowers, fresh vegetables, or aromatic herbs, beginning with seeds offers greater variety and control over your garden’s development. However, many beginners feel overwhelmed by the process, unsure of when and how to plant seeds, or how to care for young seedlings properly.
In this comprehensive guide, you’ll learn how to start a garden from seeds step-by-step. We’ll cover everything from seed selection and soil preparation to germination tips and transplanting seedlings outdoors. By the end, you’ll have the knowledge and confidence to grow a thriving garden from scratch. Whether you have a small balcony or a sprawling backyard, growing plants from seeds can be simple and highly rewarding when you follow best practices.
Why Start a Garden from Seeds?
Starting from seeds offers numerous advantages compared to buying mature plants:
- Cost-effective: Seeds are generally inexpensive compared to seedlings or mature plants.
- Wider variety: Access to rare or heirloom plant varieties not available as seedlings.
- Better control: You monitor the entire growth cycle, ensuring healthier plants.
- Satisfaction: Watching a plant grow from a tiny seed is a fulfilling experience.
Step 1: Choose the Right Seeds for Your Garden
Selecting the right seeds is crucial for success. Consider these factors:
- Climate and growing zone: Use your USDA Hardiness Zone or local climate data to pick seeds suited for your area.
- Plant type: Decide whether you want vegetables, flowers, herbs, or a mix.
- Growing season: Choose seeds that match your expected planting and harvesting timeline.
- Seed quality: Buy seeds from reputable suppliers to ensure high germination rates.
Pro tip: Start with easy-to-grow seeds like lettuce, radishes, marigolds, or basil if you’re a beginner.
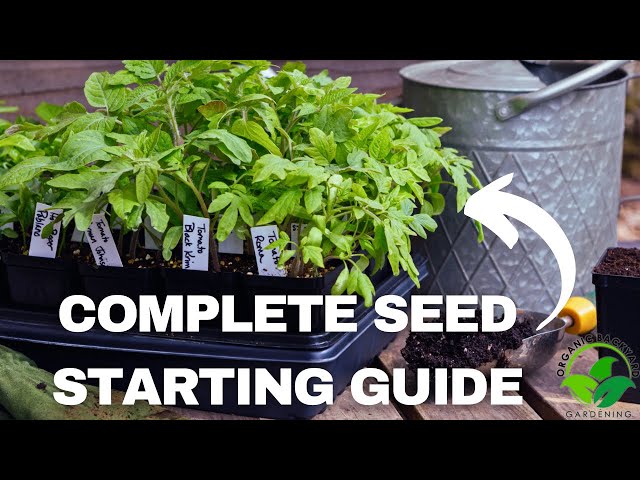
Step 2: Gather Your Supplies
To start your garden from seeds, you’ll need:
- Seed trays or containers with drainage holes
- Seed-starting mix or light potting soil (avoid garden soil which may be too heavy)
- Labels and markers to track seed types
- Watering can or spray bottle for gentle watering
- Grow lights or a sunny window providing 12-16 hours of light daily
- Plastic domes or plastic wrap to maintain humidity during germination (optional)
Step 3: Prepare the Soil and Plant the Seeds
How to prepare seed-starting soil:
- Use a sterile, well-draining seed-starting mix.
- Moisten the soil slightly before planting; it should be damp but not soggy.
Planting seeds correctly:
- Check the seed packet for recommended planting depth.
- Fill containers with soil, and plant seeds at the correct depth.
- Cover seeds lightly with soil and gently press down.
- Label each container with seed type and planting date.
Example: Lettuce seeds are typically planted 1/8 inch deep, while larger seeds like peas are planted about 1 inch deep.
Step 4: Provide Optimal Conditions for Germination
Seeds need specific conditions to sprout successfully:
- Temperature: Most seeds germinate best between 65°F and 75°F (18°C to 24°C).
- Moisture: Keep soil consistently moist but avoid waterlogging.
- Light: Some seeds require light to germinate, while others need darkness—refer to seed packet instructions.
- Humidity: Covering trays with plastic wrap or domes helps retain moisture until seeds sprout.
Tip: Use a heat mat to maintain consistent warmth if your home is cool.
Step 5: Caring for Seedlings
Once seeds sprout, follow these care steps:
- Remove covers to prevent mold and provide fresh air.
- Provide ample light—seedlings need 12-16 hours of light daily. Use grow lights if natural light is insufficient.
- Water carefully—keep soil moist but not soggy; water from the bottom if possible to avoid damping-off disease.
- Thin seedlings by snipping weaker plants at soil level, allowing the strongest seedlings more space to grow.
- Fertilize lightly after seedlings develop their first true leaves using a diluted, balanced fertilizer.
Step 6: Harden Off Seedlings Before Transplanting
Before planting seedlings outdoors, acclimate them gradually to outdoor conditions:
- Start by placing seedlings outside for a few hours in a sheltered spot.
- Increase outdoor time daily over 7-10 days.
- Protect from strong sun, wind, and cold during this period.
Hardening off reduces transplant shock and improves survival rates.
Step 7: Transplant Seedlings Into Your Garden
When seedlings have grown sturdy and outdoor soil temperatures are suitable:
- Prepare garden beds by loosening soil and adding compost.
- Transplant seedlings carefully to avoid damaging roots.
- Space plants according to seed packet recommendations.
- Water thoroughly after planting and mulch to retain moisture.
Common Challenges and How to Overcome Them
| Problem | Cause | Solution |
|————————–|———————————|————————————-|
| Poor germination | Old seeds, incorrect depth | Use fresh seeds, follow planting depth |
| Damping-off disease | Overwatering, poor air circulation | Water properly, improve airflow |
| Leggy seedlings | Insufficient light | Increase light exposure or use grow lights |
| Seedlings wilting | Under/overwatering or transplant shock | Adjust watering, harden off properly |
Expert Tips for Success
- Start seeds indoors 6-8 weeks before last frost date for most vegetables.
- Label everything clearly to avoid confusion.
- Keep a gardening journal to track planting dates, germination rates, and growth progress.
- Use companion planting to improve growth and reduce pests.
Gardening expert Dr. Linda Chalker-Scott notes, “Patience and observation are key—adjust your care based on how your seedlings respond.”
Conclusion
Starting a garden from seeds is an accessible and fulfilling way to grow your own plants. By carefully selecting seeds, preparing the right conditions, and providing attentive care to seedlings, you can enjoy a vibrant and productive garden. Remember to be patient, observe your plants closely, and adapt your techniques as needed. With practice, you’ll develop a deeper connection to your garden and the natural growth cycle.
Ready to get your hands dirty? Gather your favorite seeds and start planting today—your flourishing garden awaits!
FAQs:
Q: How long does it take for seeds to germinate?
A: Germination time varies by plant, typically ranging from 3 days (radishes) to 3 weeks (carrots).
Q: Can I start seeds directly in the garden?
A: Yes, but some seeds require a longer growing season and better controlled conditions indoors first.
Q: How often should I water seedlings?
A: Keep soil moist consistently, watering gently as needed—usually every 1-3 days depending on conditions.
By following these detailed steps, you can confidently start your garden from seeds and enjoy the many benefits of growing your own plants from the very beginning. Happy gardening!
