Introduction
A leaking garden hose can turn a simple watering task into a frustrating mess. Not only does it waste water, but it also reduces water pressure, making your gardening chores less efficient. Fortunately, repairing a leak in a garden hose is often straightforward and cost-effective. Whether you notice a small drip or a significant tear, this guide will walk you through proven methods to fix your hose quickly and effectively. By following expert tips and using common household tools, you can extend the life of your garden hose and maintain optimal gardening performance.
In this article, we’ll cover how to identify leaks, the best repair techniques for various types of damage, and maintenance tips to prevent future leaks. Whether you’re a seasoned gardener or a beginner, you’ll find practical advice to keep your hose in top shape.
Common Causes of Garden Hose Leaks
Before diving into repairs, understanding why hoses leak helps in choosing the right fix:
- Wear and Tear: Frequent bending and dragging cause cracks or holes.
- Sun Damage: UV rays degrade hose material, making it brittle.
- Sharp Objects: Punctures from thorns, nails, or sharp stones.
- Loose Connections: Worn-out or improperly attached fittings.
- Freezing Temperatures: Water expansion inside the hose can cause splits.
How to Identify a Leak in a Garden Hose
Finding the exact spot of a leak is crucial for effective repair. Here’s how:
- Visual Inspection: Look for visible cracks, holes, or softened areas.
- Water Test: Turn on the hose and observe for drips or sprays.
- Soapy Water Method: Apply soapy water along the hose; bubbles indicate leaks.
- Pressure Check: Notice if water pressure drops significantly.
Step-by-Step Methods to Repair a Leak in a Garden Hose
1. Repairing Small Holes or Punctures with Waterproof Tape
Materials Needed: Waterproof duct tape or specialized hose repair tape.
Process:
– Turn off the water and drain the hose.
– Dry the damaged area thoroughly.
– Wrap the tape tightly around the hole, overlapping layers for strong sealing.
– Wait 30 minutes before turning water back on to ensure adhesion.
Best For: Temporary fixes or small punctures under 1/4 inch.
2. Using a Hose Repair Kit for Larger Leaks or Splits
Materials Needed: Hose repair kit (includes couplings, clamps, and connectors).
Process:
– Cut out the damaged section using a sharp knife or scissors.
– Insert the hose ends into the repair coupling.
– Secure both ends with clamps or connectors provided.
– Tighten clamps firmly to prevent leaks.
Benefits:
– Restores hose integrity.
– Works well for mid-hose leaks or splits.
– Provides a durable, long-lasting repair.
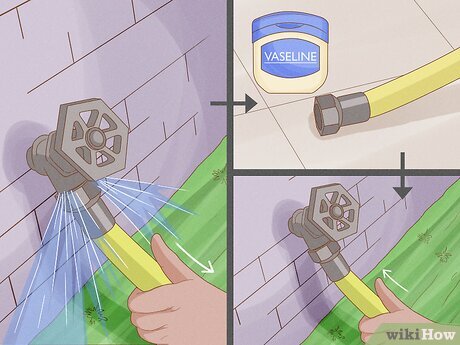
3. Fixing Leaks at Hose Fittings or Connectors
Loose or damaged fittings often cause leaks near the hose ends.
Steps:
– Inspect the fitting for cracks or worn-out washers.
– Replace rubber washers inside the connectors if worn.
– Tighten the fitting securely by hand or with pliers.
– For damaged fittings, replace them entirely using a hose fitting replacement kit.
4. DIY Sealant Solutions
For small or awkward leaks, applying a silicone-based sealant or waterproof epoxy can provide a quick fix.
Instructions:
– Clean and dry the leaking area.
– Apply sealant evenly around the leak.
– Allow the sealant to cure as per manufacturer instructions (usually 24 hours).
– Test the hose under pressure.
Note: This method is best for temporary repairs or when tape or kits aren’t available.
Tips to Prevent Future Garden Hose Leaks
- Store Properly: Coil hoses neatly and avoid kinks to prevent stress points.
- Use Hose Reels: Keeps hoses off the ground and reduces wear.
- Avoid Dragging: Move hoses carefully to prevent punctures.
- Drain Before Winter: Prevent freezing damage by emptying hoses.
- Regular Inspections: Check hoses periodically for early signs of wear.
Expert Insights on Garden Hose Maintenance
According to gardening expert Laura Jenkins, “Regular maintenance of garden hoses can extend their life by years. Simple steps like storing properly and replacing washers prevent most leaks.”
Research shows that over 30% of household water leaks come from garden hoses and outdoor faucets, emphasizing the importance of timely repairs. Efficient hose maintenance not only saves water but also reduces gardening costs.
Conclusion
Repairing a leak in your garden hose doesn’t have to be complicated or expensive. By identifying the leak type and using appropriate repair methods—whether it’s waterproof tape for small holes or a hose repair kit for larger damage—you can restore your hose’s functionality quickly. Remember, regular maintenance and proper storage go a long way in preventing future leaks.
Take action today: inspect your garden hose, fix any leaks promptly, and enjoy efficient watering with minimal waste. A well-maintained hose means a healthier garden and a happier gardener!
Quick Recap: How to Repair Leak in Garden Hose
| Leak Type | Repair Method | Materials Needed | Repair Time |
|—————————-|——————————|————————————-|——————|
| Small hole or puncture | Waterproof tape | Waterproof duct tape or repair tape | < 15 minutes |
| Large hole or split | Hose repair kit | Couplings, clamps, connector | 20-30 minutes |
| Leaks at fittings | Replace washers or fittings | Replacement washers, pliers | 10-15 minutes |
| Temporary seal | Silicone sealant or epoxy | Sealant, cleaning cloth | 24 hours curing |
By following these steps and tips, you can confidently fix leaks and keep your garden hose performing at its best.
