Garden statues add charm and personality to outdoor spaces, but exposure to the elements can cause wear and damage over time. Whether your statue is cracked, chipped, or showing signs of weathering, learning how to repair garden statues can save you money and preserve your garden’s aesthetic appeal. This guide covers practical, expert-backed techniques for restoring various types of garden statues, ensuring they look beautiful for years to come.
In this article, you’ll discover step-by-step instructions on identifying damage, selecting the right materials, and applying effective repair methods for common statue materials like concrete, resin, stone, and ceramic. We also discuss preventive care tips to extend the life of your garden art. Whether you’re a seasoned gardener or a DIY enthusiast, this guide provides straightforward advice to help you bring your garden statues back to life.
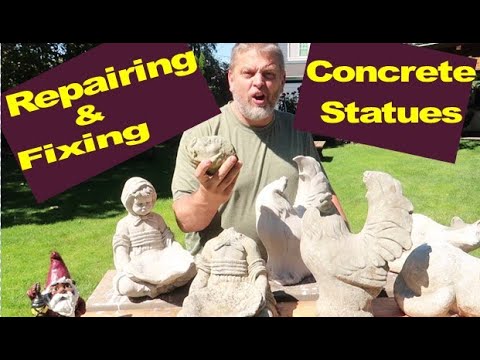
Understanding Common Types of Garden Statue Damage
Before diving into repairs, it’s important to identify the type and extent of damage. Here are the most frequent issues affecting garden statues:
- Cracks and Chips: Often caused by freezing temperatures, accidental knocks, or settling soil.
- Fading or Discoloration: Due to sun exposure, moisture, and pollution.
- Surface Erosion: Weathering wears down fine details over time.
- Broken or Missing Pieces: Limbs, heads, or small decorative parts may detach.
- Mold and Mildew: Moist environments promote biological growth on porous materials.
Knowing the damage type helps determine the best repair approach and materials.
How to Repair Cracks and Chips in Garden Statues
Step 1: Clean the Statue Thoroughly
Use a soft brush and mild detergent mixed with water to remove dirt, moss, and algae. Rinse well and let dry completely. Cleaning ensures adhesives and fillers bond properly.
Step 2: Choose the Right Repair Material
- Concrete Statues: Use a concrete patch or epoxy putty designed for masonry.
- Resin Statues: Opt for a two-part epoxy adhesive or resin filler.
- Stone Statues: Use a stone epoxy or polyester resin.
- Ceramic Statues: Employ ceramic filler or epoxy glue.
Step 3: Fill or Bond the Damage
- For small cracks, apply epoxy or filler with a putty knife, smoothing it flush with the surface.
- For larger chips or missing pieces, mold epoxy putty to replace the missing section, then shape it carefully before curing.
- Hold broken parts together with clamps or tape while adhesives cure (usually 24 hours).
Step 4: Sand and Smooth
Once dry, sand the repaired areas with fine-grit sandpaper until smooth and level with the surrounding surface.
Step 5: Paint or Seal
Match the repair to the original color using outdoor acrylic paint or masonry paint. Finish with a clear, waterproof sealant to protect against future damage.
Repairing Broken or Detached Pieces
Garden statues often have delicate parts that may break off. Here’s how to reattach them effectively:
- Use a strong adhesive: Two-part epoxy is recommended for most materials due to its durability and water resistance.
- Dry fit the pieces: Before gluing, ensure they align perfectly.
- Apply adhesive sparingly: Excess glue can mar the appearance.
- Clamp or stabilize: Hold parts firmly for the recommended curing time.
- Fill gaps if needed: Use filler putty to conceal seams and sand smooth after drying.
- Repaint and seal: As with cracks, matching paint and sealing will finish the repair.
Preventing Future Damage to Garden Statues
Prevention is key to preserving your garden art. Follow these expert tips:
- Apply Sealants Annually: Use breathable, waterproof sealants formulated for outdoor statues to repel moisture and UV rays.
- Position Strategically: Avoid placing statues where they face direct harsh sunlight or near sprinklers.
- Elevate Statues: Place them on pedestals or gravel beds to prevent ground moisture absorption.
- Regular Cleaning: Remove dirt, moss, and mildew promptly using gentle cleaning methods.
- Cover During Harsh Weather: Use protective covers in winter or during storms to reduce freeze-thaw damage.
Expert Tips for Repairing Specific Materials
Concrete Statues
Concrete is porous and heavy, requiring patching compounds compatible with cement. Epoxy putties with added sand texture provide better adhesion and realistic repair.
Resin Statues
Resin can be brittle; use flexible epoxy adhesives to prevent future cracking. Paint repairs should use UV-resistant acrylics to prevent fading.
Stone Statues
Stone repairs need specialized stone epoxy and sometimes color pigments to match natural stone hues. Avoid acidic cleaners that can etch the surface.
Ceramic Statues
Ceramics require precision in adhesive application. Use a clear epoxy for invisible repairs and avoid water exposure until fully cured.
Real-World Example: Restoring a Damaged Concrete Garden Angel
A homeowner noticed multiple cracks and a missing finger on their concrete garden angel statue. After cleaning, they applied a concrete patch mixed with fine sand to fill cracks. For the missing finger, they molded epoxy putty into shape, attached it carefully, and sanded it smooth. Finally, they painted the statue with weatherproof acrylic paint and sealed it with a breathable masonry sealant. The statue looked almost new and was protected against further damage.
Frequently Asked Questions About Garden Statue Repair
Q: Can I repair garden statues myself or do I need a professional?
A: Most minor repairs like cracks, chips, and small breaks can be done at home with proper materials and patience. Complex restoration or large structural damage may require professionals.
Q: How long do repairs last?
A: When done correctly, repairs can last several years, especially if you maintain the statue with sealants and proper care.
Q: What if the statue is very old or valuable?
A: Consult a professional conservator to avoid reducing the statue’s value or causing irreversible damage.
Conclusion
Repairing garden statues is a rewarding way to maintain your outdoor decor and protect your investment. By understanding the common types of damage, selecting appropriate repair materials, and following expert techniques, you can restore your statues to their former glory. Regular cleaning, sealing, and thoughtful placement will extend their lifespan and keep your garden inviting year-round. Whether fixing simple cracks or reattaching broken pieces, these practical steps empower you to preserve the charm and character of your garden statues for many seasons to come.
Ready to revive your garden’s artistic centerpiece? Gather your materials, follow this guide, and watch your garden statues shine once again!
