Creating a garden sieve is a simple yet highly effective way to improve your gardening process. Whether you want to sift compost, separate soil from debris, or prepare fine soil for planting, a garden sieve helps you achieve a smooth, consistent texture. This guide will walk you through how to make a garden sieve using common materials, saving you money and enhancing your gardening efficiency.
In this article, you’ll learn why a garden sieve is essential, the materials needed, and step-by-step instructions to build your own durable and functional sieve. We’ll also cover tips for using and maintaining your sieve to get the best results in your garden.
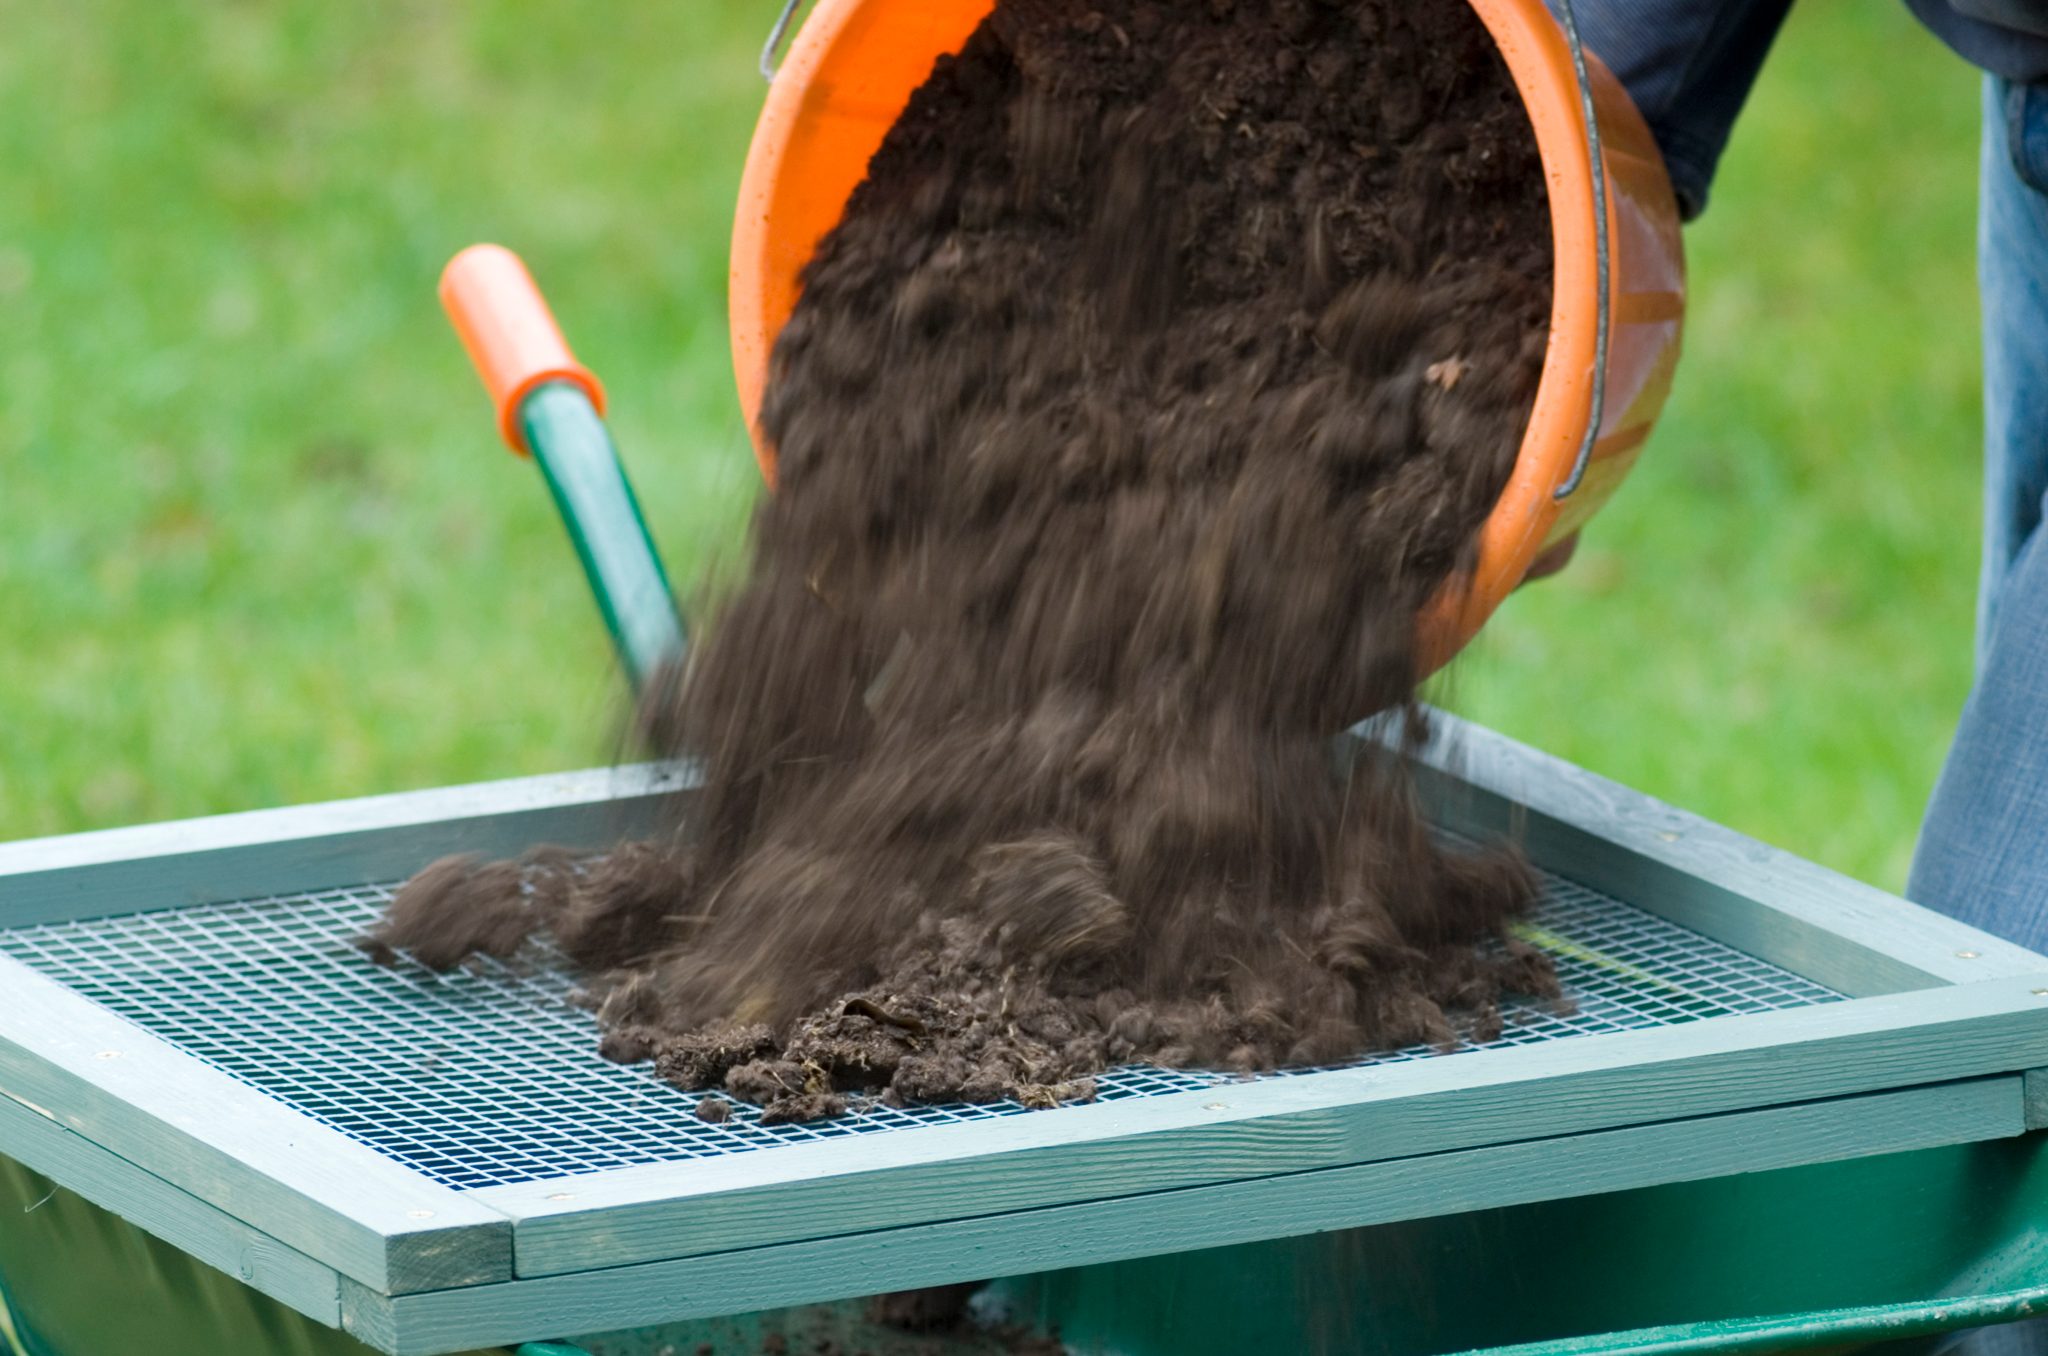
Why Use a Garden Sieve?
A garden sieve plays a crucial role in soil preparation. Here’s why every gardener benefits from having one:
- Improves soil texture by removing stones, clumps, and debris.
- Enhances seedbed preparation for better germination.
- Separates compost and mulch for uniform application.
- Saves money by repurposing materials and avoiding expensive store-bought sieves.
Understanding these benefits helps you appreciate the value of building a sieve tailored to your gardening needs.
Materials Needed to Make a Garden Sieve
Before starting, gather the following materials. These are inexpensive and often available at local hardware stores or even around your home:
- Wooden frame (e.g., 1”x2” lumber or old picture frame)
- Wire mesh or hardware cloth (with ¼-inch or ½-inch openings, depending on desired soil fineness)
- Staple gun and staples or small nails
- Hammer (if using nails)
- Saw (if cutting wood to size)
- Measuring tape
- Sandpaper (optional, for smoothing wooden edges)
- Protective gloves
Step-by-Step Instructions to Make a Garden Sieve
Step 1: Determine the Sieve Size and Frame Dimensions
Decide on the size of your sieve depending on your gardening space and needs. A common size is around 18 inches by 24 inches, which is large enough to handle soil but still manageable.
- Measure and cut four wooden pieces to form a rectangular frame.
- Sand the edges to avoid splinters.
Step 2: Assemble the Wooden Frame
- Join the four wooden pieces using nails or screws to form the frame.
- Ensure the corners are square for a stable structure.
Step 3: Cut the Wire Mesh to Fit
- Lay the wire mesh over the frame.
- Cut the mesh slightly larger than the frame to allow for secure fastening.
Step 4: Attach the Wire Mesh to the Frame
- Using a staple gun, fasten the wire mesh tightly to the wooden frame.
- Start stapling on one side, then pull the mesh taut and continue stapling on the opposite side.
- Repeat on the remaining sides to ensure the mesh is secure and flat.
Step 5: Final Checks and Adjustments
- Inspect the frame for any loose staples or sharp edges.
- Add extra staples where necessary.
- Optionally, attach handles made from wood or rope for easier use.
Tips for Using Your Garden Sieve Effectively
- Use gloves to protect your hands from wire edges.
- Shake or tap the sieve gently to separate fine soil from larger particles.
- Clean the sieve regularly by brushing off soil and debris to prevent rust or damage.
- For wet or sticky soil, allow it to dry before sieving for better results.
Advantages of Making Your Own Garden Sieve
- Customization: Choose mesh size to suit your soil type.
- Cost-effective: Save money by using scrap wood and affordable hardware cloth.
- Durability: Build a sturdy tool that lasts several seasons.
- Satisfaction: Gain a sense of accomplishment from creating your own garden tool.
Frequently Asked Questions (FAQs)
Q1: What mesh size should I use for a garden sieve?
For general soil sifting, a ¼-inch mesh works well. For finer soil or sand, opt for ⅛-inch mesh.
Q2: Can I use metal instead of wood for the frame?
Yes, metal frames are durable but require metalworking skills and tools. Wood is easier for beginners.
Q3: How do I maintain my garden sieve?
Keep it dry after use, clean off soil, and store in a sheltered place to prevent rust and wood decay.
Conclusion
Making a garden sieve is a straightforward project that every gardener can tackle with basic tools and materials. By following these steps, you can create a customized, durable sieve to improve soil quality and planting success. Whether you’re preparing seedbeds, compost, or potting mixes, a well-made garden sieve streamlines your gardening tasks.
Start building your sieve today and experience the benefits of fine, sifted soil that promotes healthier plants and more productive gardens. Remember, a little DIY effort goes a long way in cultivating a thriving green space!
Ready to enhance your garden? Gather your materials and make your own garden sieve now — your plants will thank you!
