Efficient watering is essential for thriving raised garden beds, and a drip irrigation system offers a smart, water-saving solution. If you’re looking to maintain healthy plants, reduce water waste, and save time, learning how to make a drip system for raised garden beds is a game-changer. This article will guide you through the process of creating a DIY drip irrigation system tailored specifically for raised beds, ensuring your garden gets exactly the moisture it needs.
In this comprehensive guide, you’ll discover the key components of a drip system, step-by-step installation instructions, and helpful tips to optimize watering schedules. Whether you are a seasoned gardener or a beginner, this article provides expert advice and practical insights to help you set up a reliable, efficient drip system that promotes plant health and conserves water.
Why Choose a Drip System for Raised Garden Beds?
Before diving into the how-to, it’s important to understand the benefits of drip irrigation in raised beds:
- Water Efficiency: Drip systems deliver water directly to the plant roots, reducing evaporation and runoff.
- Healthier Plants: Consistent moisture levels prevent overwatering and underwatering, promoting stronger growth.
- Time-Saving: Automating watering frees up your time for other gardening tasks.
- Prevents Disease: Watering at the soil level keeps leaves dry, reducing fungal diseases.
Raised garden beds are particularly well-suited for drip irrigation since the contained soil retains moisture well, and targeted watering prevents waste.
Materials Needed to Build a Drip System for Raised Garden Beds
To build an effective drip system, gather the following materials:
- Main supply tubing (usually 1/2 inch polyethylene tubing)
- Drip emitters (1-2 gallons per hour output, adjustable or fixed)
- Micro tubing (1/4 inch) to connect emitters to main tubing
- End caps and connectors (tees, elbows) for tubing layout
- Pressure regulator (to maintain optimal water pressure)
- Filter (to prevent clogging of emitters by debris)
- Timer (optional but recommended for automation)
- Hole punch tool (to insert emitters in tubing)
- Raised bed stakes or clips (to secure tubing in place)
These components are widely available at garden centers and online irrigation suppliers.
Step-by-Step Instructions to Install a Drip System in Raised Garden Beds
1. Plan Your Layout
- Measure your raised bed dimensions and sketch a layout.
- Decide where your plants are located and where emitters should be placed.
- Plan main tubing routes to cover all plants efficiently.
2. Connect the Main Tubing to Water Source
- Attach the filter and pressure regulator to your outdoor faucet or water source.
- Connect the main tubing to the regulator.
- Use a timer here if you want to automate watering schedules.
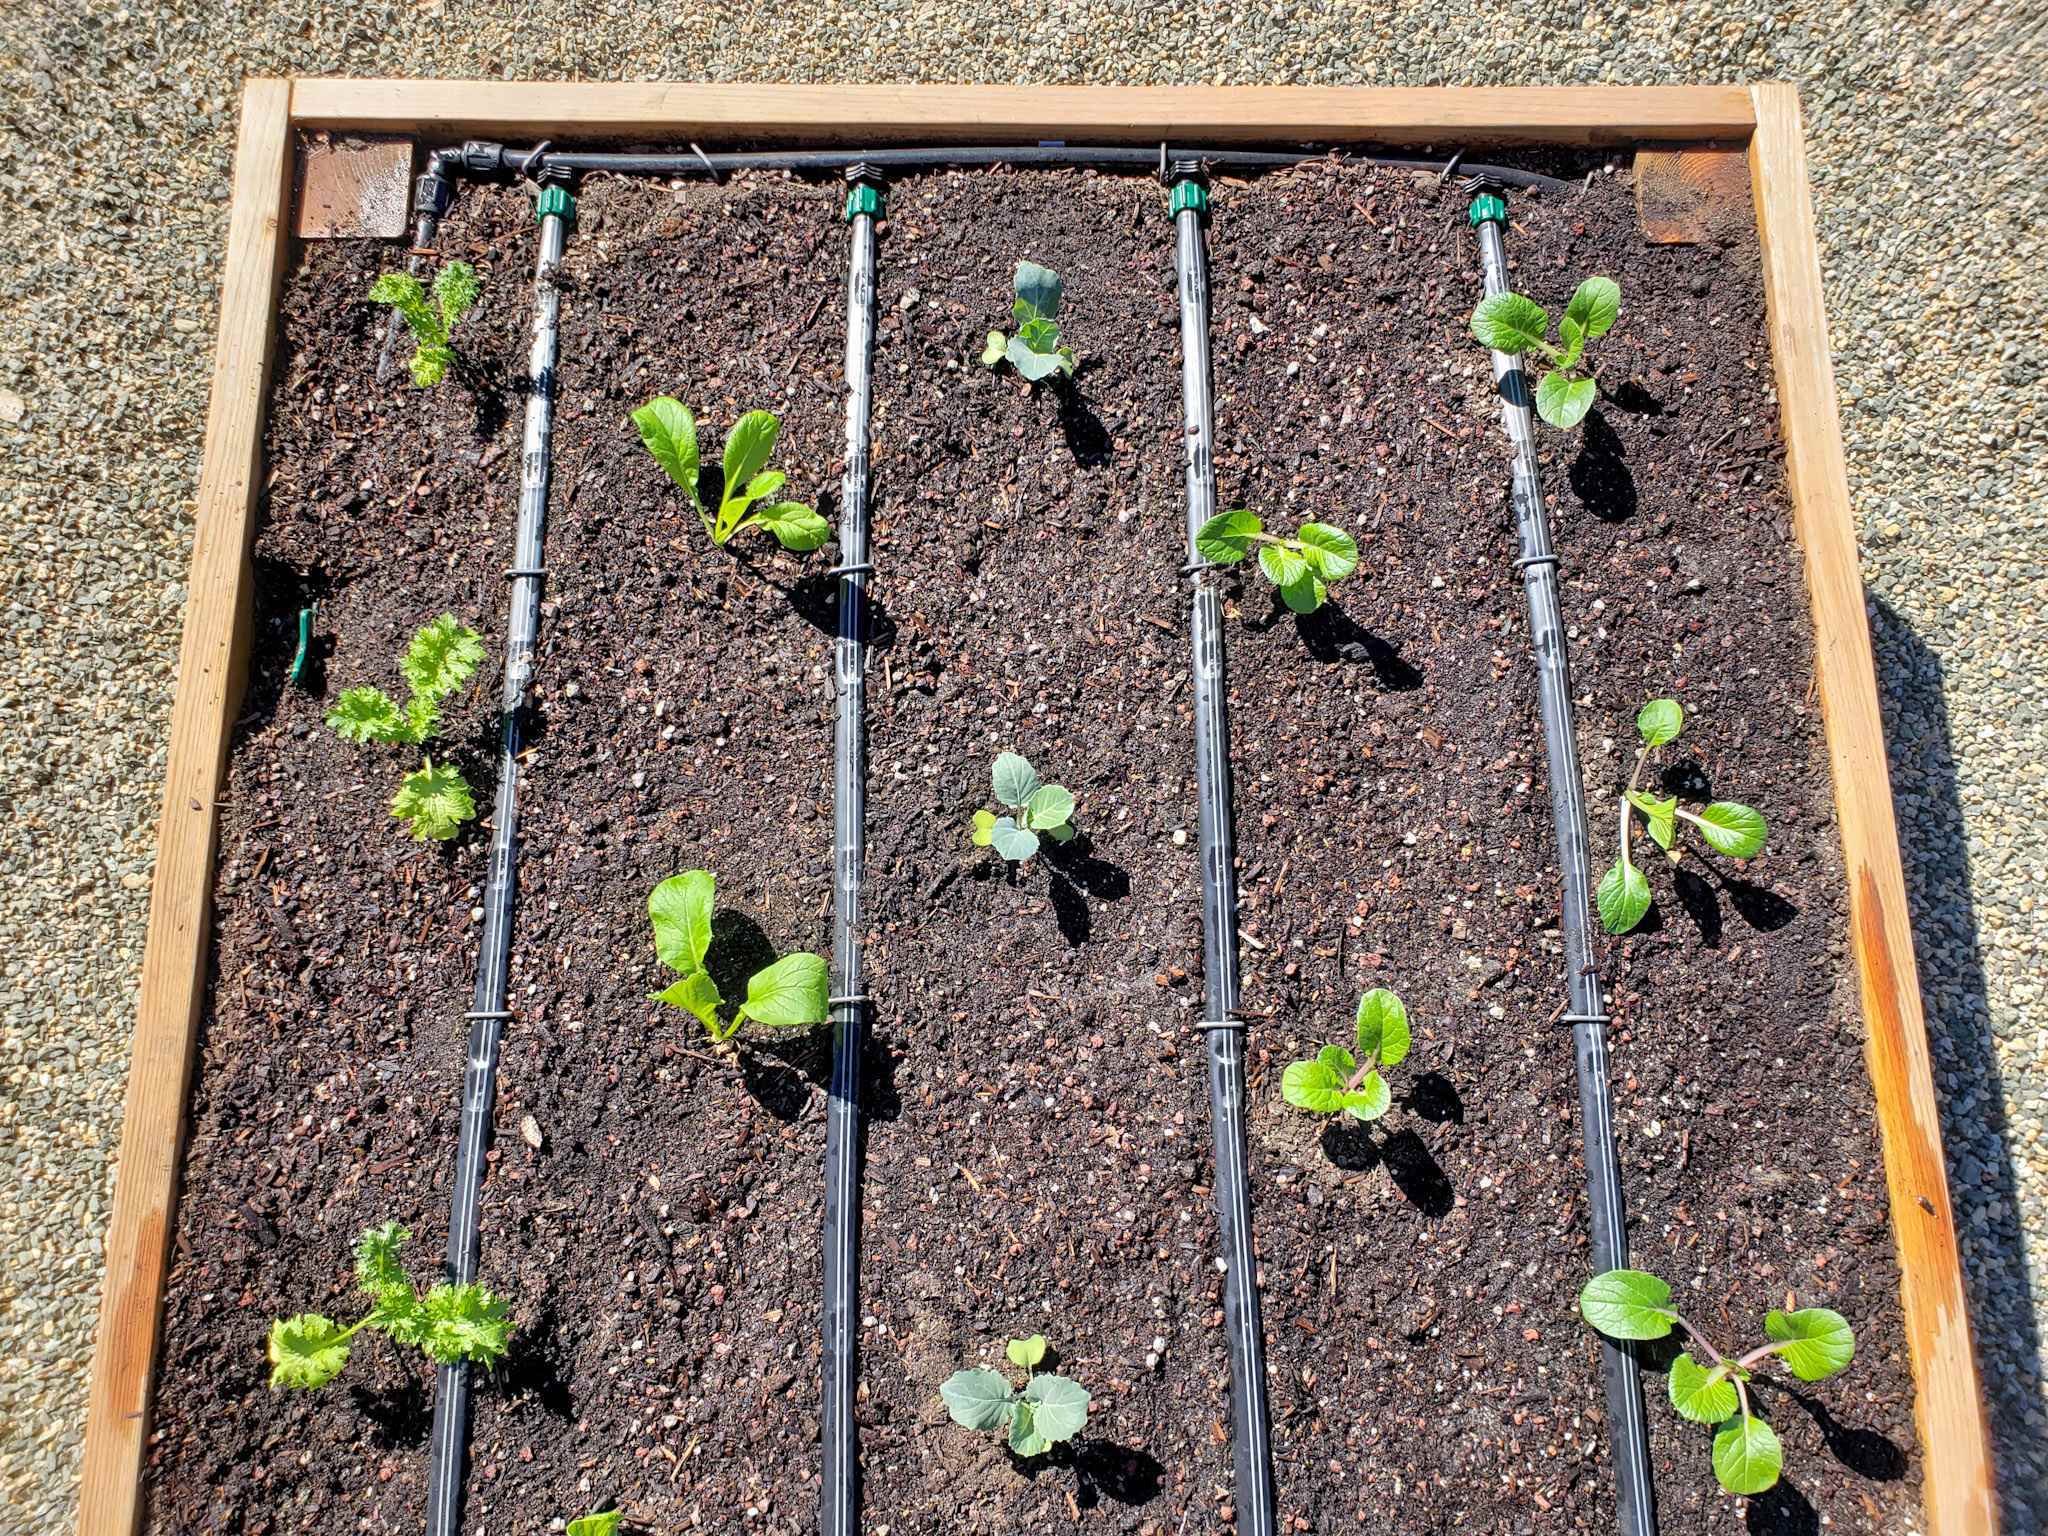
3. Lay the Main Tubing Along Raised Beds
- Run the 1/2 inch tubing along the length or perimeter of your raised beds.
- Secure the tubing with stakes or clips to prevent movement.
4. Insert Emitters Using Hole Punch
- Use the hole punch tool to create holes in the main tubing where emitters are needed.
- Insert the 1/4 inch micro tubing into these holes.
- Attach drip emitters at the other end of the micro tubing, positioning them near the base of each plant.
5. Cap Tubing Ends
- Use end caps to close off the open ends of the main tubing to prevent leaks.
6. Test the System
- Turn on the water and check all emitters for proper flow.
- Adjust emitter output or placement if necessary.
7. Automate Watering (Optional)
- Set your timer for optimal watering times, typically early morning or late evening.
- Adjust frequency and duration based on plant needs and weather conditions.
Tips for Optimizing Your Drip Irrigation System
- Use mulch over soil to retain moisture and reduce evaporation.
- Regularly clean filters to prevent clogging.
- Check emitters monthly to ensure even water distribution.
- Adjust watering schedule seasonally, increasing in hot months and reducing in rainy periods.
- Consider using a rain sensor to pause irrigation when it rains.
Common Mistakes to Avoid
- Overwatering: Drip systems provide steady moisture; avoid setting timers too long.
- Ignoring pressure requirements: Too much pressure can damage emitters; always use a pressure regulator.
- Poor tubing layout: Without proper planning, some plants may get insufficient water.
- Skipping filtration: Filters prevent clogging and extend system life.
Real-World Example: Successful Drip System in a Raised Bed Garden
Jane, a home gardener in California, installed a drip irrigation system following these steps. She reported:
- 30% reduction in water usage
- Healthier tomatoes and peppers without signs of drought stress
- Saved 2 hours weekly on manual watering
- Reduced fungal infections due to dry foliage
Her experience highlights how practical and impactful drip systems can be for raised garden beds.
Frequently Asked Questions (FAQs)
Q1: Can I use a drip system for all types of raised bed plants?
Yes, drip irrigation works well for most vegetables, herbs, and flowers grown in raised beds.
Q2: How often should I water using a drip system?
Watering frequency depends on climate and plant type but generally 15-30 minutes daily or every other day is sufficient.
Q3: Is it difficult to install a drip system by myself?
Not at all. With basic tools and some planning, DIY drip systems are straightforward to install.
Conclusion
Creating a drip system for raised garden beds is an effective way to conserve water, promote plant health, and simplify your gardening routine. By carefully planning your layout, selecting the right materials, and following the installation steps outlined above, you can build a customized irrigation system that meets your garden’s unique needs. Remember to maintain your system regularly and adjust watering schedules seasonally for best results.
Start your drip irrigation project today and enjoy a flourishing raised bed garden with less effort and more efficiency. Your plants—and the planet—will thank you!
