Creating a neat and attractive garden border not only enhances the aesthetic appeal of your outdoor space but also helps maintain order by keeping grass, soil, and mulch in place. Garden edging pavers offer a durable and stylish solution for defining flower beds, pathways, or lawn edges. If you’re wondering how to install garden edging pavers effectively, this comprehensive guide will walk you through every step—from planning and preparation to finishing touches.
In this article, you will learn the essential tools, materials, and techniques needed to install garden edging pavers. Whether you’re a DIY enthusiast or a beginner gardener, these expert tips and practical instructions will help you achieve a professional-looking garden border with lasting results.
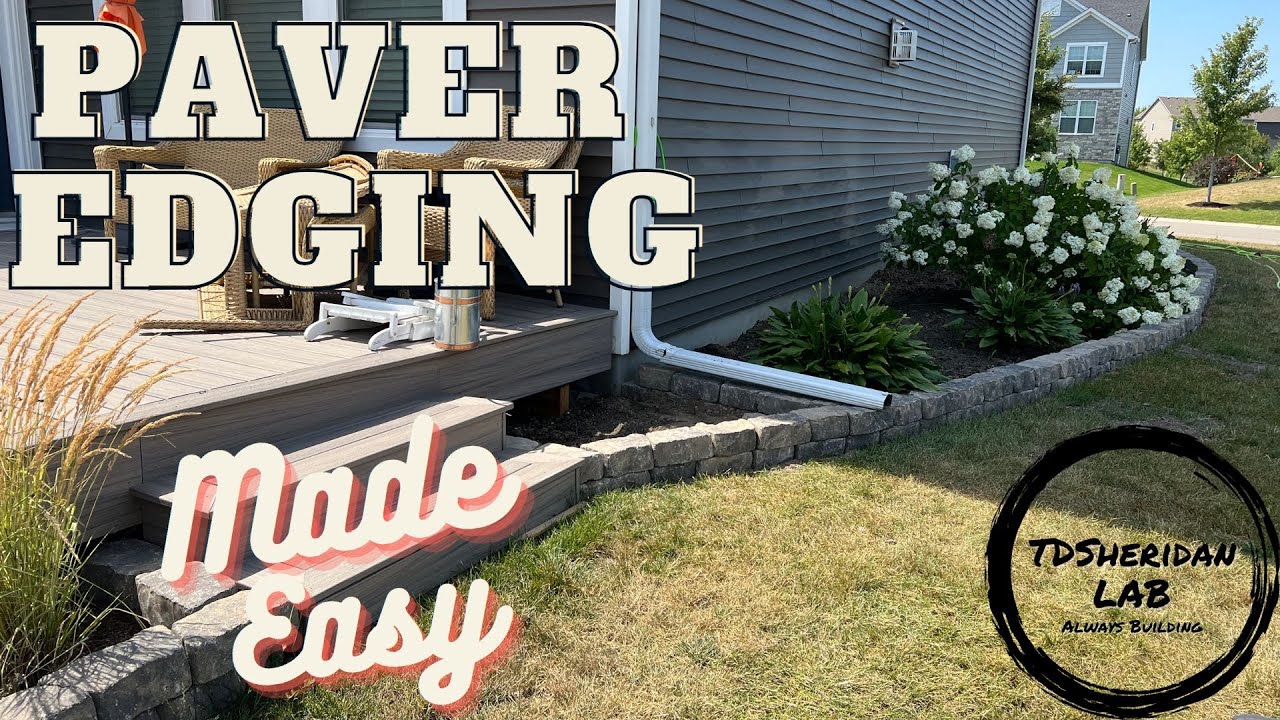
Why Install Garden Edging Pavers?
Before diving into the installation process, it’s important to understand the benefits of using pavers for garden edging:
- Improves garden aesthetics by creating clean, defined lines.
- Prevents soil and mulch from spilling onto walkways or lawns.
- Reduces lawn maintenance by limiting grass encroachment.
- Provides a durable and weather-resistant border compared to plastic or metal edging.
- Adds value to your property by enhancing curb appeal.
Tools and Materials Needed for Installing Garden Edging Pavers
Prepare your workspace by gathering the following tools and materials:
Tools:
- Shovel or spade
- Garden rake
- Rubber mallet
- Level
- Tape measure
- String line and stakes
- Wheelbarrow (optional)
- Broom
Materials:
- Garden edging pavers (brick, concrete, stone, or other preferred material)
- Gravel or crushed stone (for base)
- Sand (for leveling)
- Landscape fabric (optional, for weed prevention)
- Edging spikes or stakes (if required by the paver type)
Step-by-Step Instructions: How to Install Garden Edging Pavers
Step 1: Plan and Mark Your Edging Layout
- Use a string line and stakes to outline the desired border shape.
- Measure the length and calculate the number of pavers needed, adding extra for cuts or mistakes.
- Consider curves or straight lines depending on your garden design.
Step 2: Prepare the Ground
- Dig a trench approximately 6 to 8 inches deep and 4 to 6 inches wide, depending on paver thickness.
- Remove grass, roots, and debris to ensure a clean base.
- If you want to prevent weed growth, lay landscape fabric at the base of the trench.
Step 3: Create the Base Layer
- Pour 3 to 4 inches of crushed stone or gravel into the trench.
- Compact the gravel firmly using a tamper or by hand.
- Add a 1-inch layer of sand on top of the gravel to help level the pavers.
- Use a level and rake to smooth the sand surface.
Step 4: Lay the Pavers
- Start placing the pavers along the trench, fitting them snugly side-by-side.
- Use a rubber mallet to tap each paver gently into place ensuring they are level and aligned.
- Frequently check the level and alignment with a spirit level and string line.
- For curved edges, slightly angle the pavers to follow the contour.
Step 5: Secure the Pavers
- For added stability, use edging spikes or stakes where needed.
- Backfill around the pavers with soil or gravel to lock them in place.
Step 6: Final Touches
- Sweep sand or fine gravel into the joints between pavers to prevent shifting.
- Water lightly to settle the sand.
- Clean the surface of the pavers with a broom or brush.
Tips for a Perfect Garden Edging Installation
- Choose the right paver material that complements your garden style (e.g., natural stone for rustic looks, brick for classic charm).
- Plan for expansion and contraction by leaving small gaps if you live in areas with freeze-thaw cycles.
- Consider the height of the edging—pavers should typically sit slightly above ground level to prevent soil migration.
- Wear gloves and safety glasses for protection during digging and hammering.
- Maintain even spacing to create a clean, uniform appearance.
Common Questions About Installing Garden Edging Pavers
How deep should the trench be for garden edging pavers?
The trench should be 6 to 8 inches deep to accommodate the base layers and provide stability.
Can I curve garden edging pavers?
Yes, most pavers can be arranged to follow gentle curves by angling each piece carefully.
How long does it take to install garden edging pavers?
Installation time depends on the length and complexity of your border but typically ranges from a few hours to a full day for average-sized gardens.
Do I need to seal garden edging pavers?
Sealing is optional but recommended for natural stone or porous pavers to protect against stains and weathering.
Conclusion
Installing garden edging pavers is a rewarding DIY project that enhances the beauty and functionality of your garden. By following this clear, step-by-step guide, you can create a durable, attractive border that helps define your outdoor space and reduces maintenance. Remember to plan carefully, prepare the base properly, and take your time aligning the pavers for the best results.
Ready to transform your garden with professional edging? Gather your tools and materials, and start installing your garden edging pavers today for a clean, polished look that lasts for years. Happy gardening!
Optimize your garden’s curb appeal and functionality by mastering how to install garden edging pavers—your outdoor space will thank you!
