Creating crisp, clean edges around your garden beds can transform your outdoor space from ordinary to extraordinary. How to edge your garden is a common question among gardeners who want to improve curb appeal, prevent grass from encroaching on flower beds, and make maintenance easier. This guide walks you through everything you need to know about garden edging—from choosing the right materials to step-by-step instructions for installation.
Whether you’re a beginner gardener or looking to enhance your landscape design, learning how to edge your garden properly will boost both the aesthetics and health of your plants. In this article, we’ll explore the benefits of garden edging, popular edging materials, and practical tips to create long-lasting, attractive borders around your garden.
Why Garden Edging Matters: Benefits and Importance
Garden edging is more than just a decorative touch. Well-defined edges serve several practical and aesthetic purposes:
- Prevents grass and weeds from invading flower beds
- Creates clear boundaries for mulch and soil
- Simplifies lawn mowing and garden maintenance
- Enhances the overall landscape design and curb appeal
- Protects plants by reducing soil erosion and runoff
By installing proper edging, you maintain a tidy garden layout, which helps your plants thrive and your outdoor space look professionally landscaped.
What Are the Best Materials for Garden Edging?
Choosing the right edging material depends on your garden style, budget, and maintenance preferences. Here are the most popular options, each with pros and cons:
1. Plastic or Vinyl Edging
- Pros: Affordable, flexible, easy to install, low maintenance
- Cons: Less durable, can crack in extreme temperatures
2. Metal Edging (Steel or Aluminum)
- Pros: Durable, sleek modern look, flexible for curves
- Cons: More expensive, may require tools for installation
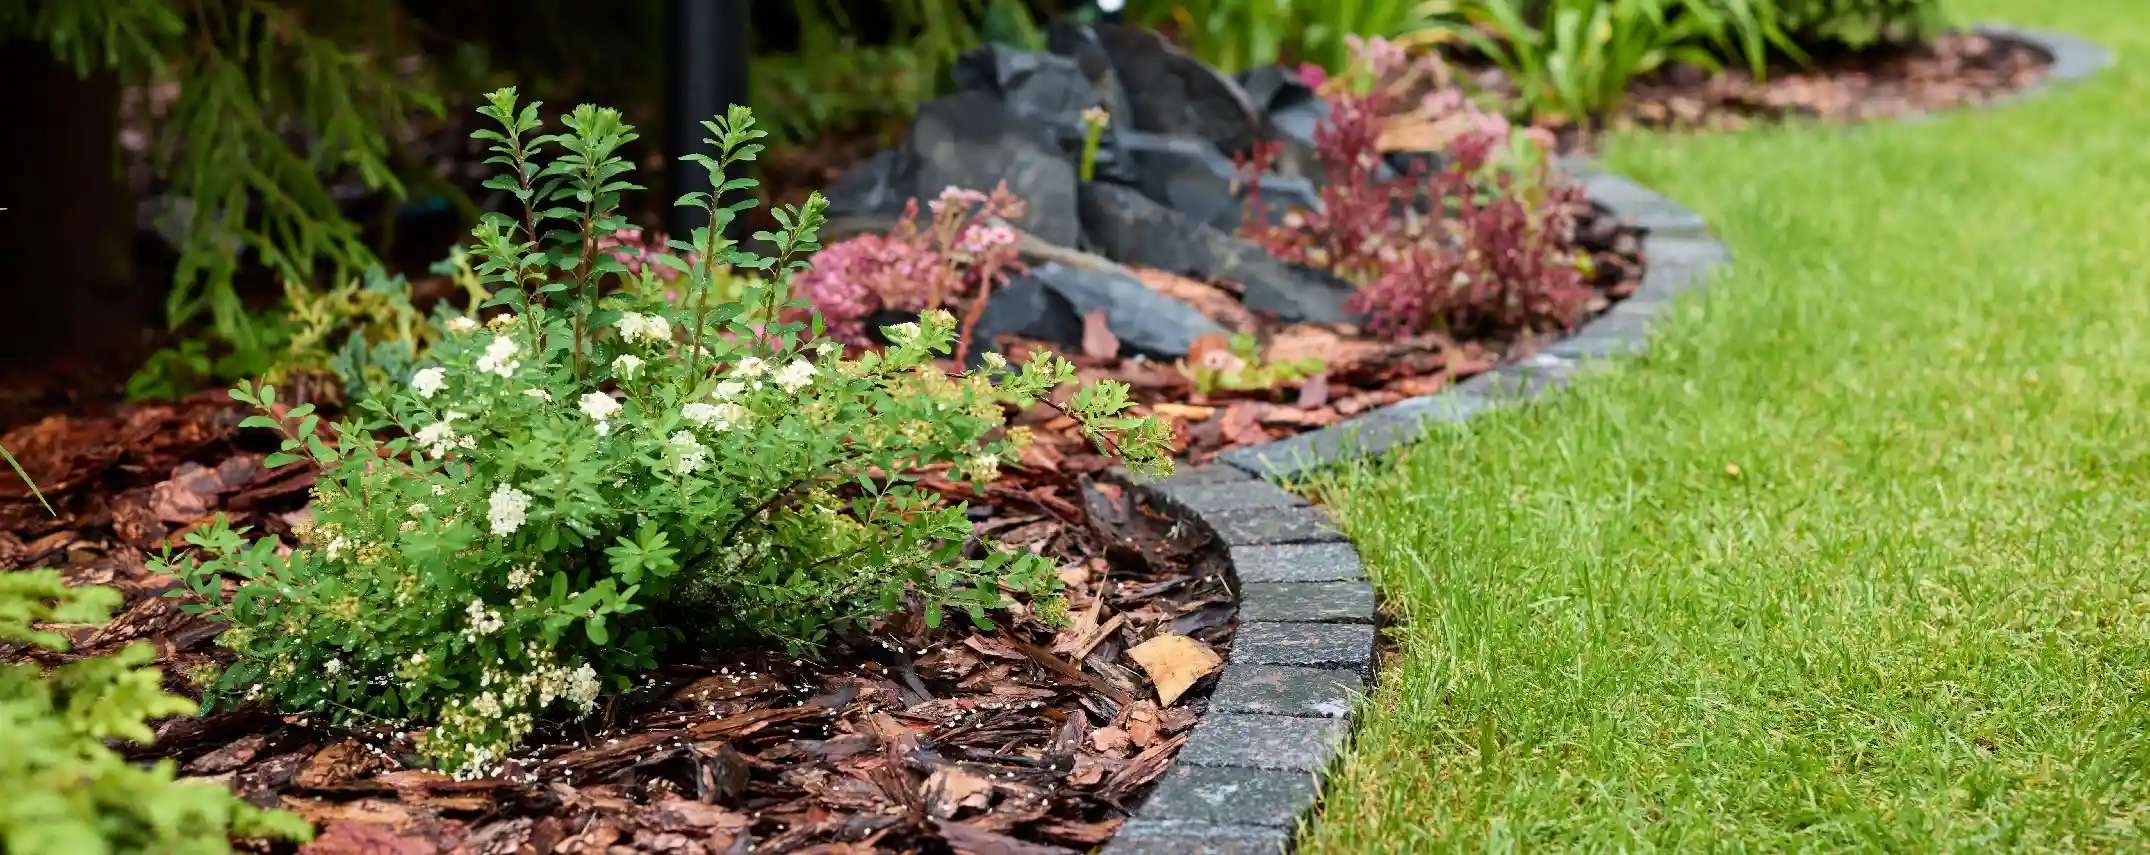
3. Brick or Stone Edging
- Pros: Classic, natural appearance, very durable
- Cons: Labor-intensive installation, higher cost
4. Wood Edging
- Pros: Natural look, easy to customize shapes
- Cons: Prone to rot, needs regular treatment or replacement
5. Concrete Edging
- Pros: Extremely durable, can be molded into shapes, low maintenance
- Cons: Permanent, requires skill or professional help
How to Edge Your Garden: Step-by-Step Instructions
Follow these steps for a successful garden edging project:
Step 1: Plan Your Edging Layout
- Walk around your garden and mark the desired edge with spray paint or a garden hose.
- Decide on straight or curved edges based on your garden’s style.
Step 2: Choose Your Edging Material
- Select the material that matches your garden’s aesthetic and maintenance level.
Step 3: Prepare the Ground
- Use a spade or edging tool to dig a trench about 4-6 inches deep along the marked line.
- Remove grass, roots, and debris to create a clean base.
Step 4: Install the Edging
- Place the edging material into the trench.
- For flexible materials, bend them to follow curves.
- Ensure the edging sits flush with the soil surface to prevent tripping.
Step 5: Secure the Edging
- Use stakes or spikes to anchor edging firmly.
- Backfill the trench with soil and tamp down to stabilize.
Step 6: Finish and Maintain
- Add mulch or decorative stones behind the edging to enhance appearance.
- Regularly check for displacement and clean edges during lawn mowing.
Expert Tips for Perfect Garden Edging
- Use a garden hose to design smooth, natural curves before digging.
- Consider installing edging at least 4 inches deep for durability and to prevent grass from creeping under.
- For metal edging, wear gloves and use a mallet for secure installation.
- Keep edging slightly below the lawn height to avoid tripping hazards.
- Combine edging with mulch to improve weed control and soil moisture retention.
Real-World Example: Transforming a Backyard with Stone Edging
Sarah, a homeowner in Oregon, transformed her backyard with brick edging around flower beds. By digging trenches and installing bricks flush with the soil, she created a clean border that stopped grass invasion and gave her garden a polished look. Maintaining her garden became easier because the edging clearly defined mowing boundaries and kept mulch in place, reducing weed growth by 30% over the first season.
Frequently Asked Questions About Garden Edging
Q1: How deep should garden edging be installed?
For best results, dig a trench 4-6 inches deep to secure edging firmly and prevent grass from growing underneath.
Q2: Can I edge my garden myself, or should I hire a professional?
Most garden edging projects can be done DIY with basic tools. However, complex designs or heavy materials like concrete may require professional help.
Q3: How often should I maintain my garden edging?
Inspect edging after each mowing season. Clean debris and re-secure any displaced sections annually.
Conclusion: Mastering How to Edge Your Garden for Lasting Beauty
Edging your garden is a straightforward way to enhance your landscape’s beauty and functionality. By selecting the right materials and following proper installation steps, you create clean, defined borders that protect your plants and simplify maintenance. Whether you prefer classic stone, flexible plastic, or sleek metal, edging elevates your outdoor space and adds value to your home.
Start planning your garden edging project today and enjoy a neater, healthier, and more visually appealing garden for years to come.
