Creating a raised vegetable garden is one of the most rewarding ways to grow fresh, healthy produce right in your backyard. Whether you have limited space, poor soil quality, or simply want to improve your garden’s productivity, raised beds offer a practical and efficient solution. This guide will walk you through how to construct a raised vegetable garden with clear, expert-approved steps that ensure success.
Raised vegetable gardens enhance soil drainage, reduce weed growth, and make gardening accessible by minimizing bending and kneeling. In this article, you will learn everything from selecting the right location and materials to preparing the soil and planting your first crops. By following these steps, you’ll create a thriving raised bed garden that boosts your harvest and gardening enjoyment.
Why Choose a Raised Vegetable Garden?
Before diving into the build, it’s important to understand the benefits of raised beds:
- Improved Soil Quality: You control the soil mix, ensuring optimal fertility and drainage.
- Better Pest and Weed Control: Raised beds create a physical barrier against weeds and some pests.
- Easier Access: Raised height reduces strain on your back and knees.
- Extended Growing Season: Soil warms faster in spring, allowing earlier planting.
- Efficient Water Use: Water stays concentrated in the bed, minimizing waste.
Step 1: Selecting the Best Location for Your Raised Vegetable Garden
Choosing the right spot is crucial for a successful garden.
- Sunlight: Aim for 6-8 hours of direct sunlight daily. Most vegetables thrive with ample sun.
- Accessibility: Place the bed near a water source and a path for easy maintenance.
- Level Ground: Select a flat area to prevent water pooling and soil erosion.
- Protection: Avoid windy spots or areas prone to flooding.
Step 2: Deciding on the Size and Shape of Your Raised Bed
Raised beds come in various sizes, but consider these guidelines:
- Width: 3 to 4 feet wide allows easy reach from both sides without stepping on the soil.
- Length: Up to 12 feet or longer, depending on space and preference.
- Height: 6 to 12 inches is sufficient for most vegetables; 12 to 24 inches is ideal for root crops or poor soil conditions.
Tip: Start with a manageable size (e.g., 4×8 feet) to avoid overwhelming yourself.
Step 3: Choosing the Right Materials for the Frame
Materials affect durability, aesthetics, and cost. Common choices include:
- Wood: Cedar and redwood resist rot naturally; untreated pine is cheaper but less durable.
- Composite Lumber: Made from recycled materials, it resists weather and insects.
- Concrete Blocks or Bricks: Long-lasting and provide a modern look.
- Metal: Galvanized steel beds are durable but can heat up quickly in sun.
Avoid treated lumber with harmful chemicals that may leach into your soil.
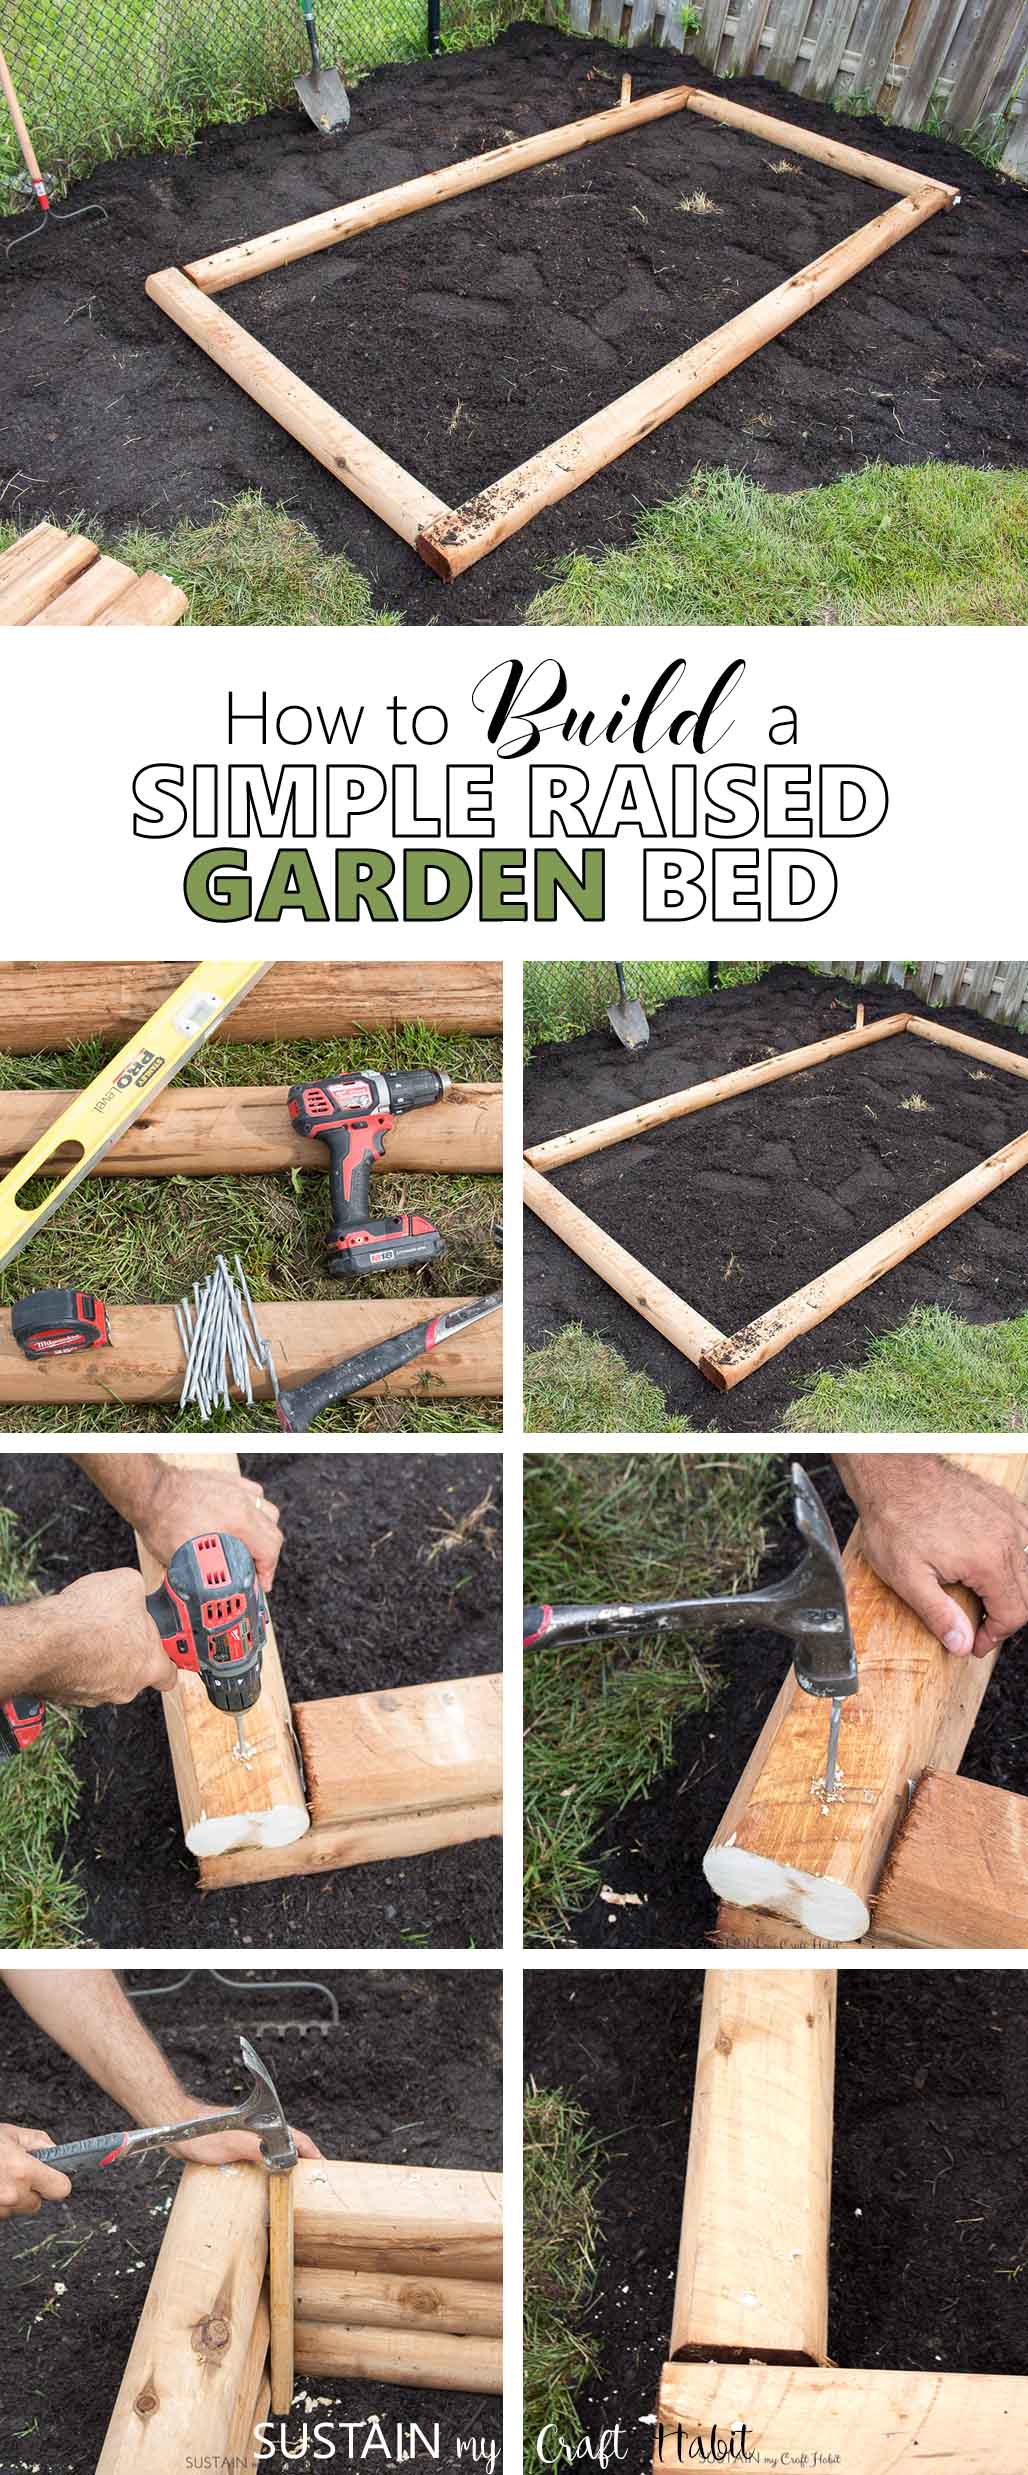
Step 4: Building Your Raised Vegetable Garden Frame
Tools and Materials Needed:
- Measuring tape
- Saw (if cutting wood)
- Drill and screws or nails
- Level
- Protective gloves
Construction Steps:
- Measure and cut your chosen material according to your bed size.
- Assemble the frame by attaching the corners securely with screws or nails.
- Check for levelness and adjust if needed to ensure even soil distribution.
- If desired, add corner braces for extra stability.
- Place the frame in your chosen location.
Step 5: Preparing the Soil for Planting
The soil mix inside the raised bed is key to healthy plants.
- Remove grass or weeds from the area under the bed.
- Add a weed barrier fabric at the bottom if you want extra weed protection.
- Mix together:
- 50% high-quality topsoil
- 30% compost (rich in organic matter)
- 20% coarse sand or perlite (for drainage)
- Fill the raised bed with this mixture, leaving about an inch below the rim.
Step 6: Planting Your Vegetables and Garden Maintenance
Planting Tips:
- Choose vegetables suited to your climate and season.
- Use companion planting to maximize space and reduce pests.
- Space plants according to seed packet recommendations.
- Water deeply after planting.
Maintenance:
- Water regularly, especially during dry spells.
- Mulch with straw or shredded leaves to retain moisture and suppress weeds.
- Fertilize every 4-6 weeks with organic options like fish emulsion or compost tea.
- Monitor for pests and diseases; use natural remedies when possible.
Expert Insights: Maximizing Your Raised Garden’s Productivity
According to horticulturist Dr. Lisa Johnson, “Raised beds allow gardeners to tailor soil conditions precisely, which can increase yields by up to 30% compared to traditional in-ground gardens.” She also emphasizes rotating crops annually to maintain soil health and reduce disease risk.
Common Questions About Raised Vegetable Gardens
Q: How long do raised beds last?
A: With proper materials and maintenance, wooden raised beds last 5-10 years, while concrete or metal beds can last decades.
Q: Can I build a raised bed on concrete or asphalt?
A: Yes, just ensure proper drainage by adding holes or a drainage layer, and use soil mix designed for containers.
Q: How often should I water raised beds?
A: Typically, 1-2 inches per week; however, raised beds dry out faster, so daily checks during hot weather are recommended.
Conclusion
Constructing a raised vegetable garden is a rewarding project that enhances your gardening experience and boosts your harvest. By carefully selecting the location, materials, and soil mix, you build a sturdy foundation for healthy, productive plants. Regular maintenance and smart planting will keep your garden thriving season after season.
Ready to grow your own fresh vegetables with ease? Start planning your raised bed today and enjoy the benefits of homegrown produce that’s nutritious, sustainable, and delicious. Happy gardening!
By following this comprehensive guide on how to construct a raised vegetable garden, you equip yourself with the knowledge and confidence to cultivate a flourishing garden tailored to your space and needs.
