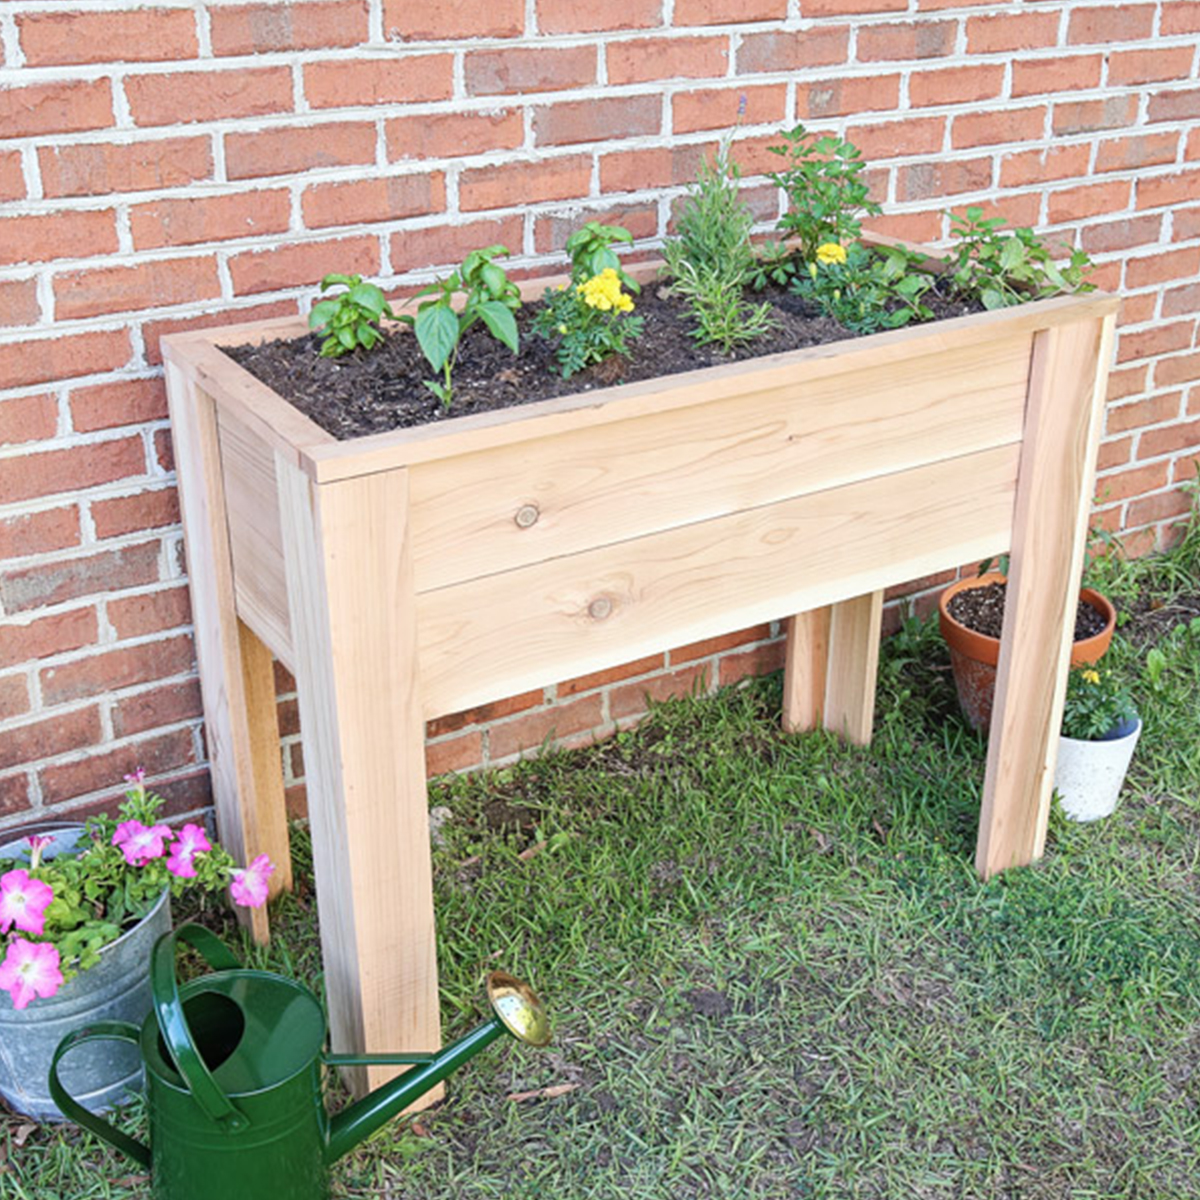
Raised garden beds with legs offer an ergonomic and practical solution for gardening enthusiasts. They elevate your plants off the ground, improving accessibility, drainage, and soil quality. Whether you have limited space or want to reduce back strain, building a raised garden bed with legs can transform your gardening experience.
This guide will walk you through the entire process—from planning and selecting materials to assembling your raised bed and ensuring its longevity. You’ll learn expert tips, practical steps, and useful design ideas to create a durable, functional raised garden bed tailored to your needs. By the end, you’ll have the confidence to build a sturdy garden bed that improves plant health and simplifies maintenance.
Why Choose a Raised Garden Bed With Legs?
Before diving into construction, understanding the benefits helps guide your design choices:
- Improved Accessibility: Legs raise the bed to a comfortable height, reducing the need to bend or kneel, ideal for those with mobility issues.
- Enhanced Drainage: Elevation prevents waterlogging by allowing excess water to drain freely.
- Better Soil Control: You can fill the bed with nutrient-rich soil tailored for your plants.
- Pest Reduction: Raised beds can deter some ground-dwelling pests and weeds.
- Aesthetic Appeal: Legs add a stylish, modern touch to your garden or patio.
Materials and Tools Needed
To build a raised garden bed with legs, gather the following:
Materials:
- Wood planks (cedar or redwood preferred for durability and rot resistance)
- Leg supports (2×4 or 4×4 lumber works well)
- Galvanized screws or bolts (to resist rust)
- Wood sealant or outdoor paint (optional but recommended for longevity)
- Landscape fabric (to line the bed and prevent soil leakage)
- Corner brackets (for extra joint stability)
Tools:
- Measuring tape
- Saw (circular or miter saw)
- Drill with screwdriver bits
- Screwdriver
- Level
- Pencil
- Safety glasses and gloves
Step-by-Step Guide: How to Build a Raised Garden Bed With Legs
Step 1: Plan and Measure Your Garden Bed
- Decide dimensions: A common size is 4 feet long, 2 feet wide, and 2 feet high (including legs).
- Height: Legs typically add 1.5 to 2 feet, making the planting area accessible.
- Location: Choose a sunny, level spot with good drainage.
Step 2: Cut the Wood Pieces
- Cut the side and end planks to size for the bed frame.
- Cut four legs to your desired height.
- Cut additional support braces for stability if needed.
Step 3: Assemble the Frame
- Attach the side planks to the end planks with screws to form a rectangle.
- Use corner brackets for added strength.
- Ensure all corners are square with a carpenter’s square or by measuring diagonals.
Step 4: Attach the Legs
- Position each leg at the inside corners of the frame.
- Secure legs using long screws or bolts driven through the frame into the legs.
- For extra stability, add diagonal braces between legs and frame.
Step 5: Seal the Wood
- Apply wood sealant or outdoor paint to protect against moisture and insects.
- Focus on end grains and cut surfaces.
Step 6: Line the Bed
- Staple landscape fabric inside the bed to prevent soil loss while allowing water drainage.
Step 7: Fill and Plant
- Fill the bed with a mix of high-quality soil and compost.
- Choose plants suitable for your climate and sunlight availability.
Tips for Building a Durable Raised Garden Bed With Legs
- Opt for rot-resistant wood: Cedar and redwood naturally resist decay.
- Use galvanized or stainless steel fasteners: These prevent rust and prolong bed life.
- Add drainage holes to legs (optional): Prevent water pooling inside hollow legs.
- Consider mobility: Add caster wheels if you want to move the bed seasonally.
- Design for comfort: Ensure the bed height suits your reach to avoid strain.
Common Questions About Raised Garden Beds With Legs
Q: How high should the legs be?
A: Typically, 18 to 24 inches provides comfortable working height for most people.
Q: Can I use recycled wood?
A: Yes, but avoid wood treated with harmful chemicals. Ensure it’s clean and safe for growing food.
Q: How long will the bed last?
A: With proper wood selection and maintenance, a raised bed can last 5-10 years or more.
Real-World Example: Expert Advice on Raised Garden Bed Construction
Gardening expert Lisa Johnson shares, “Building raised beds with legs revolutionized my gardening. I can tend to my plants without back pain, and the elevated design keeps pests away. Using cedar and applying sealant annually have kept my beds sturdy through seasons.”
Conclusion
Building a raised garden bed with legs is a smart investment for any gardener seeking efficiency, accessibility, and healthier plants. By carefully selecting materials, following precise assembly steps, and maintaining your bed, you create a long-lasting garden feature that enhances your outdoor space.
Ready to get started? Gather your tools and wood, follow this step-by-step guide, and enjoy the benefits of elevated gardening. Your plants—and your back—will thank you.
Call to Action:
Explore different raised bed designs and experiment with plant varieties to maximize your garden’s potential. Share your raised bed projects with local gardening communities to inspire others!
