Creating well-defined garden edging is one of the easiest and most effective ways to enhance your garden’s appearance and functionality. Garden edging not only improves the aesthetic appeal by giving your garden a polished, organized look, but it also helps to keep grass, mulch, and soil in place, preventing unwanted spread and simplifying maintenance. Whether you’re a beginner or an experienced gardener, learning how to build garden edging can transform your outdoor space.
In this guide, we’ll cover everything you need to know about building garden edging—from choosing materials to step-by-step installation techniques. You’ll find expert tips, practical advice, and solutions suitable for various garden styles and budgets. Let’s dive in and create garden edging that elevates your landscaping while standing the test of time.
Why Garden Edging Matters: Benefits and Uses
Before we get into how to build garden edging, it’s important to understand why it matters. Here are some key benefits:
- Defines garden borders clearly: Helps separate flower beds, lawns, and pathways.
- Prevents grass and weeds from spreading: Keeps unwanted plants from invading garden beds.
- Retains mulch and soil: Prevents erosion, especially on slopes.
- Improves garden maintenance: Makes mowing and trimming easier and neater.
- Enhances curb appeal: A well-edged garden looks polished and cared for, increasing property value.
Choosing the Right Garden Edging Material
Selecting the right materials is crucial for durability, style, and maintenance. Here are popular options:
1. Plastic or Rubber Edging
- Pros: Affordable, flexible, easy to install.
- Cons: Less durable, can warp or crack in extreme weather.
- Best for: Curved beds, temporary edging.
2. Metal Edging (Steel or Aluminum)
- Pros: Sleek, modern look; very durable.
- Cons: Can be more expensive, requires tools to install.
- Best for: Contemporary gardens, sharp clean lines.
3. Wood Edging
- Pros: Natural look, easy to customize.
- Cons: Susceptible to rot unless treated.
- Best for: Rustic or cottage-style gardens.
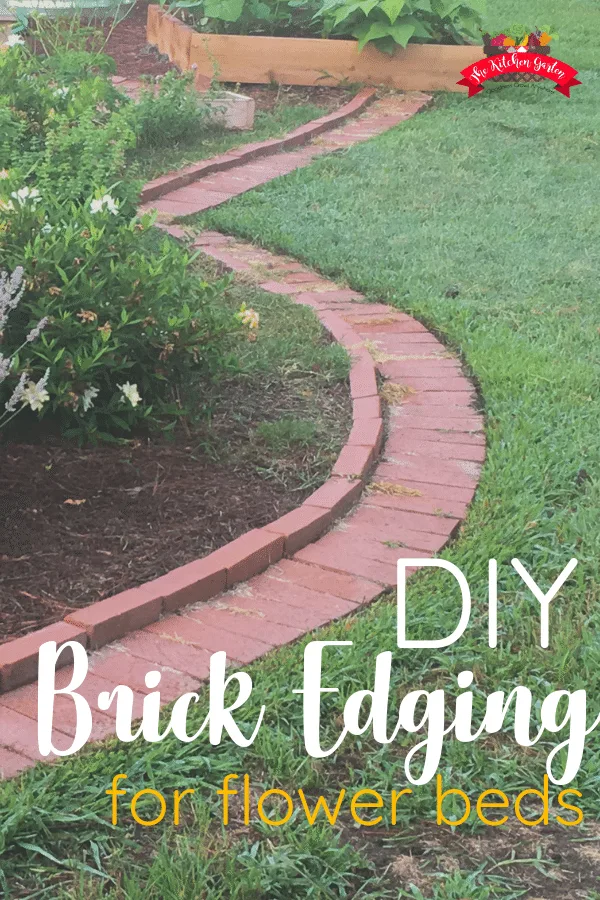
4. Brick or Stone Edging
- Pros: Long-lasting, adds texture and color.
- Cons: Labor-intensive to install, higher cost.
- Best for: Formal gardens, pathways.
5. Concrete Edging
- Pros: Durable, can be molded into various shapes.
- Cons: Requires skill or professional help.
- Best for: Permanent, structural edging.
Step-by-Step Guide: How to Build Garden Edging
Follow these steps for a successful garden edging installation:
Step 1: Plan and Mark the Edging Line
- Use a garden hose or string to outline the desired shape.
- Adjust curves and straight lines until satisfied.
- Mark the line with spray paint or stakes.
Step 2: Prepare the Ground
- Dig a trench along the marked line. The trench depth depends on the material (typically 4-6 inches deep).
- Remove roots, rocks, and debris.
- Level the bottom of the trench with a flat shovel.
Step 3: Install the Edging Material
- Plastic or Rubber: Lay flexible edging into the trench, securing with stakes.
- Metal: Hammer metal edging into the trench, ensuring edges are flush with the soil.
- Wood: Place treated wood planks or logs along the trench, secure them with stakes or spikes.
- Brick/Stone: Lay bricks or stones tightly together on a bed of sand or mortar.
- Concrete: Pour concrete into forms or mold to desired shape; allow to cure.
Step 4: Backfill and Compact Soil
- Fill the trench on both sides of the edging with soil.
- Compact soil firmly to hold edging in place.
Step 5: Add Final Touches
- Mulch around the edging to enhance appearance and suppress weeds.
- Water the area to settle soil.
Expert Tips for Long-Lasting Garden Edging
- Use a level to keep edging straight and even.
- Consider drainage to prevent pooling water near edging.
- Treat wood with sealants to prevent rot and insect damage.
- Choose materials suited to your climate for durability.
- Regularly inspect and maintain edging, especially after harsh weather.
Common Questions About Garden Edging
How deep should garden edging be installed?
Most edging requires a trench 4-6 inches deep to remain stable and prevent shifting.
Can I install garden edging myself?
Yes, with basic tools and clear instructions, DIY installation is possible for most materials.
How much does garden edging cost?
Costs vary widely based on materials—plastic edging can be as low as $1 per foot, while stone or metal can range from $10-$30 per foot.
Conclusion
Building garden edging is a straightforward project that significantly improves your garden’s structure, appearance, and ease of maintenance. By choosing the right materials and following simple installation steps, you can create clean, attractive borders that protect your plants and define your outdoor space beautifully. Whether you prefer the rustic charm of wood or the elegance of stone, garden edging is a smart investment in your garden’s health and aesthetics.
Ready to transform your garden? Start planning your edging project today and enjoy a more organized, vibrant outdoor space tomorrow. Remember, well-crafted garden edging is not just a boundary—it’s the finishing touch that ties your entire landscape together.
