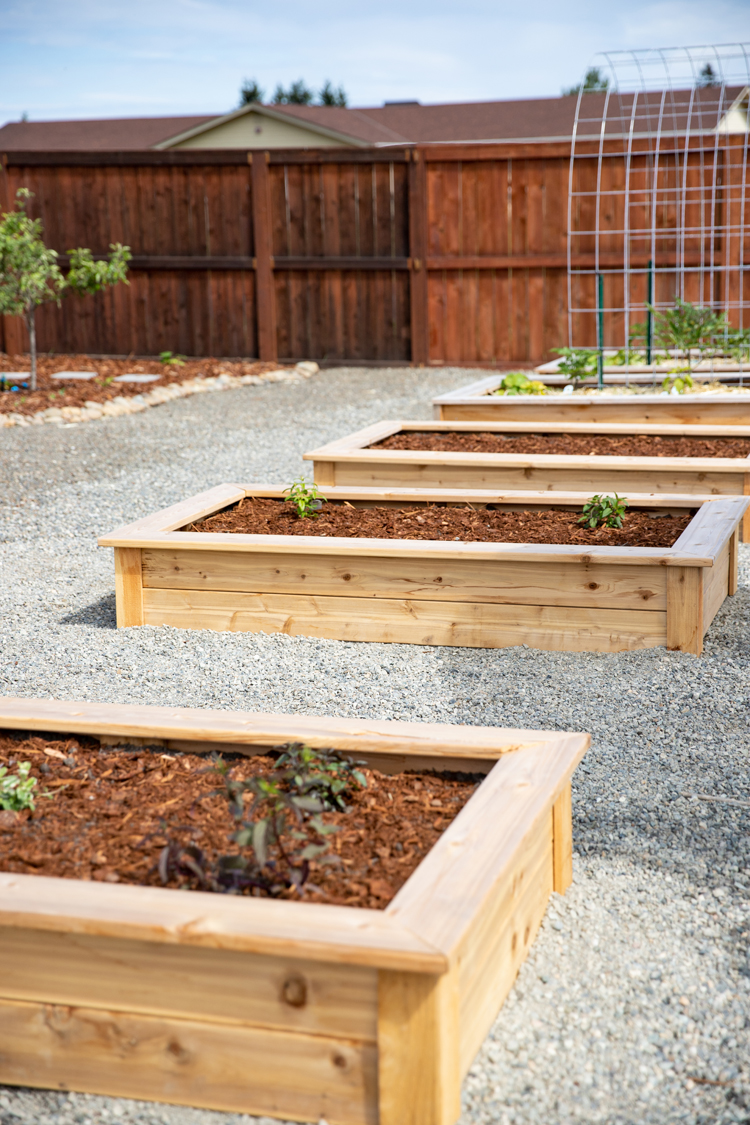
Creating a thriving garden starts with a solid foundation, and cedar garden boxes provide the perfect structure for healthy plants. If you’re wondering how to build cedar garden boxes, you’ve come to the right place. Cedar is a top choice for raised garden beds due to its natural resistance to rot, insects, and weather damage. This guide will walk you through every step—from choosing materials to assembly—so you can build sturdy, long-lasting garden boxes that enhance your outdoor space.
In this article, you’ll learn why cedar makes an excellent garden box material, how to select the right wood, tools you’ll need, and detailed instructions to build your own cedar garden box. Whether you’re a beginner or an experienced gardener, these insights will help you create elevated beds perfect for vegetables, herbs, and flowers. Plus, we’ll share tips on soil preparation and maintenance to maximize your garden’s productivity.
Why Choose Cedar for Garden Boxes?
Before diving into construction, it’s essential to understand why cedar is ideal for garden boxes:
- Natural Durability: Cedar contains oils that resist rot and insect damage, unlike untreated pine or fir.
- Lightweight Yet Strong: Easy to handle during assembly but sturdy enough to hold soil and plants.
- Attractive Appearance: Cedar ages to a beautiful silver-gray patina, enhancing garden aesthetics.
- Chemical-Free: Safe for growing edibles because it doesn’t require toxic preservatives.
- Excellent Moisture Resistance: Helps soil retain moisture while preventing wood decay.
These advantages make cedar a smart investment for gardeners seeking long-term, eco-friendly raised beds.
Tools and Materials Needed to Build Cedar Garden Boxes
To build your cedar garden boxes efficiently and safely, gather the following:
Materials:
- Cedar boards (1”x6” or 1”x8”, depending on desired height)
- Cedar corner posts (2”x2” or 4”x4” for added stability)
- Exterior-grade wood screws (stainless steel or coated to prevent rust)
- Landscape fabric (optional, to line the bottom and prevent weeds)
- Soil and compost mix for planting
Tools:
- Measuring tape
- Electric drill with screwdriver bit
- Saw (circular saw or hand saw)
- Carpenter’s square
- Clamps (optional, for holding pieces steady)
- Safety goggles and gloves
Step-by-Step Instructions: How to Build Cedar Garden Boxes
Step 1: Plan Your Garden Box Size and Location
- Decide on the dimensions of your garden box based on available space and what you want to grow.
- Common sizes: 4’x4’, 4’x8’, or 3’x6’.
Recommended height: 12” to 18” for root depth and ease of access.
Select a sunny, level spot in your yard with good drainage.
Step 2: Cut Cedar Boards and Posts
- Measure and mark cedar boards according to your desired dimensions:
- For a 4’x8’ box, cut two boards at 8 feet (length) and two boards at 4 feet (width).
- Cut corner posts to the same height as your boards or slightly taller if you want to add a trellis or cover.
Step 3: Assemble the Frame
- Place two lengthwise boards parallel on a flat surface.
- Position two widthwise boards between them to form a rectangle.
- Align corner posts at each joint for reinforcement.
- Use a carpenter’s square to ensure corners are 90 degrees.
- Pre-drill holes to prevent wood splitting.
- Secure boards and posts together with exterior-grade screws at each corner.
Step 4: Prepare the Site and Install the Box
- Clear the ground of grass and debris where the box will sit.
- Optional: Lay landscape fabric inside the box to deter weeds and improve drainage.
- Position the assembled cedar box on the prepared site.
Step 5: Fill with Soil and Compost
- Use a rich, well-draining soil mix suitable for your plants.
- Combine garden soil with compost or organic matter for nutrients.
- Fill the garden box to about an inch below the top edge.
Step 6: Plant and Maintain Your Garden
- Choose plants compatible with your climate and season.
- Water regularly, ensuring soil stays moist but not waterlogged.
- Add mulch on top to retain moisture and suppress weeds.
Tips for Building and Maintaining Cedar Garden Boxes
- Use stainless steel screws to prevent rust and extend the lifespan of your garden box.
- Avoid pressure-treated wood for edibles as it contains harmful chemicals.
- Seal cedar wood with a natural oil if you want to maintain the original color longer.
- Elevate the boxes slightly with bricks or pavers for better drainage.
- Rotate crops yearly to maintain soil health and reduce pests.
- Inspect for damage annually and replace any warped or cracked boards.
Frequently Asked Questions About Cedar Garden Boxes
How long do cedar garden boxes last?
With proper care, cedar garden boxes can last 15 to 20 years due to cedar’s natural rot resistance.
Can I build garden boxes without corner posts?
Yes, but corner posts provide extra stability, especially for tall or large boxes.
Is cedar safe for growing vegetables?
Absolutely. Cedar is chemical-free and ideal for edible gardening.
How often should I water raised cedar garden boxes?
Water when the top inch of soil feels dry. Frequency varies by weather but typically 2-3 times per week.
Conclusion
Building cedar garden boxes is a rewarding DIY project that combines durability, beauty, and functionality. Cedar’s natural resistance to rot and insects makes it a superior choice for raised beds, providing a safe and long-lasting home for your plants. By following the step-by-step instructions above, you can construct your own sturdy garden boxes tailored to your space and gardening needs.
Investing time in proper assembly, soil preparation, and maintenance will ensure your cedar garden boxes support healthy, thriving plants season after season. Ready to get your hands dirty? Start planning your cedar garden boxes today and enjoy the benefits of homegrown produce and vibrant blooms right at your doorstep.
Take Action: Gather your materials, follow this guide, and build a cedar garden box that will transform your gardening experience. Share your progress and results with your community to inspire others!
