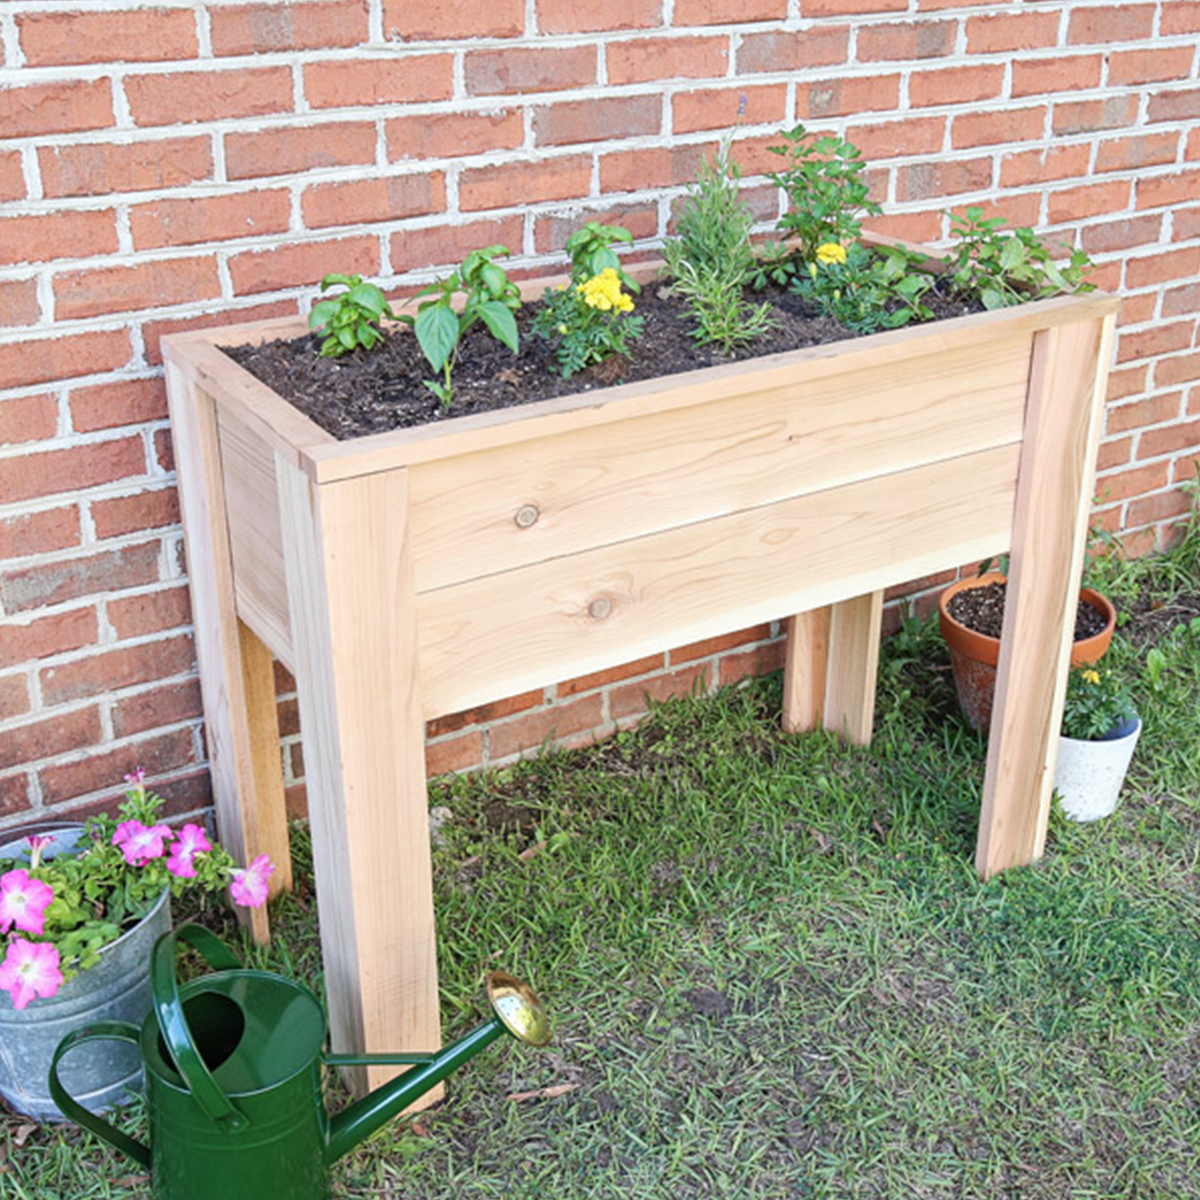
Elevated garden beds with legs are becoming increasingly popular among gardening enthusiasts for their ergonomic benefits, improved soil drainage, and ease of maintenance. Whether you have limited space, poor soil quality, or physical constraints, building a garden bed with legs offers a practical and stylish solution. In this comprehensive guide, we’ll walk you through the process of constructing your own raised garden bed with legs, covering materials, design tips, and step-by-step instructions to ensure your gardening project is a success.
Why Build a Garden Bed With Legs?
Building a garden bed with legs elevates your planting area above ground level, offering several advantages:
- Improved Accessibility: Easier to tend plants without bending or kneeling, ideal for people with mobility issues.
- Better Drainage: Legs lift the bed, preventing waterlogging and promoting healthier root growth.
- Pest Control: Elevation helps reduce risks from ground-dwelling pests like slugs and snails.
- Soil Control: You can fill the bed with high-quality soil tailored to your plants’ needs.
- Stylish Design: Adds an aesthetic appeal to patios, decks, and small gardens.
What You’ll Need: Materials and Tools
Before you start, gather these materials and tools:
Materials
- Wood planks (cedar, redwood, or treated pine for durability)
- Wood screws or galvanized nails
- Wood stain or sealant (optional, for weatherproofing)
- Legs (4 wooden legs or repurposed furniture legs, ideally 12-24 inches tall)
- Corner brackets (for extra support)
- Landscape fabric (to line the bed and prevent soil loss)
- Soil mix (quality garden soil or compost blend)
Tools
- Power drill with screwdriver bit
- Measuring tape
- Saw (hand saw or power saw)
- Screwdriver
- Level
- Pencil
Step-by-Step Instructions: How to Build a Garden Bed With Legs
Step 1: Plan and Measure Your Garden Bed
- Decide on the size of your garden bed. Common dimensions range from 3×2 feet to 4×4 feet.
- Choose the height of the legs based on your comfort; 18-24 inches is typical for easy access.
- Sketch a simple plan including frame dimensions and leg placement.
Step 2: Cut the Wood Pieces
- Cut four wood planks for the frame sides according to your chosen length and width.
- Cut four legs to the desired height. Make sure all legs are equal in length for stability.
Step 3: Assemble the Frame
- Lay the planks flat and join them to form a rectangle or square, using screws or nails at the corners.
- Reinforce corners with brackets for added durability.
- Use a level to ensure the frame sits flat.
Step 4: Attach the Legs
- Secure each leg firmly to the inside corner of the frame. Use screws and, if needed, additional brackets.
- Double-check that the legs are vertical and the frame is level.
Step 5: Add Landscape Fabric
- Line the interior of the bed with landscape fabric to prevent soil from falling through gaps while allowing water drainage.
- Staple or tack the fabric to the frame edges.
Step 6: Finish the Wood (Optional)
- Apply wood stain or sealant to protect the wood from weather damage and extend its lifespan.
- Allow drying time as per the product instructions.
Step 7: Fill With Soil and Plant
- Fill the garden bed with a rich soil mix suitable for your plants.
- Plant your chosen flowers, herbs, or vegetables and water thoroughly.
Tips for Success: Optimize Your Elevated Garden Bed
- Choose Rot-Resistant Wood: Cedar and redwood naturally resist decay, reducing maintenance needs.
- Consider Drainage: Drill a few small holes in the bottom or ensure the landscape fabric promotes drainage.
- Position Wisely: Place your garden bed where it receives adequate sunlight for your plants.
- Use Mulch: Add a layer of mulch on top of the soil to retain moisture and reduce weeds.
- Add Mobility: Attach caster wheels to the legs if you want to move the garden bed easily.
Common Questions About Building Garden Beds With Legs
How high should the legs be for a garden bed?
A leg height of 18 to 24 inches is ideal for comfortable gardening without bending excessively, but adjust based on your height and gardening style.
What wood is best for outdoor garden beds?
Cedar and redwood are top choices due to their natural resistance to rot and insects. Treated pine can be used but ensure it’s safe for gardening.
Can I build a garden bed with legs on a balcony?
Yes! Elevated beds are perfect for balconies because they save space and prevent soil spillage. Just ensure the balcony can support the weight.
Real-World Example: Elevated Garden Beds in Urban Spaces
Urban gardeners often face limited space and poor soil quality. Elevated garden beds with legs transform balconies and patios into thriving green spaces. For instance, a New York City resident built a 4×2 foot cedar garden bed with 20-inch legs, growing herbs and salad greens that yielded fresh produce year-round, all while avoiding back strain.
Conclusion: Elevate Your Gardening Experience
Building a garden bed with legs is a practical, accessible, and stylish way to enhance your gardening setup. By following the steps outlined above, you can create a durable, ergonomic planting space that improves soil health, reduces pests, and fits your space perfectly. Whether you’re a seasoned gardener or just starting, an elevated garden bed can transform how you grow plants — making gardening easier and more enjoyable.
Start your project today, and enjoy the benefits of gardening at a comfortable height!
Ready to build your own elevated garden bed? Gather materials, plan your design, and take the first step towards a more accessible and productive garden.
