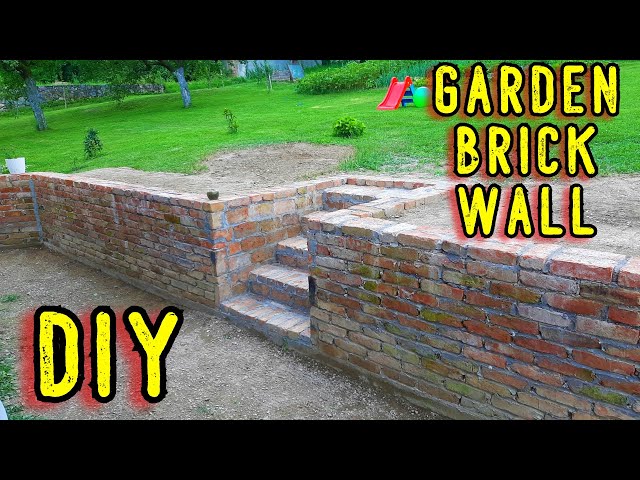
Building a brick garden retaining wall is a practical and attractive way to manage soil erosion, create level planting areas, and add charm to your outdoor space. Whether you’re dealing with a sloped yard or want to enhance your garden’s structure, a well-built retaining wall can transform your landscape. This guide will walk you through the process of building a durable, visually appealing brick retaining wall that complements your garden design.
In this article, we will cover everything from planning and selecting materials to laying bricks and ensuring structural stability. By the end, you’ll have the knowledge and confidence to construct a retaining wall that lasts for years while boosting your garden’s curb appeal.
Why Build a Brick Garden Retaining Wall?
Before diving into construction, it’s important to understand the benefits of a brick retaining wall:
- Erosion Control: Prevents soil from washing away on slopes.
- Garden Terracing: Creates flat planting beds on uneven terrain.
- Aesthetic Appeal: Adds a classic, elegant look to your outdoor space.
- Property Value: Increases landscape value with a functional design.
With these advantages in mind, let’s explore how to build your brick retaining wall efficiently and correctly.
Step 1: Planning Your Brick Retaining Wall
Assess Your Site
Start by evaluating the area where you want the wall:
- Slope Gradient: Measure the slope to determine wall height and length.
- Soil Type: Clay, sand, or rocky soil affects drainage and wall stability.
- Drainage Needs: Proper water flow prevents pressure buildup behind the wall.
Design Considerations
- Wall Height: For walls over 3 feet tall, consider consulting a structural engineer.
- Wall Thickness: A typical brick wall thickness is one brick wide (about 4 inches).
- Style: Decide between a straight, curved, or stepped design based on your garden layout.
Obtain Permits
Check with local building authorities regarding permits or regulations for retaining walls.
Step 2: Gathering Materials and Tools
Essential Materials
- Bricks: Choose weather-resistant, high-quality bricks designed for outdoor use.
- Mortar Mix: Use a mixture suited for retaining walls, typically Type S or N mortar.
- Gravel: For the base and drainage layer.
- Drain Pipe: Perforated pipe to manage water behind the wall.
- Landscape Fabric: To separate soil from gravel drainage.
Tools Required
- Shovel and hoe
- Masonry trowel
- Level
- Tape measure
- String line and stakes
- Rubber mallet
- Wheelbarrow
- Bucket for mortar mixing
- Brick chisel or saw (for cutting bricks)
Step 3: Preparing the Foundation
A solid foundation is key to a durable retaining wall.
- Excavate the Trench: Dig a trench about 12 inches deep and twice as wide as a brick (around 8 inches). The depth varies based on wall height and soil conditions.
- Add Gravel Base: Pour 4-6 inches of compacted gravel for drainage and a stable base.
- Level the Base: Use a level and tamper to ensure a flat, even surface.
Step 4: Laying the First Course of Bricks
The first row sets the tone for the entire wall.
- Mix Mortar: Prepare a consistent, workable mortar mix.
- Spread Mortar: Apply a 1-inch thick mortar bed on the gravel base.
- Place Bricks: Lay bricks end to end, pressing them into the mortar.
- Check Alignment: Use a string line and level to keep bricks straight and even.
- Tap Bricks: Gently tap with a rubber mallet for a snug fit.
- Mortar Joints: Leave about 3/8-inch gaps between bricks for mortar joints.
Step 5: Building Up the Wall
Continue Brick Courses
- Spread mortar on the top of the first row.
- Stagger bricks in a running bond pattern (each brick overlaps the one below by half its length).
- Clean excess mortar from brick faces to maintain neatness.
Incorporate Drainage
- Place perforated drain pipe behind the base of the wall.
- Line the back with landscape fabric to prevent soil clogging.
- Fill behind the wall with gravel to facilitate water drainage.
Reinforce for Stability
- For taller walls, integrate reinforcement such as:
- Geogrid layers: Mesh layers tied into the soil.
- Tie-backs or anchors: Metal rods fixed into the soil and wall.
Step 6: Finishing Touches
- Cap Bricks: Install rounded or flat cap bricks on top for a polished look.
- Tool Mortar Joints: Use a jointing tool to smooth and shape mortar for weather resistance.
- Clean Wall: Remove mortar stains with a stiff brush and water.
- Landscape Around Wall: Add soil, plants, or mulch to integrate the wall into your garden.
Tips for Building a Long-Lasting Brick Retaining Wall
- Use Quality Bricks and Mortar: Weather-resistant materials prevent cracking and deterioration.
- Ensure Proper Drainage: Water pressure is the main cause of wall failure.
- Maintain Regularly: Inspect for cracks or loose bricks and repair promptly.
- Avoid Overloading: Don’t build excessive soil height without professional advice.
Common Questions About Brick Retaining Walls
How deep should the foundation trench be?
Typically, 12 inches deep, but deeper for taller walls or unstable soil.
Can I build a retaining wall without mortar?
Dry-stacked walls exist but are less stable and not recommended for significant loads.
How long does it take to build a brick retaining wall?
Small walls can take a weekend; larger projects may require several days or professional help.
Conclusion
Building a brick garden retaining wall combines functionality with timeless beauty. By carefully planning your design, preparing a solid foundation, and following proper bricklaying techniques, you can create a sturdy wall that enhances your garden’s landscape for years. Remember, drainage and material quality are critical for longevity. Whether you’re a DIY enthusiast or hiring a pro, this guide provides the essential steps to build a retaining wall that stands strong and looks stunning.
Ready to transform your garden? Gather your materials and start building a brick retaining wall that balances durability with aesthetic charm.
Quick Summary: How to Build a Brick Garden Retaining Wall
| Step | Key Action | Important Tip |
|———————–|—————————————|————————————–|
| Planning | Assess site and design wall | Check local permits |
| Materials & Tools | Select bricks, mortar, drainage tools | Use weather-resistant materials |
| Foundation | Excavate trench and add gravel base | Ensure level and compacted base |
| First Course | Lay first brick row on mortar bed | Use string line for alignment |
| Build Up Wall | Continue with staggered brick courses | Install drainage behind the wall |
| Finishing | Add cap bricks and tool mortar joints | Clean mortar and landscape around |
Building your brick garden retaining wall is a rewarding project that combines practicality with visual appeal. Follow these expert-backed steps to ensure your wall is both beautiful and built to last.
