Creating garden boxes is a fantastic way to grow your own vegetables, herbs, or flowers in a controlled, organized space. Garden boxes, also known as raised beds, improve soil quality, enhance drainage, and can even reduce pest problems. Whether you have limited space or poor soil conditions, making your own garden boxes can transform your gardening experience.
In this article, we’ll walk you through the essential steps to build durable, functional garden boxes. From choosing materials to assembling and filling your garden beds, you’ll learn how to create a thriving garden space tailored to your needs. We’ll also explore tips on location, soil preparation, and maintenance to ensure your garden boxes flourish all season long.
Why Build Garden Boxes?
Raised garden boxes offer several advantages over traditional in-ground gardening:
- Improved drainage prevents waterlogging.
- Better soil control lets you tailor nutrient levels.
- Reduced weed growth due to contained soil.
- Easier access reduces strain on your back and knees.
- Extended growing season by warming soil faster in spring.
Understanding these benefits helps you appreciate why garden boxes are a smart investment for gardeners of all levels.
What Materials Do You Need to Make Garden Boxes?
Before starting, gather the right tools and materials. Here’s a list of essentials:
Materials:
- Lumber: Cedar, redwood, or treated pine (avoid chemically treated wood for edibles)
- Screws or nails: Galvanized or stainless steel to prevent rust
- Landscape fabric: To line the bottom (optional, for weed control)
- Soil mix: High-quality compost, topsoil, and organic matter
Tools:
- Saw (hand or power)
- Drill with screwdriver bits
- Measuring tape
- Carpenter’s square
- Level
- Gloves and safety glasses
Choosing durable, non-toxic wood like cedar ensures your garden boxes last several seasons without leaching harmful chemicals into your soil.
Step-by-Step Guide to Building Garden Boxes
Step 1: Decide on the Size and Location
- Size: Common dimensions are 4 feet wide by 8 feet long, and 12-18 inches deep. Four feet wide allows easy access from both sides.
- Location: Choose a sunny spot with at least 6-8 hours of direct sunlight daily. Ensure good drainage and proximity to a water source.
Step 2: Cut Your Lumber
- Measure and mark your wood pieces.
- Cut four boards for the sides of the box (two long and two short).
- For a 4×8 box, cut two 8-foot and two 4-foot pieces.
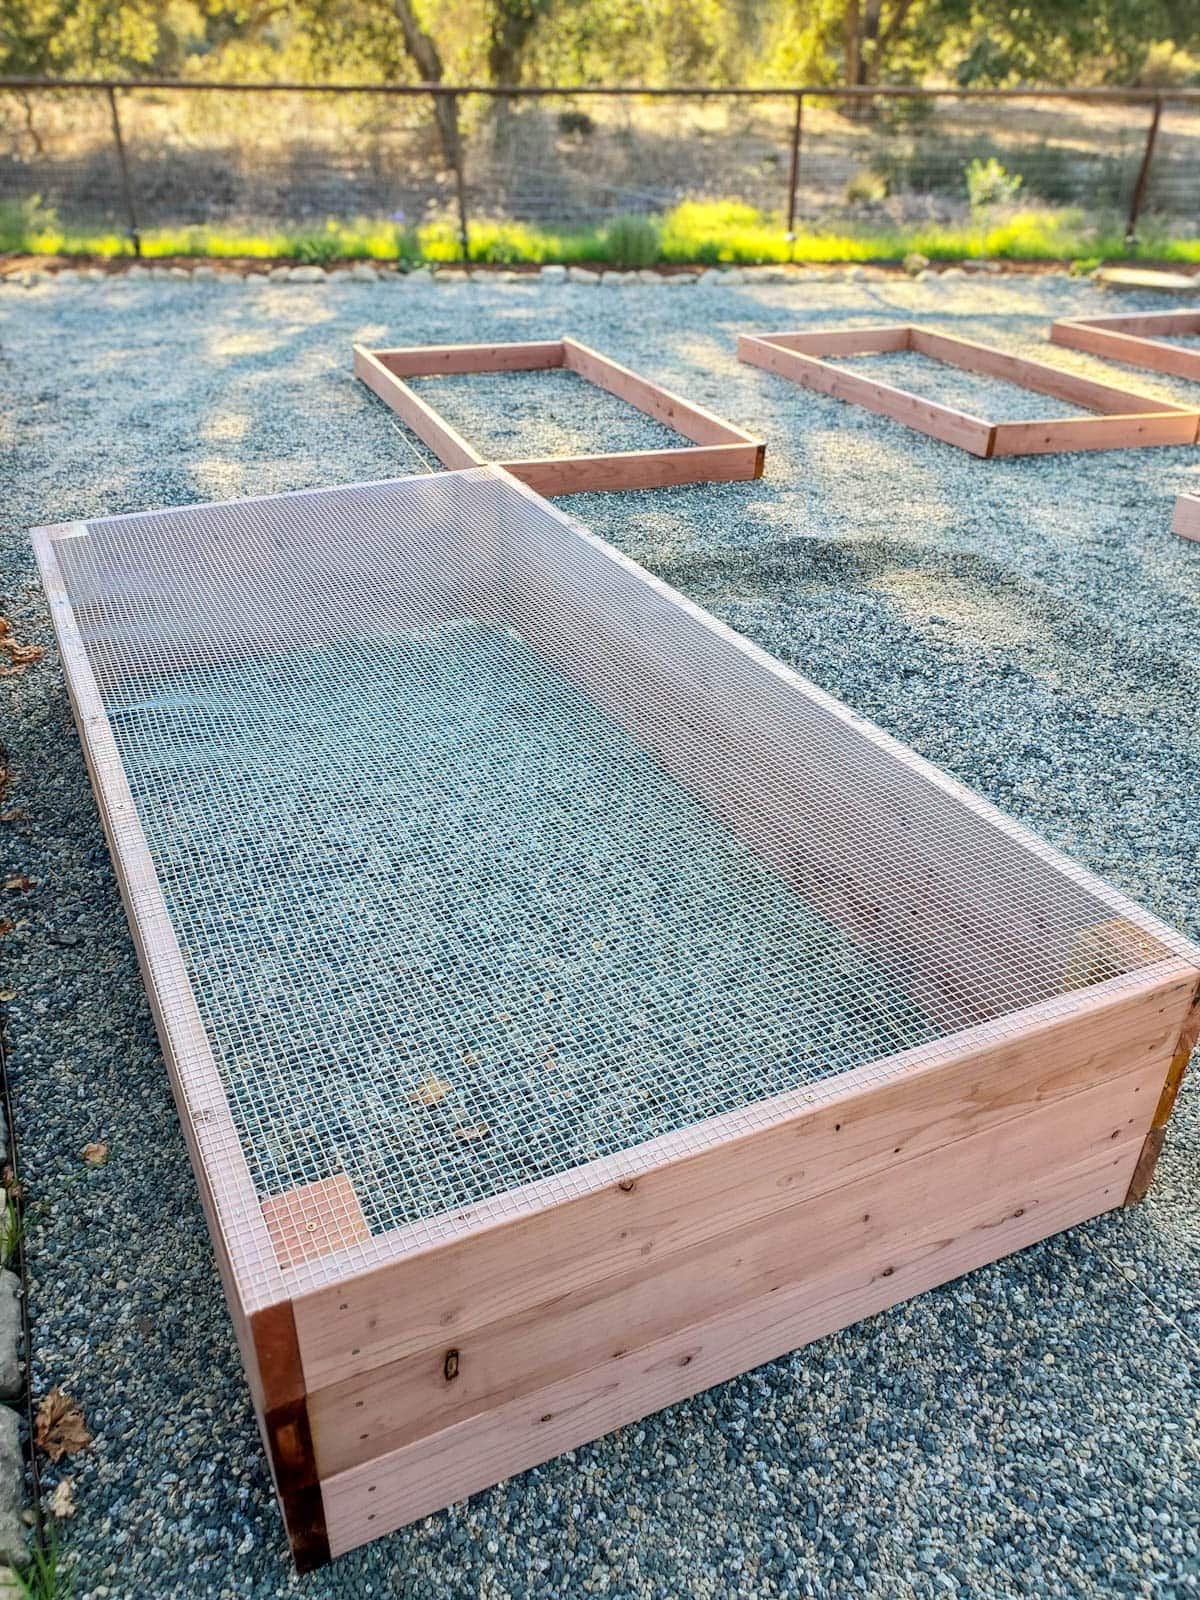
Step 3: Assemble the Frame
- Align the boards to form a rectangle.
- Use a carpenter’s square to ensure corners are 90 degrees.
- Drill pilot holes to prevent wood splitting.
- Screw the boards together at the corners.
Step 4: Prepare the Site
- Clear the area of grass, weeds, and debris.
- Optionally, lay down landscape fabric to prevent weeds.
- Level the ground to ensure an even box.
Step 5: Place the Frame and Fill with Soil
- Set your assembled box in place.
- Fill with a mixture of 60% topsoil, 30% compost, and 10% potting soil or organic matter.
- Leave a few inches at the top to allow for watering and mulch.
Tips for Successful Garden Boxes
- Use untreated or naturally rot-resistant wood to avoid chemical contamination.
- Add a trellis or support for climbing plants like beans or cucumbers.
- Install drip irrigation for efficient watering.
- Rotate crops annually to prevent soil depletion.
- Mulch the surface to retain moisture and suppress weeds.
Common Questions About Making Garden Boxes
How Deep Should Garden Boxes Be?
For most vegetables, a depth of 12-18 inches is sufficient. Root vegetables like carrots may require deeper beds, up to 24 inches.
Can I Use Other Materials Besides Wood?
Yes, garden boxes can be made from stone, brick, metal, or recycled plastic. Wood is popular due to ease of assembly and natural insulation.
How Long Do Garden Boxes Last?
With quality wood and proper care, garden boxes can last 5-10 years. Regular maintenance like resealing and checking for rot extends their lifespan.
Real-World Example: A Successful Urban Garden Box Project
In Seattle, urban gardener Lisa built four cedar garden boxes on her apartment balcony. By selecting compact vegetables and herbs, she harvested fresh produce throughout the summer. Her boxes measured 4×4 feet, optimized for limited space, and included built-in trellises for climbing peas. This setup demonstrates how garden boxes can adapt to various environments.
Conclusion
Building your own garden boxes is a rewarding project that enhances your gardening productivity and enjoyment. By selecting the right materials, planning your layout thoughtfully, and following proper assembly steps, you can create a vibrant garden space—even in small or challenging areas.
Start with manageable dimensions, use quality soil, and apply consistent care to watch your garden boxes thrive. Whether you grow flowers, herbs, or veggies, raised beds offer a practical solution for gardeners seeking control and convenience. Ready to dig in? Gather your tools, get your hands dirty, and build your perfect garden boxes today!
Call to Action:
Ready to build your first garden box? Grab your materials and follow this guide step-by-step. Share your gardening journey with us and inspire others to grow their own green spaces!
