Introduction
Cutworms are a common garden pest that can quickly destroy young seedlings and established plants by cutting through their stems at the soil line. For home gardeners and small-scale organic farmers, knowing how to get rid of cutworms in the garden is essential to protect valuable crops and maintain healthy yields. This guide offers a comprehensive approach to understanding cutworm biology, recognizing damage, and implementing both natural and chemical control methods. You’ll learn about preventive practices like crop rotation and mulch barriers, as well as how to monitor and time your interventions effectively. Supported by expertise from sources such as the University of Minnesota Extension, USDA, and University of California Agriculture and Natural Resources, this article empowers you to manage cutworm infestations sustainably and with confidence.
Identification and Lifecycle of Cutworms
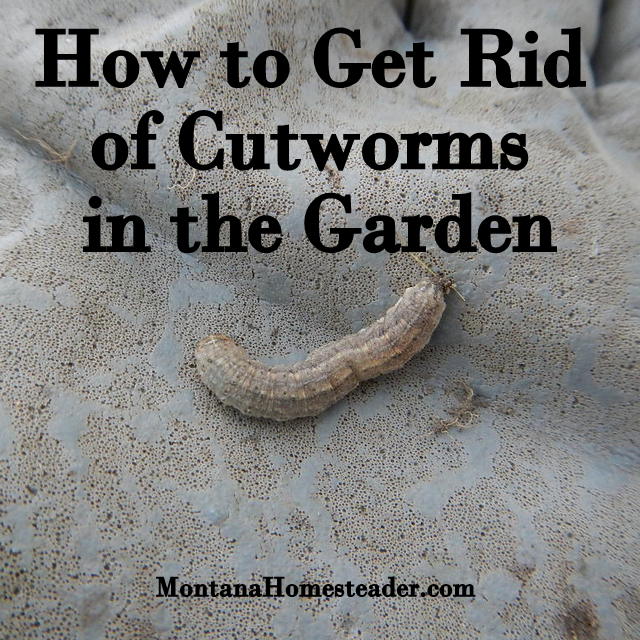
Cutworms are actually caterpillars of several moth species, known for their nocturnal feeding habits. These larvae live in the soil during the day and emerge at night to chew through plant stems typically near ground level. Understanding their lifecycle is critical for effective control. Cutworms overwinter as pupae underground and emerge as moths in spring to lay eggs on host plants.
Key stages include:
– Egg laying on plant debris or soil surface
– Larval stage (cutworm caterpillars) that cause the most damage
– Pupation in soil
By targeting cutworms during the larval stage, gardeners can reduce damage significantly. Early detection during seedling emergence is crucial since cutworm damage often appears as wilted or severed young plants.
Common Plants Affected by Cutworms
Cutworms have a broad host range affecting many vegetable and flower crops. Some of the most commonly affected plants include:
- Tomatoes
- Peppers
- Lettuce
- Beans
- Cabbage and other brassicas
- Corn
Seedlings and transplants are especially vulnerable because cutworms sever stems close to the soil, killing the entire plant. Recognizing the signs of cutworm damage — such as cut stems lying near the base of plants or missing seedlings — helps you respond promptly to infestations.
Natural and Organic Methods to Control Cutworms
For organic gardeners, biological control and cultural practices are the backbone of cutworm management. Here are effective natural strategies:
- Beneficial nematodes: Species like Steinernema carpocapsae are microscopic worms that parasitize cutworm larvae in the soil. Applying them during warm soil conditions can dramatically reduce cutworm populations.
- Natural predators: Encouraging birds, ground beetles, and parasitic wasps helps keep cutworms in check.
- Mulch barriers: Organic mulches such as straw or wood chips create a physical barrier that limits cutworm movement.
- Handpicking: Inspect soil around seedlings at night with a flashlight to remove cutworms manually.
Implementing these methods aligns with organic pest control principles and helps maintain soil and ecosystem health.
Chemical Treatments and Their Safe Usage
While organic methods are preferred, sometimes chemical insecticides are necessary for severe infestations. When choosing chemical treatments, follow these guidelines:
- Use organic pesticides approved by the USDA or local extension services.
- Target applications to the base of plants where cutworms feed.
- Avoid broad-spectrum insecticides that harm beneficial insects.
- Follow label instructions meticulously to ensure safety for humans, pets, and pollinators.
Products containing Bacillus thuringiensis (Bt) are effective against caterpillars and safe for organic gardens. However, overuse of chemical insecticides can disrupt natural predator populations, leading to pest resurgence.
Preventive Garden Practices to Reduce Cutworm Damage
Prevention is the most sustainable approach to cutworm management. Key practices include:
- Crop rotation: Rotating crops annually disrupts the cutworm lifecycle by removing preferred hosts.
- Clean cultivation: Remove plant debris and weeds to reduce egg-laying sites.
- Seedling protection: Use collars made from cardboard or plastic around young plants to physically block cutworms.
- Timing planting: Planting after peak cutworm activity reduces exposure.
These strategies reduce pest pressure and improve overall garden resilience.
Seasonal Timing for Cutworm Control
Cutworm activity peaks in late spring and early summer when moths lay eggs. Early spring is the ideal time to start monitoring soil and seedlings. Applying beneficial nematodes or mulch barriers before larvae emerge enhances control effectiveness.
Regular scouting during this period helps identify early infestation signs, allowing timely intervention. Adjusting control measures according to local climate and crop schedules maximizes success.
Monitoring and Early Detection Techniques
Early detection is vital for minimizing cutworm damage. Techniques include:
- Inspect seedlings daily for wilted or cut stems.
- Check soil around plants at night for feeding larvae.
- Use pheromone traps to monitor adult moth populations (available through extension services).
Maintaining detailed records of infestations and control outcomes supports adaptive management and reduces future outbreaks.
How I’d Do It: Practical Steps for Effective Cutworm Management
- Begin with thorough soil preparation by cleaning debris and rotating crops.
- Apply beneficial nematodes in early spring when soil temperatures exceed 55°F.
- Use organic mulch barriers around vulnerable seedlings immediately after planting.
- Inspect plants nightly during peak cutworm season and handpick larvae where feasible.
- If infestation escalates, apply targeted organic pesticides like Bt according to label instructions.
- Protect future crops by maintaining crop rotation and practicing ongoing monitoring.
Common Pitfalls to Avoid
- Ignoring early signs of cutworm damage can lead to extensive crop loss.
- Overreliance on chemical insecticides may kill natural predators and worsen pest problems.
- Failure to rotate crops or remove plant debris creates ideal conditions for cutworm survival.
- Using thick, heavy mulch that retains moisture excessively can promote other soil pests.
Avoiding these pitfalls enhances the effectiveness of your integrated pest management plan.
Checklist for Managing Cutworms in Your Garden
- [ ] Identify cutworm damage on seedlings and mature plants
- [ ] Implement crop rotation annually
- [ ] Apply beneficial nematodes in spring
- [ ] Set up mulch or physical barriers around seedlings
- [ ] Monitor plants daily during high-risk periods
- [ ] Use organic pesticides only if necessary
- [ ] Encourage natural predators by providing habitat
- [ ] Keep garden clean of weeds and debris
Tools and Metrics for Effective Control
- Soil thermometer to apply nematodes at optimal temperatures
- Night flashlight for inspecting larvae
- Pheromone traps for adult moth monitoring
- Garden journal to track infestations and treatments
These tools improve precision and timing, critical factors for successful cutworm management.
FAQs
What are the earliest signs of cutworm infestation?
Early signs include missing or wilted seedlings with stems cut near the soil surface, often accompanied by the presence of small larvae under the soil or mulch. Leaves may also show irregular holes if larvae feed on older plants.
Can beneficial nematodes completely eliminate cutworms?
While beneficial nematodes significantly reduce cutworm populations, they usually do not provide 100% eradication. Combining nematode applications with other cultural controls like mulch barriers and crop rotation yields the best results.
Are chemical insecticides safe for organic gardens?
Some chemical insecticides, such as those containing Bacillus thuringiensis (Bt), are approved for organic use and are safe when applied correctly. However, broad-spectrum insecticides should be avoided as they harm beneficial insects and soil health.
When is the best time to apply cutworm control methods?
Early spring and just before seedling emergence are ideal times to apply biological controls and establish physical barriers. Monitoring should continue through late spring and early summer, aligning with the cutworm lifecycle.
How do crop rotation and garden cleanliness help in cutworm control?
Crop rotation removes preferred host plants, disrupting cutworm breeding cycles. Keeping garden beds free of weeds and debris eliminates egg-laying and hiding spots, reducing pest populations.
Key Takeaways
Managing cutworms effectively requires a combination of identification, timely intervention, and preventive practices. Understanding the cutworm lifecycle allows you to apply control measures precisely when they will be most effective. Natural methods such as beneficial nematodes, mulch barriers, and encouraging natural predators support sustainable garden pest management. Chemical treatments should be used cautiously, favoring organic-approved options to protect beneficial insects. Preventive practices like crop rotation and seedling protection create a resilient garden ecosystem. Regular monitoring and early detection are critical to preventing extensive damage.
By following these expert-backed strategies, gardeners can safeguard their plants against cutworm damage while maintaining an environmentally friendly approach.
References
- University of Minnesota Extension. “Cutworms.” https://extension.umn.edu/insects/cutworms
- U.S. Department of Agriculture (USDA) Agricultural Research Service. “Cutworms in Vegetables.” https://www.ars.usda.gov/plants-insects/vegetables/cutworms
- University of California Agriculture and Natural Resources. “Cutworms: Pest Notes.” https://ipm.ucanr.edu/PMG/PESTNOTES/pn7407.html
