Introduction
Fitting a garden gate is a practical project that enhances your property’s security, privacy, and curb appeal. Whether you’re a homeowner, gardener, or landscaping professional, understanding how to fit a garden gate correctly ensures durability and smooth operation. This guide covers everything from selecting the right garden gate type and materials to precise measuring, installation techniques, troubleshooting common challenges, and maintenance practices. Additionally, it highlights important local regulations and permits to keep your installation compliant.
By following expert tips from sources like the American Fence Association and the USDA National Agroforestry Center, you’ll gain confidence in handling your garden gate installation. Let’s explore the types of gates, necessary tools, step-by-step fitting, and how to avoid common pitfalls.
Types of Garden Gates and Materials
Garden gates come in a variety of types and materials designed to fit different styles and functional needs. The two most common materials are wooden garden gates and metal garden gates.
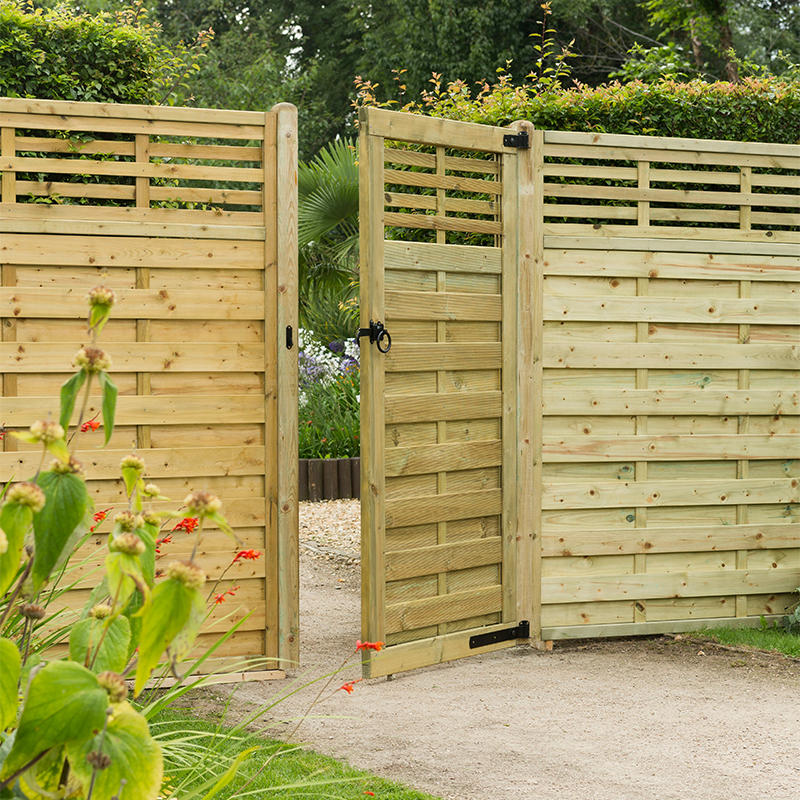
- Wooden garden gates offer a classic, natural look and are often favored for traditional or cottage-style gardens. They can be made from cedar, redwood, or pressure-treated pine, which are known for their weather resistance when properly maintained.
- Metal garden gates typically use steel, aluminum, or wrought iron. These gates provide robust security and require less frequent maintenance but must be treated or coated to prevent rust.
Other gate types include vinyl and composite materials, which are weatherproof and low-maintenance options. When selecting your gate, consider:
- Climate and weather exposure
- Desired level of privacy and security
- Style compatibility with your home and garden
- Required gate width and height
Understanding gate hardware like garden gate hinges and garden gate latches is crucial as well. Choose hardware rated for outdoor use and compatible with your gate’s weight and material.
Measuring Your Garden Gate Space Accurately
Accurate measurement is the foundation of a successful garden gate installation. Improper measurements often lead to misaligned gates and operational issues.
To measure:
- Measure the gate opening width at the top, middle, and bottom. Use the smallest measurement to ensure the gate fits.
- Measure the height on both sides and in the middle to account for any slope.
- Consider the swing direction (inward or outward) and clearance needed for the gate to open fully.
- Add space for hardware clearance, typically 1/8 to 1/4 inch on each side.
Use a sturdy tape measure and a level to check for horizontal and vertical alignment. The University of Minnesota Extension recommends noting all measurements precisely before purchasing materials or gates.
Tools and Materials Needed for Fitting a Garden Gate
Having the right tools and materials at hand streamlines your installation process. Essential tools include:
- Power drill with appropriate bits
- Screwdrivers (Phillips and flathead)
- Tape measure and level
- Carpenter’s square
- Adjustable wrench or socket set
- Hammer and chisel (for post adjustments)
- Saw (if gate or posts require trimming)
- Post hole digger or auger
- Concrete mix (for setting posts)
Materials you’ll need:
- Garden gate (wooden or metal)
- Gate posts (wood, metal, or composite)
- Heavy-duty garden gate hinges and latches (weather-resistant)
- Screws or bolts suited for outdoor use
- Gravel for drainage under posts
Select weatherproof hardware and materials suitable for your climate to extend gate longevity.
Step-by-Step Installation Process
1. Prepare the Gate Opening
Clear the area around the gate opening. If installing new posts, dig holes at least 2 feet deep and 8 inches wide, depending on soil conditions and gate size.
2. Set the Posts
Place gravel at the bottom for drainage. Position posts in the holes, checking for plumb and alignment using a level. Pour concrete around the posts and allow it to cure for at least 24-48 hours.
3. Attach Hinges to the Gate
Following the manufacturer’s instructions, fix the hinges to the gate frame. Position hinges about 7 inches from the top and bottom edges for stability.
4. Hang the Gate
With assistance, hold the gate in place and attach the hinges to the gate post. Ensure the gate is level and swings freely without obstruction.
5. Install the Latch
Mark the latch position on the gate and post. Drill pilot holes and fit the latch securely, confirming it engages smoothly.
6. Final Checks
Test the gate’s swing direction and alignment. Adjust hinges or latch position if necessary to prevent sagging or binding.
Common Challenges and Troubleshooting Tips
Even experienced DIYers encounter issues when fitting garden gates. Here are common pitfalls and how to avoid them:
- Gate sagging: Often caused by loose hinges or insufficient support. Use heavy-duty hinges and consider installing a diagonal brace on wooden gates.
- Misaligned latch: Ensure precise measurement before drilling. Adjust latch plates if engagement is difficult.
- Uneven ground clearance: Level the ground or trim the gate bottom to prevent dragging.
- Rusting hardware: Choose galvanized or stainless-steel hinges and latches for weather resistance.
If you face persistent problems, consult resources from the American Fence Association for advanced troubleshooting.
Maintenance and Care for Garden Gates
Proper maintenance extends your gate’s lifespan and keeps it functioning well.
- Regularly clean hinges and latches to remove dirt and debris.
- Lubricate moving parts with silicone spray or light oil.
- Inspect wooden gates annually for rot or insect damage; reseal or repaint as needed.
- For metal gates, check for rust spots and treat with rust-inhibiting primer and paint.
- Tighten loose screws or bolts promptly.
Weatherproof garden gates require less upkeep but still benefit from routine inspections.
Local Regulations and Permits Related to Garden Gates
Before installation, verify local building codes and homeowner association (HOA) rules. Some municipalities require permits for fence and gate installations, especially if the gate affects property line access or street visibility.
Contact your local council or zoning office to:
- Confirm setback requirements
- Understand height restrictions
- Obtain necessary permits
Ignoring these regulations can result in fines or forced removal. The USDA National Agroforestry Center provides guidance on fencing standards that may apply in rural or agricultural zones.
How I’d Do It: Expert Insights
Drawing from years of field experience, I recommend prioritizing precise measurements and sturdy post installation. Start by selecting a gate material that suits your climate—cedar for longevity in damp environments or powder-coated metal for minimal maintenance. Always use heavy-duty, weatherproof hardware from reputable brands for hinges and latches.
Take your time during alignment and test the gate swing multiple times before finalizing hardware. If working alone, use temporary supports such as clamps or blocks to hold the gate during attachment. Document measurements and installation steps to streamline future maintenance.
Common Pitfalls When Fitting Garden Gates
- Skipping post curing time leading to misalignment
- Using incompatible or low-quality hardware causing early failure
- Ignoring slope and ground clearance resulting in dragging gates
- Overlooking local regulations and permits
- Rushing installation and improper hinge placement
Avoid these by planning ahead, choosing quality materials, and following manufacturer instructions carefully.
Garden Gate Installation Checklist
- [ ] Measure gate opening width and height accurately
- [ ] Select gate type and material suitable for your climate
- [ ] Purchase weather-resistant hinges and latches
- [ ] Gather essential tools (drill, level, tape measure, post hole digger)
- [ ] Prepare gate posts and ensure proper setting with concrete
- [ ] Attach hinges and hang gate ensuring level swing
- [ ] Install latch and test operation
- [ ] Confirm compliance with local building codes and HOA rules
- [ ] Schedule regular maintenance checks
Tools and Metrics for Fitting a Garden Gate
- Tape measure: For precise width and height measurements
- Level and carpenter’s square: Ensure posts and gates are plumb and square
- Power drill with bits: For screwing hinges and latches
- Post hole digger/auger: To dig sturdy post holes
- Concrete mix: For setting posts securely
- Adjustable wrench: Tightening bolts
Using accurate tools prevents common alignment and fitting errors.
FAQs
How do I know what size gate I need?
Measure the gate opening width at multiple points (top, middle, bottom) and use the smallest measurement. Also, measure the height and consider clearance for ground and hardware. This ensures your gate fits perfectly without binding.
What type of hinges are best for garden gates?
Heavy-duty, weather-resistant hinges such as galvanized steel or stainless steel are ideal. For wooden gates, strap hinges provide good support. For metal gates, butt hinges are common. Choose hinges rated for your gate’s weight.
Can I install a garden gate myself?
Yes, with proper tools, planning, and patience, DIY garden gate fitting is achievable. Follow step-by-step instructions carefully and use quality materials. Assistance may be needed for heavy gates.
Are permits always required for garden gates?
Permit requirements vary by location. Check local building codes and HOA guidelines before installation. Permits are often necessary if the gate affects property boundaries or public access.
How do I maintain a wooden garden gate?
Regularly inspect for rot or insect damage, clean off dirt, and reseal or repaint every 1-2 years. Lubricate hinges and latches to prevent rust and ensure smooth operation.
Key Takeaways
Fitting a garden gate properly involves accurate measuring, selecting suitable materials, using appropriate hardware, and following local regulations. Prioritize weather-resistant components and allow concrete posts to cure fully for gate stability. Regular maintenance preserves gate function and appearance. Leveraging resources from the American Fence Association, USDA National Agroforestry Center, and University of Minnesota Extension ensures your installation meets professional standards.
Taking a step-by-step approach and avoiding common pitfalls will result in a secure, durable, and attractive garden gate that enhances your outdoor space.
References
- USDA National Agroforestry Center. “Fencing and Gates.” https://www.fs.usda.gov/nac/resources/fencing-and-gates
- University of Minnesota Extension. “Garden Gates.” https://extension.umn.edu/yard-and-garden-tools/garden-gates
- American Fence Association. “Installation Resources.” https://www.americanfenceassociation.com/resources/installation/
