Introduction
Operating a garden tiller is an essential skill for home gardeners, landscaping professionals, and DIY enthusiasts aiming to prepare soil efficiently and promote healthy plant growth. A garden tiller facilitates soil aeration, improves nutrient distribution, and simplifies the task of breaking up compacted earth—key steps in organic gardening soil prep and landscaping. This guide provides a comprehensive overview of garden tiller operation, covering types of tillers, step-by-step instructions, safety precautions, maintenance tips, troubleshooting advice, and best practices for selecting the right tiller for your garden size and soil type.
Understanding how to use a garden tiller properly not only enhances soil structure but also prevents common mistakes that can damage the soil or the equipment. Whether you’re using a small engine tiller or a larger rotary tiller, the insights from entities like John Deere, the University of California Agriculture and Natural Resources, and the USDA Natural Resources Conservation Service will help you cultivate your garden effectively and safely.
Types of Garden Tillers and Their Uses
Garden tillers come in various types, each suited for specific soil cultivation techniques and garden sizes.
Front-Tine Tillers
Front-tine tillers have blades located in front of the wheels, making them excellent for light to medium-duty soil preparation. They are ideal for smaller gardens and raised beds, providing good control and maneuverability.
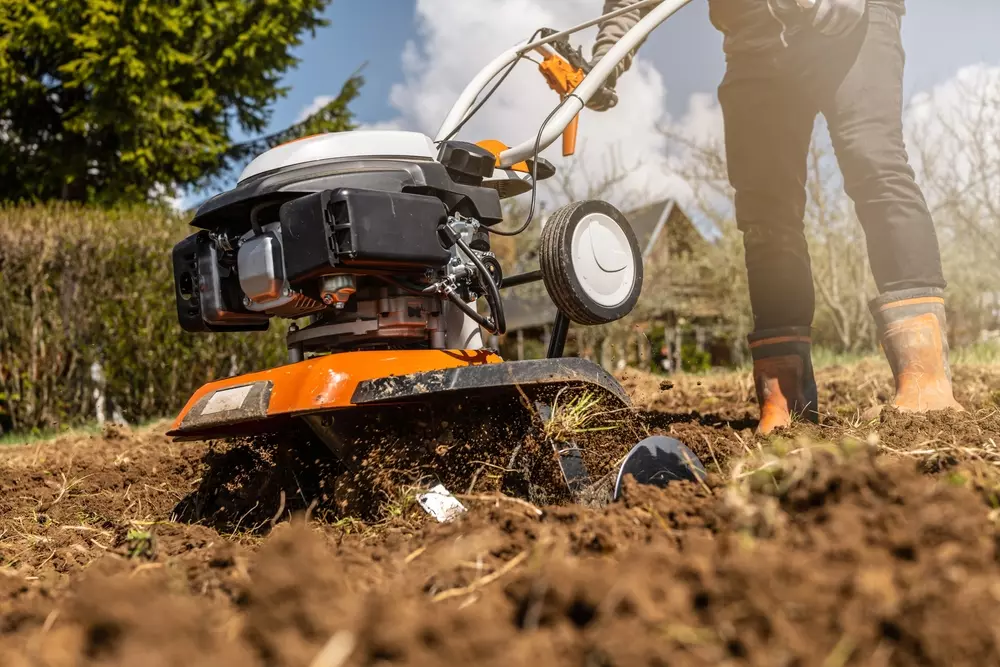
Rear-Tine Tillers
Rear-tine tillers feature blades behind the wheels, offering more power and deeper soil penetration. They are suited for larger plots and tougher soil conditions where deeper tilling is required.
Rotary Tillers
Rotary tillers, often powered by small engines, use rotating blades to churn and aerate the soil. These are widely used in commercial landscaping and organic gardening due to their efficiency in soil aeration and weed control.
Choosing the Right Tiller
Consider your garden size, soil type, and the degree of soil compaction when selecting a tiller. For example:
- Small gardens or vegetable patches: Compact front-tine tillers or handheld rotary tillers
- Medium to large gardens: Rear-tine tillers with adjustable depth controls
- Heavy, compacted soil: Powerful rotary tillers or tractor-mounted tillers like those from John Deere
How to Operate a Garden Tiller: Step-by-Step Instructions
Operating a garden tiller requires both technique and attention to detail. Follow these steps to ensure safe and effective soil cultivation.
- Read the Manufacturer’s Manual: Before starting, familiarize yourself with the specific model’s controls and safety features.
- Perform a Pre-Operation Check: Inspect the tiller for loose parts, fuel or oil leaks, and sharp blades.
- Wear Protective Gear: Use gloves, sturdy footwear, and eye protection to guard against debris and vibration.
- Prepare the Area: Remove rocks, sticks, and other debris that might interfere with tiller blades.
- Start the Engine Safely: For small engine tillers, ensure the choke and throttle are set correctly before ignition.
- Engage the Tines Slowly: Lower the tiller tines into the soil gradually to avoid sudden jerks.
- Operate at a Steady Pace: Walk behind the tiller at a controlled speed to prevent soil compaction and ensure even tilling.
- Overlap Passes: Slightly overlap each pass to cultivate the soil uniformly.
- Stop and Inspect: After tilling, turn off the tiller and check for any damage or unusual wear.
Actionable Insight
Maintain a consistent tilling depth (typically 4–6 inches) depending on plant requirements and soil type. Avoid tilling too deep frequently as this can disrupt soil layers and beneficial microorganisms.
Safety Precautions When Using a Garden Tiller
Garden tiller safety is paramount to prevent injuries and equipment damage.
- Wear appropriate clothing: Avoid loose garments that can get caught in blades.
- Use personal protective equipment (PPE): Gloves, safety glasses, and ear protection are essential.
- Operate only on dry or moderately moist soil: Wet soil can clog tines and cause the machine to slip.
- Keep bystanders and pets away: Maintain a safe perimeter during operation.
- Be mindful of underground utilities: Call local services to mark utility lines before digging.
- Never disable safety features: Devices like blade guards and kill switches protect the operator.
Maintenance Tips for Prolonging Tiller Life
Regular maintenance extends your garden tiller’s life and ensures consistent performance.
- Clean after each use: Remove soil and debris from tines and engine areas.
- Check and change oil: Follow the manufacturer’s schedule for oil maintenance.
- Sharpen or replace tines: Dull blades reduce efficiency and strain the engine.
- Inspect belts and cables: Replace any worn or frayed parts promptly.
- Store properly: Keep the tiller in a dry, sheltered area to avoid rust and corrosion.
Entities like John Deere emphasize small engine maintenance as a critical factor for durability.
Common Troubleshooting and Problem-Solving
Some common issues arise during garden tiller operation:
- Tiller won’t start: Check fuel quality, spark plug condition, and choke settings.
- Tines not spinning: Inspect the drive belt and clutch for wear or damage.
- Excessive vibration: Tighten loose parts and balance tines.
- Poor soil penetration: Adjust tilling depth or check for overly compacted soil.
Quick Fixes
- Replace stale fuel
- Clean or replace spark plugs
- Tighten or replace belts
Environmental and Soil Health Considerations
Using a garden tiller responsibly can improve soil health while minimizing environmental impact.
- Avoid over-tilling: Excessive tilling can disrupt soil structure and harm beneficial organisms.
- Incorporate organic matter: After tilling, add compost or mulch to enrich soil.
- Use tillers to improve soil aeration: This enhances root growth and water infiltration.
- Follow guidelines from the USDA Natural Resources Conservation Service on soil conservation to prevent erosion.
How I’d Do It: Personal Approach to Garden Tiller Operation
From my experience, preparation is key. I start by thoroughly inspecting the garden area and selecting a rear-tine tiller for medium-sized plots with moderately compacted soil. I always wear gloves and eye protection, clear debris, and start tilling at a slow pace to assess soil condition. I avoid wet soil to prevent clumping and always overlap passes for even cultivation. Post-operation, I clean the tiller and sharpen the tines if needed. This method balances efficiency with soil health, leading to robust garden growth.
Common Pitfalls to Avoid
- Operating on wet soil causing clogs and soil compaction
- Ignoring safety gear and risking injury
- Over-tilling leading to soil degradation
- Using the wrong tiller type for your garden size or soil hardness
- Neglecting regular maintenance causing premature equipment failure
Garden Tiller Operation Checklist
- [ ] Read the tiller’s manual
- [ ] Inspect tiller for damage or loose parts
- [ ] Wear gloves, eye protection, and suitable footwear
- [ ] Clear garden debris
- [ ] Check fuel, oil, and spark plug
- [ ] Ensure soil is dry or slightly moist
- [ ] Operate at steady speed with consistent depth
- [ ] Clean and maintain tiller after use
Essential Tools and Metrics
- Protective gear: Gloves, goggles, ear plugs
- Fuel and oil: Fresh gasoline and engine oil
- Basic tools: Wrenches and screwdrivers for adjustments
- Soil moisture meter: To verify optimal tilling conditions
- Sharpening tools: Files or grinders for tine maintenance
FAQs
What type of garden tiller is best for beginners?
Front-tine tillers are generally easier to handle and ideal for beginners with small to medium gardens. They offer greater control and require less strength than rear-tine models.
How often should I maintain my garden tiller?
Maintenance depends on usage frequency, but after every 10–15 hours of operation, check oil levels, clean the tines, and inspect belts. Seasonal maintenance should include a thorough inspection and servicing.
Can I use a garden tiller on clay soil?
Garden tillers can work on clay soil but require careful timing. It’s best to till when the soil is dry to slightly moist to avoid compaction. Rear-tine tillers or rotary tillers are better suited for heavy clay.
Is it safe to till around established plants?
Avoid tilling too close to established plants to prevent root damage. Use hand tools or light cultivation methods near sensitive areas.
How does tilling affect soil health?
Proper tilling aerates soil, improves nutrient distribution, and controls weeds. However, over-tilling can disrupt soil microbes and structure, so moderation is key.
Key Takeaways
Operating a garden tiller effectively requires understanding the right type for your garden, following safety precautions, and maintaining the equipment regularly. Selecting the appropriate tiller—whether front-tine, rear-tine, or rotary—depends on soil type and garden size. Safety gear and careful operation prevent accidents, while proper maintenance extends tool life. Avoid common pitfalls like tilling wet soil or over-tilling to protect soil health. Leveraging guidance from authorities such as the University of California Agriculture and Natural Resources and the USDA Natural Resources Conservation Service helps enhance both gardening success and environmental stewardship.
References
- USDA Natural Resources Conservation Service. Soil Health and Tillage. [https://www.nrcs.usda.gov/wps/portal/nrcs/detail/soils/health/]
- University of California Agriculture and Natural Resources. Garden Tilling and Soil Preparation Guide. [https://ucanr.edu/sites/gardenweb/files/123456.pdf]
- John Deere. Garden Tiller Maintenance and Safety Tips. [https://www.deere.com/en/gardening-and-yard-care]
- Environmental Protection Agency (EPA). Sustainable Gardening Practices. [https://www.epa.gov/green-infrastructure/sustainable-gardening]
