Introduction
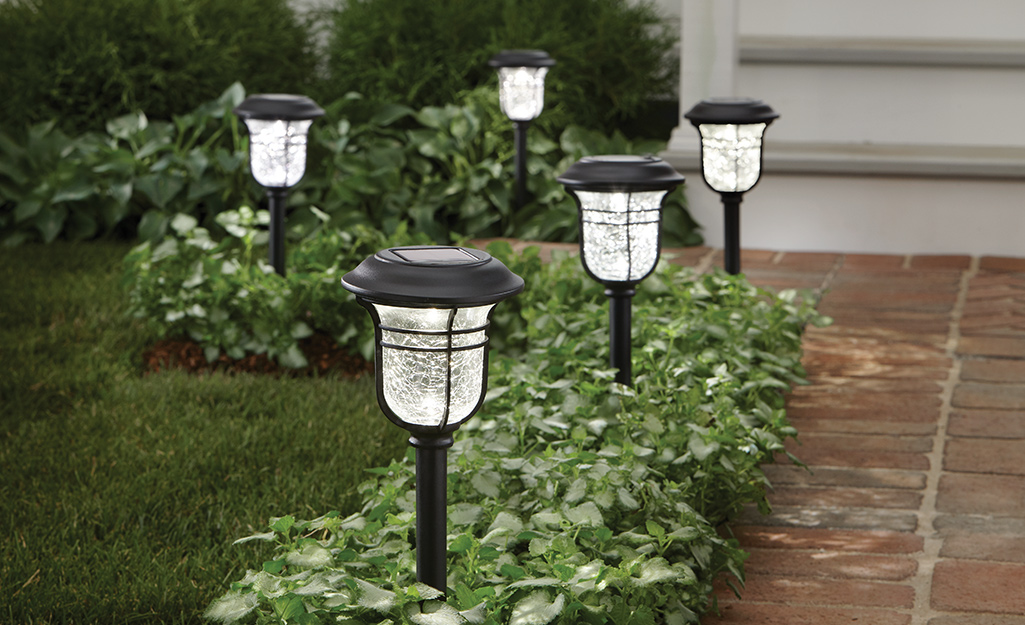
Setting up solar garden lights is an excellent way for homeowners and gardening enthusiasts to enhance outdoor spaces with eco-friendly, energy-efficient lighting. These lights harness solar energy through built-in solar panels, converting sunlight into electricity stored in rechargeable batteries. This process powers LED lights at night, offering a low-maintenance, cost-saving alternative to traditional wired lighting. In this guide, you’ll learn how to select the right solar garden lights, the tools and materials needed, and a detailed step-by-step installation process. We’ll also explore optimal placement strategies, maintenance tips to extend your lights’ lifespan, and troubleshooting solutions for common issues. Understanding how solar garden lights work and their benefits can transform your garden into a beautifully illuminated, sustainable haven.
Solar garden light installation merges technology with aesthetics, using components like solar panels, LED lights, and rechargeable batteries. This guide draws on research from the U.S. Department of Energy, insights from the National Renewable Energy Laboratory, and gardening expertise from the Royal Horticultural Society to provide you with comprehensive, practical advice.
Understanding How Solar Garden Lights Work
Solar garden lights operate by converting sunlight into electrical energy via a photovoltaic solar panel. During the day, solar panels collect sunlight and charge an internal battery, typically a rechargeable NiMH or Li-ion cell. At dusk, a sensor activates the LED light to illuminate your garden path, flower beds, or patio areas.
Key components include:
- Solar Panel: Captures sunlight and converts it into electricity.
- Rechargeable Battery: Stores energy for nighttime use.
- LED Light: Provides bright, energy-efficient lighting.
- Light Sensor: Automatically switches lights on/off based on ambient light.
This system makes solar garden lights self-sufficient and easy to install without wiring.
Benefits of Solar Garden Lights
- Energy Efficient: Uses renewable solar energy, reducing your carbon footprint.
- Cost-Effective: No electricity bills or wiring costs.
- Easy Installation: Plug-and-play designs minimize setup complexity.
- Weatherproof: Most models are designed to withstand outdoor elements.
Choosing the Right Solar Garden Lights for Your Garden
Selecting appropriate solar garden lights depends on your garden size, lighting needs, and aesthetic preferences. Consider these factors:
- Brightness (Lumens): For pathways, choose 100-200 lumens; for accent lighting, 50-100 lumens suffice.
- Battery Capacity: Larger batteries provide longer lighting duration; look for high mAh ratings.
- Solar Panel Size and Efficiency: Bigger panels capture more sunlight, especially important in shaded or less sunny areas.
- Weatherproof Rating (IP65 or higher): Ensures durability against rain, dust, and temperature variations.
- Design and Style: From stake lights to lanterns, pick styles that complement your garden’s theme.
Leading brands such as Sunforce and Gama Sonic offer reliable, well-reviewed solar garden lighting options.
Actionable Insight: Prioritize lights with adjustable brightness and removable batteries for easier maintenance.
Tools and Materials Needed for Installation
To install solar garden lights efficiently, gather these essential tools and materials:
- Solar garden lights (with included stakes or mounting brackets)
- Measuring tape or garden ruler
- Pencil or garden markers for placement
- Soft cloth or brush for cleaning panels
- Screwdriver or drill (for mounting models)
- Replacement batteries (compatible NiMH or Li-ion cells)
Keeping these handy will streamline your setup process and ensure safety.
Step-by-Step Installation Process
Follow these steps for a successful solar garden light installation:
- Plan Your Layout: Map out where you want lights, considering pathways, focal points, and garden features.
- Test Each Light: Before installation, charge the lights in direct sunlight for at least 6 hours, then test their function.
- Prepare the Ground or Mounting Surface: Clear debris and level the soil or surface where stakes or brackets will go.
- Install the Lights: Insert stake lights firmly into the ground or securely mount bracket lights on walls or posts.
- Adjust Solar Panel Angle: Tilt panels toward the sun’s path (usually south-facing in the northern hemisphere) for maximum exposure.
- Confirm Operation: At dusk, verify that lights turn on automatically.
Tips for Success
- Avoid shaded spots beneath trees or buildings.
- Space lights evenly for consistent illumination.
- Angle solar panels between 30°-45° depending on latitude for optimal sunlight capture.
Best Placement and Positioning for Optimal Sunlight
Proper placement is critical to maximize solar panel efficiency and light output. Here’s how to position your solar garden lights:
- Sunlight Exposure: Ensure panels receive 6-8 hours of direct sunlight daily.
- Avoid Obstructions: Keep panels clear of leaves, branches, or structures casting shadows.
- Height and Angle: Position lights at recommended heights and angle solar panels toward the sun’s trajectory.
- Consider Seasonal Changes: Adjust placement or panel angle to accommodate shifting sunlight during different seasons.
Pro Tip: Use a compass or smartphone app to determine the true south direction and track sun movement.
Maintenance Tips for Longevity and Efficiency
Maintaining your solar garden lights is straightforward but essential:
- Clean Solar Panels Regularly: Dust, dirt, and debris block sunlight; wipe panels monthly with a soft cloth.
- Check Batteries Annually: Replace rechargeable batteries every 1-2 years to maintain brightness.
- Inspect for Damage: Look for cracks, corrosion, or water ingress especially after storms.
- Store During Harsh Weather: Consider removing lights in winter or covering them to prevent damage.
Maintenance Checklist:
– Clean panels
– Test light function
– Replace batteries if dim
– Secure mounting
Troubleshooting Common Issues with Solar Garden Lights
Even with the best setup, you may encounter issues. Here’s how to solve them:
- Lights Not Turning On: Check if the battery is charged; replace if old. Confirm the light sensor isn’t covered.
- Dim or Flickering Light: Clean the solar panel and replace batteries. Ensure no shading.
- Short Lighting Duration: Battery may be weak or solar panel dirty; clean and replace batteries if needed.
- Lights Stay On During Daylight: Light sensor might be faulty or dirty; clean sensor and test.
If problems persist, consult manufacturer support or consider upgrading to higher-quality, weatherproof solar lights.
How I’d Do It: Practical Expert Approach
Drawing on years of experience, here’s my recommended approach:
- Purchase solar garden lights with adjustable solar panel angles and replaceable batteries from trusted brands.
- Plan installation on a sunny day, mapping light positions carefully.
- Clean panels and test each unit before final placement.
- Use a smartphone compass app to ensure panels face true south (if in the northern hemisphere).
- After installation, monitor performance for a week, adjusting panel angles as needed.
- Schedule quarterly maintenance, especially cleaning panels and checking batteries.
This method ensures optimal performance, energy efficiency, and long-term satisfaction.
Common Pitfalls to Avoid
- Installing lights in shaded or obstructed areas, reducing solar charging.
- Neglecting regular cleaning of panels and lights.
- Using incompatible or damaged batteries for replacements.
- Ignoring weatherproofing ratings, leading to premature failure.
- Overlooking the correct angle and orientation of solar panels.
Avoiding these mistakes saves time, money, and frustration.
Installation Checklist
- [ ] Select solar lights with adequate brightness and battery capacity
- [ ] Choose weatherproof models with IP65+ rating
- [ ] Map out light positions with sunlight exposure in mind
- [ ] Charge and test lights prior to installation
- [ ] Use appropriate tools: screwdriver, tape measure, cleaning cloth
- [ ] Install lights securely with proper panel angling
- [ ] Test automatic on/off function at dusk
- [ ] Schedule periodic maintenance and battery replacement
Tools and Metrics to Monitor
- Measuring Tape: For accurate spacing and placement
- Smartphone Compass App: To determine solar panel orientation
- Light Meter (optional): Measures illumination levels to optimize brightness
- Soft Cloth: For cleaning solar panels
- Replacement Batteries: Compatible NiMH or Li-ion cells
Monitoring solar light brightness and battery health ensures consistent performance.
FAQs
How long do solar garden lights last?
Most solar garden lights have a lifespan of 2 to 5 years, depending on battery quality, solar panel efficiency, and environmental conditions. Rechargeable batteries typically require replacement every 1-2 years to maintain brightness and lighting duration.
Can solar garden lights work in cloudy or shaded areas?
Solar lights need direct sunlight to charge efficiently. While some sunlight on cloudy days can still charge batteries, heavily shaded areas significantly reduce performance. Positioning in direct sunlight is essential for optimal function.
How do I replace the batteries in solar garden lights?
Check the manufacturer’s instructions to identify compatible battery types (usually NiMH or Li-ion). Remove the light casing carefully, replace with new batteries, and test the light. Avoid mixing battery brands or using non-rechargeable cells.
Are solar garden lights weatherproof?
Most quality solar garden lights come with an IP65 or higher weatherproof rating, designed to withstand rain, dust, and moderate temperature variations. However, extreme weather (heavy snow, storms) may require temporary removal or protection.
How bright are solar-powered LED lights compared to wired outdoor lighting?
Solar-powered LED lights typically emit between 50-200 lumens, suitable for garden paths and accent lighting. Wired outdoor lighting can offer higher brightness levels but involves more installation complexity and energy cost.
Key Takeaways
- Proper solar panel positioning and exposure to direct sunlight are critical for efficient solar garden light operation.
- Selecting lights with appropriate brightness, battery capacity, and weatherproof ratings ensures durability and effectiveness.
- Regular solar light maintenance, including cleaning panels and battery replacement, extends light lifespan.
- Avoid common pitfalls like installing in shaded areas or using incompatible batteries.
- Using tools like a smartphone compass and light meter can help optimize installation.
- Solar garden lights offer a sustainable, cost-effective solution for illuminating gardens with minimal wiring and energy consumption.
References
- U.S. Department of Energy. (n.d.). Solar Lighting. https://www.energy.gov/energysaver/solar-lighting
- National Renewable Energy Laboratory. (n.d.). Solar Lighting Research. https://www.nrel.gov/research/solar-lighting.html
- Royal Horticultural Society. (n.d.). Garden Lighting Advice. https://www.rhs.org.uk/advice/profile?pid=472
Setting up solar garden lights is a rewarding project that combines sustainability, technology, and garden aesthetics. By following this comprehensive guide, you can confidently install, maintain, and troubleshoot your solar lighting system, creating a vibrant and energy-efficient outdoor environment.
