Introduction
If you’ve noticed chives popping up where you don’t want them, you’re not alone. Getting rid of chives in the garden can be challenging due to their perennial nature and ability to spread through underground bulbs. Known scientifically as Allium schoenoprasum, chives are a popular culinary herb but can quickly become invasive if left unchecked. This guide offers practical, environmentally conscious strategies to remove chives effectively, whether you want to clear a vegetable bed or maintain a pristine flower garden.
We’ll start by helping you identify chives and distinguish them from similar plants like onions or garlic. Then, we’ll explore common reasons gardeners choose to remove chives and cover both manual and chemical removal techniques. You’ll learn how to prevent regrowth and spread, consider the environmental impact of various methods, and understand the best seasonal timing for removal. Along the way, you’ll find expert tips, a handy checklist, and answers to frequently asked questions to ensure your success in managing this persistent perennial weed.
Identification of Chives vs. Similar Plants
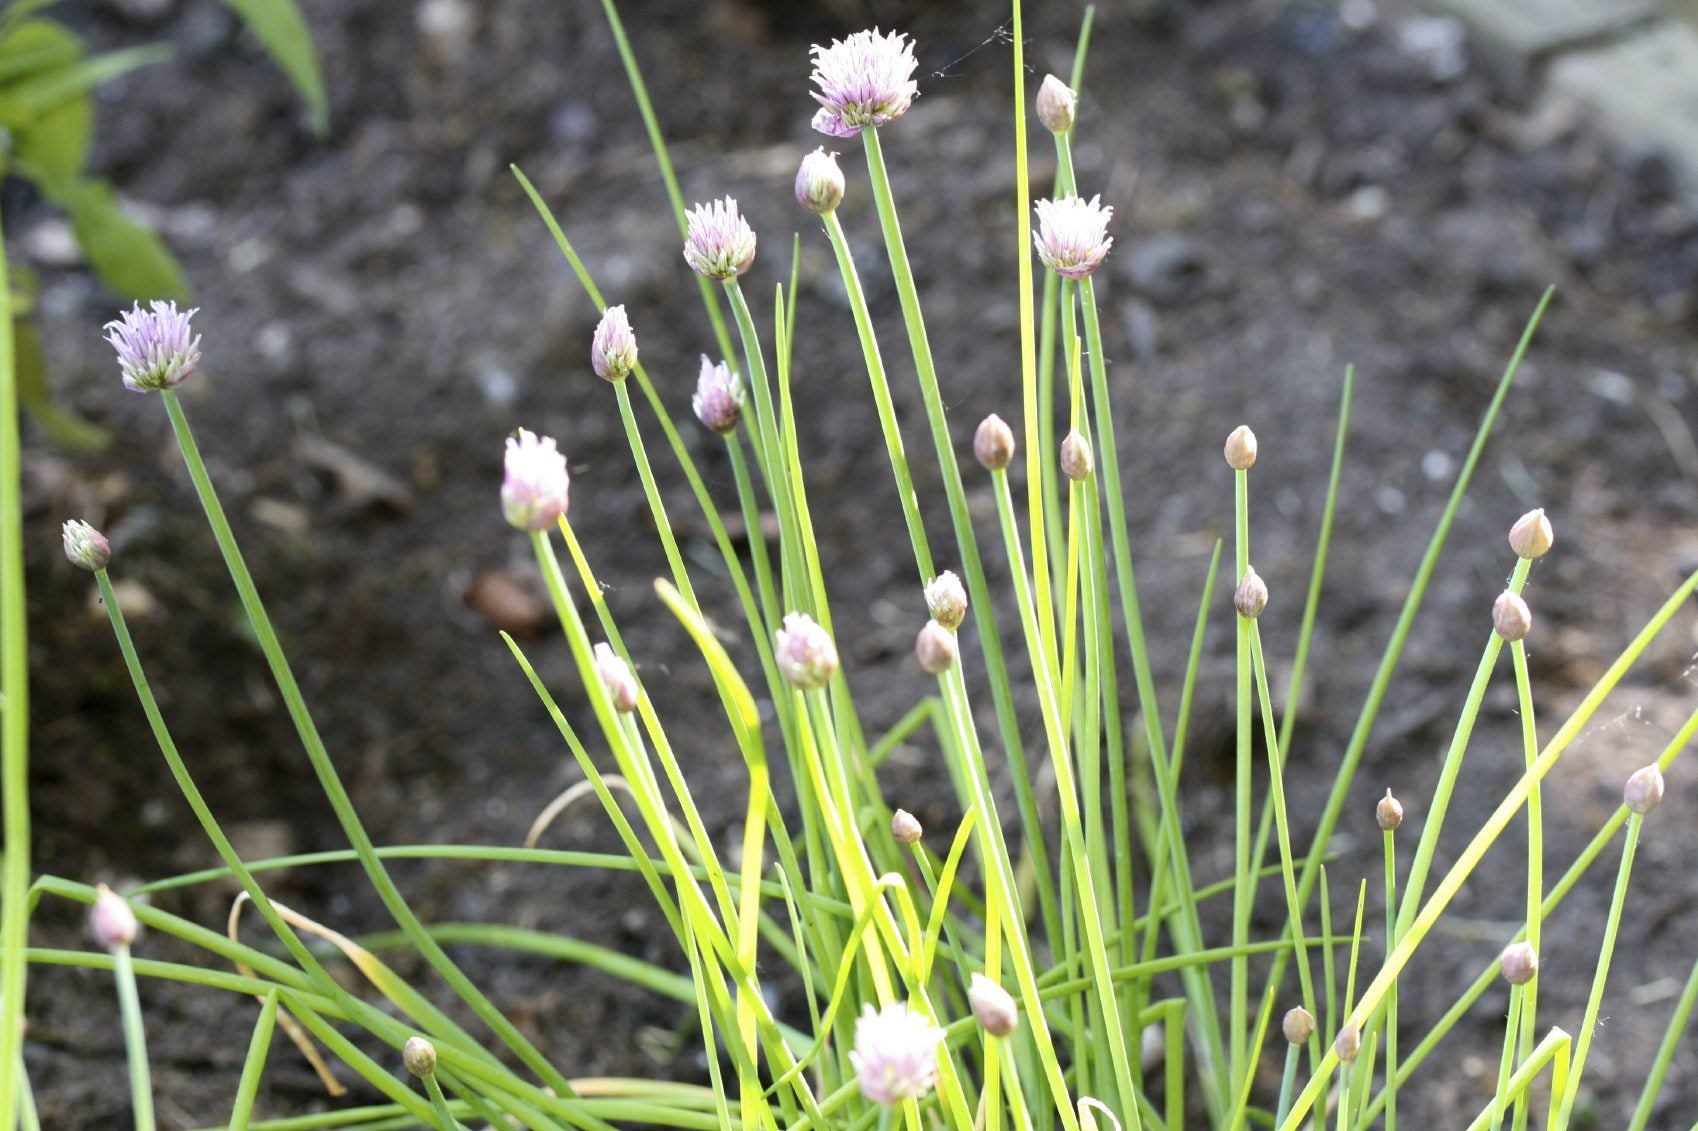
Recognizing Allium schoenoprasum is the first step in effective removal. Chives have slender, hollow, tubular green leaves that grow in clumps, typically 8 to 20 inches tall. Their purple-pink flowers bloom in spring to early summer, usually in rounded umbels. Unlike onions, chive leaves are hollow rather than flat, and their bulbs are smaller and less pungent.
Distinguishing chives from similar plants helps avoid accidental removal of desirable herbs. For example, garlic chives (Allium tuberosum) have flat leaves and a milder aroma. Wild onions have stronger-smelling bulbs and solid leaves. Pay attention to the plant’s aroma and leaf structure to correctly identify chives.
Actionable Insight
- Use a hand lens or magnifier to inspect leaf shape and texture.
- Smell leaves to differentiate chives (mild onion scent) from other alliums.
- Observe flowering patterns during spring to confirm identity.
Understanding these characteristics ensures you target only unwanted chives for removal, preserving other valuable plants.
Common Reasons to Remove Chives from Gardens
While chives are beneficial in companion planting—deterring pests and attracting pollinators—there are several reasons gardeners may want to remove them:
- Invasiveness: Chives spread aggressively through bulbs and can overtake garden beds.
- Competition: They compete with vegetables and ornamental plants for nutrients and space.
- Aesthetic concerns: Dense clumps may disrupt garden design or replace delicate flowers.
- Allergic reactions: Some gardeners or pets may have sensitivities.
Recognizing why chives are unwanted helps tailor removal methods appropriately, balancing garden health and aesthetics.
Manual Removal Techniques for Chives
Manual extraction is often the safest and most environmentally friendly approach. Since chives grow from underground bulbs, simply cutting leaves won’t prevent regrowth.
Steps for Effective Manual Removal:
- Wear gloves and protective clothing to avoid skin irritation.
- Loosen soil around the chive clump using a garden fork or hand trowel.
- Gently lift the entire root system, ensuring all bulbs and bulbils are removed.
- Dispose of removed plant material carefully—do not compost it, as it may sprout again.
- Apply mulch (such as wood chips or straw) over the cleared area to suppress any remaining bulbs.
Repeated manual removal may be necessary since missed bulbs can regenerate. Regular monitoring is key.
Chemical and Organic Herbicide Options
When chives have spread extensively, herbicides may be considered. However, it’s crucial to balance effectiveness with environmental safety.
Chemical Herbicides:
- Glyphosate is a widely used, non-selective herbicide registered by the EPA. It can kill chives but also harms nearby plants, so apply carefully with a spot treatment method.
Organic Herbicides:
- Products containing clove oil or vinegar can weaken chives but often require multiple applications.
- Integrated Pest Management (IPM) principles, promoted by the University of Minnesota Extension, recommend combining organic sprays with manual removal for best results.
Important: Avoid excessive herbicide use near edible plants to prevent contamination.
Preventing Chive Regrowth and Spread
Stopping chives from returning is as important as initial removal. To prevent regrowth:
- Apply a thick layer of mulch to block sunlight and suppress bulb sprouting.
- Modify watering practices—chives prefer moist soil, so reducing irrigation in problem areas can help.
- Introduce ground covers that compete with chives for resources.
- Regularly inspect and remove new shoots early to prevent establishment.
Environmental Impact of Removal Methods
Choosing environmentally friendly strategies protects beneficial insects and soil health. Manual removal and mulching have minimal impact and support sustainable gardening.
Chemical herbicides, especially synthetic ones like glyphosate, carry risks including potential harm to pollinators and soil microorganisms. Following USDA and EPA guidelines ensures responsible use. Organic herbicides offer a safer alternative but may require persistence.
Seasonal Timing for Best Removal Results
The most effective time to remove chives is in early spring or late fall when plants store energy in bulbs but are less vigorous above ground. Removal before flowering prevents seed spread. Avoid summer removal as chives regenerate quickly then.
How I’d Do It: Step-by-Step Personal Approach
- Identify chive patches accurately using leaf and flower characteristics.
- Wear gloves and use a garden fork to loosen soil around each clump.
- Carefully extract entire root systems, ensuring no bulbs remain.
- Dispose of removed plant matter in the trash, not compost.
- Apply a 3-inch layer of organic mulch to suppress regrowth.
- Monitor the area weekly, removing new shoots promptly.
- If regrowth persists after several weeks, apply an organic herbicide spot treatment following label instructions.
- Repeat manual removal and mulching the following early spring for lasting control.
Common Pitfalls to Avoid
- Leaving bulbs behind: Even small bulb fragments can regenerate.
- Composting chive clumps: This risks spreading chives to other garden areas.
- Overusing herbicides: Excessive chemical use can damage desired plants and soil.
- Ignoring regrowth: Persistent monitoring and repeated removal are necessary.
- Removing during peak growth: This can stress nearby plants and reduce removal success.
Checklist for Removing Chives
- [ ] Identify chives correctly
- [ ] Gather gloves, garden fork, trowel, and mulch
- [ ] Prepare disposal bags for removed plants
- [ ] Loosen soil and extract entire root systems
- [ ] Apply mulch after removal
- [ ] Monitor area weekly for new growth
- [ ] Use organic herbicide spot treatment if needed
- [ ] Maintain removal schedule seasonally
Recommended Tools and Metrics
- Garden fork and hand trowel: For loosening soil and digging roots
- Gardening gloves: To protect skin from irritation
- Mulch materials: Wood chips, straw, or shredded bark
- Organic herbicide spray: Look for EPA-registered products with natural ingredients
- Magnifying lens: To distinguish chives from similar plants
- Notebook or garden app: Track removal dates and regrowth observations
FAQs
How can I tell chives apart from wild onions?
Chives have hollow, slender leaves with a mild onion scent, while wild onions have solid leaves and a stronger smell. Observing flower color and leaf texture can also help; chives produce purple-pink flowers in umbels.
Is glyphosate safe to use around vegetable gardens?
Glyphosate is effective but non-selective and can harm edible plants if applied carelessly. Follow EPA guidelines strictly, use spot treatments, and avoid windy days to minimize drift.
Can mulching alone control chives?
Mulching helps suppress growth by blocking sunlight but usually isn’t enough alone to eliminate chives. Combine it with manual removal or spot herbicide application for best results.
When is the best time to remove chives?
Early spring or late fall are ideal because chives store energy in bulbs and regrow less vigorously. Removing before flowering prevents seed spread.
Should I compost removed chives?
No. Composting chive bulbs or clumps risks spreading them to other garden areas. Dispose of them in trash or green waste bins where allowed.
Key Takeaways
- Correctly identify Allium schoenoprasum to target removal efforts.
- Manual extraction of roots and bulbs is the safest and most sustainable method.
- Use mulch to prevent regrowth and suppress residual bulbs.
- Apply chemical or organic herbicides cautiously, following EPA and University of Minnesota Extension recommendations.
- Remove chives during early spring or late fall for maximum effectiveness.
- Monitor regularly and repeat removal to prevent resurgence.
- Avoid composting removed chives to prevent unintentional spreading.
References
- United States Department of Agriculture (USDA). Urban Gardening Topics. https://www.usda.gov/topics/urban-gardening
- University of Minnesota Extension. Weed Management in the Yard and Garden. https://extension.umn.edu/yard-and-garden-questions/weed-management
- Environmental Protection Agency (EPA). Integrated Pest Management (IPM) Principles. https://www.epa.gov/safepestcontrol/integrated-pest-management-ipm-principles
By following these expert, practical, and environmentally conscious strategies, you can regain control over your garden and keep unwanted chives at bay while maintaining a healthy and vibrant growing space.
