Replacing a garden tap might seem like a small home improvement task, but it plays a crucial role in maintaining your outdoor water supply. Whether your tap is leaking, damaged, or simply outdated, changing it promptly can prevent water wastage, avoid costly damage, and improve your garden’s irrigation efficiency. In this guide, we’ll walk you through everything you need to know about garden tap changing—from identifying signs of wear to step-by-step replacement instructions and expert tips.
Understanding how to properly change a garden tap not only saves you money on plumber fees but also ensures your outdoor water system functions reliably through all seasons. Whether you’re a DIY enthusiast or a homeowner looking for straightforward advice, this article covers the essentials, tools required, common problems, and safety precautions to keep in mind.
Why Change Your Garden Tap? Common Signs and Benefits
When Should You Replace Your Garden Tap?
Knowing when to change your garden tap can save you from bigger issues down the line. Here are the most common indicators:
- Leaking or dripping water around the tap head or joints
- Rust, corrosion, or cracks visible on the tap body
- Reduced water pressure when in use
- Difficulty turning the tap handle
- Old or outdated tap models that don’t support modern fittings (like hose connectors)
- Frozen or burst taps after harsh winters
Benefits of Replacing a Faulty Garden Tap
- Water conservation: Eliminates leaks that waste precious water.
- Cost savings: Prevents higher water bills and expensive home repairs.
- Enhanced functionality: Supports modern garden tools and irrigation systems.
- Improved durability: New taps resist corrosion and damage better.
- Peace of mind: Ensures reliable outdoor water access year-round.
Tools and Materials Needed for Garden Tap Changing
Before starting the replacement, gather the necessary tools and materials to ensure a smooth process:
- Adjustable wrench or spanner
- Pipe wrench (for stubborn fittings)
- Screwdriver (flathead or Phillips, depending on the tap)
- PTFE (Teflon) tape to seal threaded joints
- Replacement garden tap (choose the correct size and type)
- Pipe cutters (if pipe modification is needed)
- Bucket or container to catch water
- Cloth or rag for cleanup
- Safety gloves and goggles
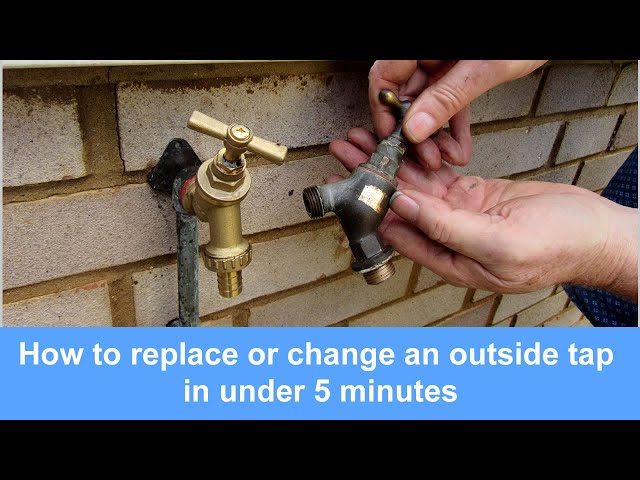
Step-by-Step Guide: How to Change a Garden Tap
1. Turn Off the Water Supply
Locate the main water valve supplying the garden tap and turn it off to prevent water flow during the replacement.
2. Drain Remaining Water
Open the garden tap to release any remaining water in the pipe. Place a bucket underneath to catch drips.
3. Remove the Old Tap
- Use a wrench to loosen the nut connecting the tap to the pipe.
- If the tap is soldered or glued, you may need to cut the pipe carefully.
- Remove the old tap and clean the pipe threads or end.
4. Prepare the New Tap
- Wrap PTFE tape around the threaded end of the new tap to ensure a watertight seal.
- Make sure the tape covers the threads evenly without overlapping excessively.
5. Install the New Tap
- Screw the new tap onto the pipe threads by hand.
- Tighten it securely with a wrench—avoid overtightening which can damage fittings.
6. Turn the Water Back On
Slowly open the main valve and check the new tap for leaks.
7. Test the Tap
Turn the tap on and off several times, ensuring smooth operation and no drips.
Types of Garden Taps: Which One Should You Choose?
Selecting the right garden tap depends on your needs and plumbing setup. Here are common types:
| Tap Type | Description | Best For |
|———————–|———————————————–|———————————-|
| Compression Tap | Traditional type with a washer inside | Basic garden use |
| Ball Valve Tap | Uses a ball to control flow, quick operation | Durability and easy control |
| Frost-Proof Tap | Designed to prevent freezing in cold climates | Areas with harsh winters |
| Tap with Hose Connector | Built-in connector for garden hoses | Convenient irrigation |
Expert Tips for a Successful Garden Tap Replacement
- Check local plumbing codes before purchasing or installing a tap, especially if it involves pipe modifications.
- Use frost-proof taps in colder regions to prevent pipe bursts during winter.
- Replace washers and seals regularly to maintain tap longevity.
- Consider upgrading to taps with anti-siphon features to prevent backflow contamination.
- Wear safety gear when cutting pipes or working with tools.
Troubleshooting Common Garden Tap Issues After Replacement
| Problem | Possible Cause | Solution |
|——————————-|———————————–|——————————————-|
| Tap leaks after installation | Poorly sealed threads or overtightening | Reapply PTFE tape and tighten properly |
| Reduced water flow | Blockage in tap or pipe | Clean or replace tap |
| Tap handle is stiff or stuck | Corrosion or debris | Lubricate or replace tap |
| Water drips from spout | Worn washer | Replace washer inside tap |
Conclusion
Changing a garden tap is a straightforward yet essential maintenance task that can save water, reduce costs, and improve your outdoor watering experience. By recognizing the signs of a failing tap, choosing the right replacement, and following the proper installation steps, you can confidently handle this job yourself or understand what to expect from a professional plumber.
Take action today—inspect your garden taps regularly and replace any faulty units promptly. Doing so ensures your garden stays well-watered, your water bills stay low, and your outdoor plumbing remains durable for years to come.
Ready to upgrade your garden’s water supply? Gather your tools, pick the right tap, and follow our guide to enjoy a reliable and efficient outdoor water system!
