Starting a container garden from seeds is a rewarding way to grow your own fresh vegetables, herbs, and flowers at home. Whether you have limited outdoor space or simply want to enjoy gardening on your balcony or patio, container gardening offers flexibility and control over your plants’ environment. This guide will walk you through the essential steps to successfully start a container garden from seeds, ensuring healthy growth and a bountiful harvest.
In this article, you’ll learn the best practices for selecting containers, choosing the right seeds, preparing soil, and nurturing your seedlings. We’ll also cover troubleshooting common problems and expert tips to maximize your garden’s potential. By the end, you’ll feel confident in creating your own thriving container garden, even if you’re new to gardening.
Why Start a Container Garden From Seeds?
Growing plants from seeds in containers is not only cost-effective but also gives you access to a wider variety of plants than buying seedlings. Seeds are easy to store and transport, and starting from seed lets you control the growth process from the very beginning, leading to stronger, healthier plants.
Benefits Include:
- More plant variety: Choose heirloom or rare seeds.
- Cost savings: Seeds are cheaper than seedlings.
- Better root development: Plants develop robust root systems.
- Convenience: Grow plants anywhere with limited space.
Step 1: Choosing the Right Containers for Seed Starting
Selecting the appropriate container is crucial for seed germination and seedling growth. Here’s what to consider:
- Size: Start seeds in small containers like seed trays, peat pots, or recycled yogurt cups with drainage holes.
- Material: Plastic, peat, or biodegradable pots all work; biodegradable options reduce transplant shock.
- Drainage: Ensure containers have holes to prevent waterlogging.
Pro Tip: Use seed trays with clear lids to retain moisture and warmth, promoting faster germination.
Step 2: Selecting Quality Seeds
The success of your container garden begins with the seeds you choose. Here’s how to pick the best seeds:
- Buy from reputable suppliers to ensure high germination rates.
- Choose seeds suited to your climate and growing season.
- Opt for disease-resistant varieties if available.
- Check seed packets for planting depth and spacing instructions.
Step 3: Preparing the Seed Starting Mix
Regular garden soil is too dense for seeds. Use a light, well-draining seed starting mix designed for optimal moisture retention and aeration.
Ingredients of a good seed starting mix:
– Peat moss or coconut coir for moisture retention.
– Perlite or vermiculite to improve drainage.
– Avoid fertilizers at this stage to prevent burning delicate seedlings.
Step 4: Planting Seeds in Containers
Follow these steps for successful seed planting:
- Fill containers with the seed starting mix, leaving about ½ inch from the top.
- Moisten the mix evenly but avoid sogginess.
- Plant seeds at the depth recommended on the seed packet.
- Cover seeds lightly with mix or vermiculite.
- Label containers with seed type and date.
- Cover containers with plastic wrap or a humidity dome to maintain moisture.
Step 5: Providing Optimal Conditions for Germination
Seeds need the right environment to sprout:
- Temperature: Most seeds germinate best between 65°F to 75°F.
- Light: Some seeds require light to germinate; others do not. Place containers under grow lights or near a sunny window once germinated.
- Moisture: Keep the soil consistently moist but not waterlogged.
- Air circulation: Remove covers once seedlings emerge to prevent fungal diseases.
Step 6: Caring for Seedlings
Once your seeds sprout, focus on nurturing strong seedlings:
- Light: Provide 12-16 hours of bright, indirect light daily.
- Watering: Water gently when the surface feels dry; avoid overwatering.
- Feeding: After the first true leaves appear, feed seedlings with a diluted, balanced fertilizer.
- Thinning: Remove weaker seedlings to allow space for the strongest to thrive.
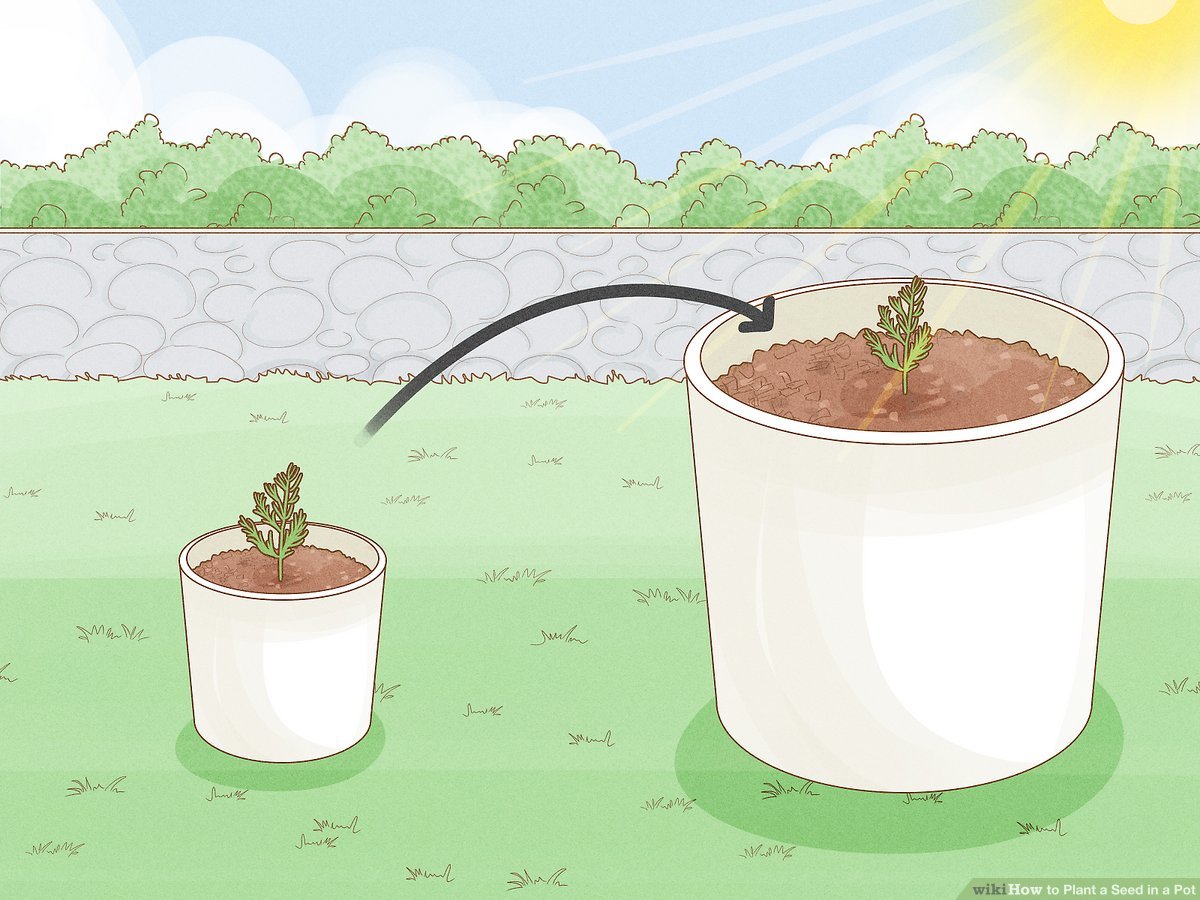
Step 7: Transplanting Seedlings to Larger Containers or Outdoors
When seedlings develop 2-3 sets of true leaves, they’re ready to be transplanted:
- Harden off seedlings by gradually exposing them to outdoor conditions over 7-10 days.
- Transplant into larger containers or garden beds with nutrient-rich soil.
- Plant at the same depth as they were in seed trays.
- Water thoroughly after transplanting to reduce shock.
Common Challenges and Solutions
| Problem | Cause | Solution |
|————————|—————————–|—————————————-|
| Seeds fail to germinate| Too cold, dry, or old seeds | Maintain warm, moist conditions; use fresh seeds |
| Damping-off disease | Fungal infection | Improve air circulation; avoid overwatering |
| Leggy seedlings | Insufficient light | Increase light intensity or duration |
| Seedlings wilting | Over or underwatering | Adjust watering schedule; ensure drainage |
Expert Tips for Successful Container Gardening From Seeds
- Use a seedling heat mat to maintain consistent soil temperature.
- Rotate containers daily to ensure even light exposure.
- Sterilize containers and tools to prevent disease spread.
- Keep a gardening journal to track planting dates, germination rates, and growth progress.
Conclusion
Starting a container garden from seeds is an accessible and fulfilling way to cultivate fresh plants, even in small spaces. By carefully selecting containers, seeds, and soil, and providing the right care, you can enjoy a lush garden year-round. Remember, patience and consistency are key to gardening success. Begin your container garden today and watch your green space flourish from tiny seeds to vibrant plants!
Ready to start your container garden? Gather your seeds, containers, and soil, and take the first step toward growing your own beautiful, homegrown plants. Happy gardening!
