A leaky garden hose can turn simple watering tasks into frustrating experiences. Not only does it waste water, but it can also reduce the pressure needed for effective irrigation. Whether your hose has tiny pinholes or a significant split, knowing how to repair it quickly and efficiently saves you money and extends the life of your garden equipment. In this guide, we’ll walk you through easy, proven methods to fix common leaks, helping you get back to gardening with confidence.
From identifying the source of the leak to selecting the right repair technique, this article covers everything you need. You’ll learn about patching small holes, replacing damaged sections, and maintaining your hose to prevent future leaks. With practical tips and expert advice, even beginners can tackle hose repairs like a pro.
How to Identify the Leak in Your Garden Hose
Before repairing, pinpointing exactly where the leak is located is crucial. Here’s how to do it efficiently:
- Visual Inspection: Check the entire length of the hose for obvious cracks, splits, or damp spots.
- Pressure Test: Attach the hose to a water source and turn it on. Slowly run your hand along the hose to feel for escaping water.
- Listen Carefully: In quiet environments, a hissing sound often indicates a leak.
- Use Soapy Water: Spray a mixture of water and dish soap along the hose. Bubbles will form at the leak points.
Tip: Mark leak spots with a waterproof marker for easy identification during repair.
Common Causes of Garden Hose Leaks
Understanding why your hose leaks helps prevent future problems. Typical causes include:
- Wear and Tear: Over time, hoses degrade due to exposure to sun, cold, and friction.
- Kinks and Twists: Repeated bending weakens the hose material.
- Damaged Fittings: Loose or cracked connectors at the ends cause leaks.
- Punctures: Sharp objects like thorns or tools can puncture the hose.
Quick Fixes for Small Leaks and Pinholes
Small leaks are the easiest to fix and often don’t require replacing the hose. Here are some effective solutions:
1. Using Waterproof Tape
Waterproof tape, such as self-fusing silicone tape, is a popular quick fix.
- Step 1: Clean and dry the damaged area.
- Step 2: Stretch and wrap the tape tightly around the leak, overlapping layers.
- Step 3: Ensure the tape extends a few inches beyond the leak on both sides.
Pros: Fast, inexpensive, and no tools required.
Cons: Temporary fix; may need rewrapping after heavy use.
2. Applying Hose Repair Tape or Patch Kits
Specialized hose repair tapes and patch kits provide a stronger, longer-lasting seal.
- Step 1: Cut a patch from the repair kit that covers the leak.
- Step 2: Clean and dry the area thoroughly.
- Step 3: Apply adhesive or peel-back backing and firmly press the patch onto the hose.
Tip: These kits often come with clear instructions—follow them carefully for best results.
Repairing Larger Tears and Hose Sections
If your hose has a large tear or multiple leaks, cutting out the damaged section might be necessary.
1. Using Hose Menders
Hose menders are connectors designed to join two hose ends.
- Materials Needed: Hose mender, utility knife, hose clamps.
- Step 1: Cut out the damaged section using a sharp knife, making straight cuts.
- Step 2: Insert the mender into both cut ends.
- Step 3: Tighten hose clamps securely around the mender to prevent leaks.
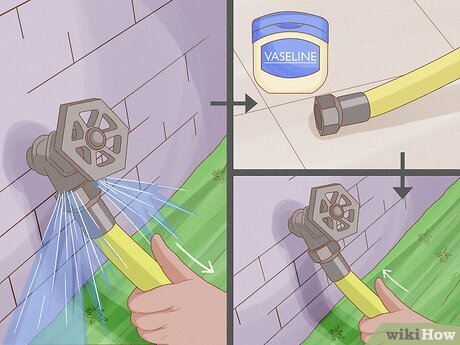
2. Replacing Hose Fittings
Leaks around the fittings can often be fixed by replacing or tightening them.
- Step 1: Unscrew the old fitting carefully.
- Step 2: Inspect for cracks or damage.
- Step 3: Screw on a new fitting, using plumber’s tape on threaded ends to ensure a tight seal.
Preventative Maintenance Tips to Avoid Future Leaks
Regular care extends your hose’s lifespan and reduces leaks:
- Drain before storing: Water inside hoses can freeze and cause splits.
- Store properly: Coil your hose loosely and avoid sharp bends.
- Avoid dragging: Rough surfaces and dragging over rocks cause abrasion.
- Use hose reels: They help in organized storage and reduce kinks.
- Inspect regularly: Detect minor issues before they worsen.
Expert Advice on Choosing Repair Materials
- Silicone Tape: Best for waterproof, flexible sealing; withstands temperature changes.
- Rubber Patch Kits: Provide durable, permanent fixes for rubber hoses.
- Metal Hose Menders: Ideal for heavy-duty hoses; offer robust connections.
- Plumber’s Tape (Teflon Tape): Crucial for threaded fittings to prevent leaks.
Frequently Asked Questions (FAQs)
Q: Can I use duct tape to fix a leaking hose?
A: Duct tape is not waterproof and will only provide a short-term fix. Waterproof silicone tape or patch kits are more effective.
Q: How long does a typical hose repair last?
A: Repairs can last from a few months to years, depending on repair quality and hose usage.
Q: Can I repair any type of garden hose?
A: Most hoses can be repaired, but some thin or extremely damaged hoses might need replacement.
Conclusion
Repairing a leaky garden hose is a manageable task that saves water, money, and hassle. By accurately locating leaks and applying the appropriate repair method—whether taping small holes or replacing hose sections—you can restore your hose’s functionality quickly. Regular maintenance and proper storage further prevent leaks and extend your hose’s life. Next time you encounter a drip or split, use these expert tips to fix it efficiently and keep your garden thriving.
Take action today: Inspect your garden hose and try these repairs to ensure your watering system works flawlessly all season long!
