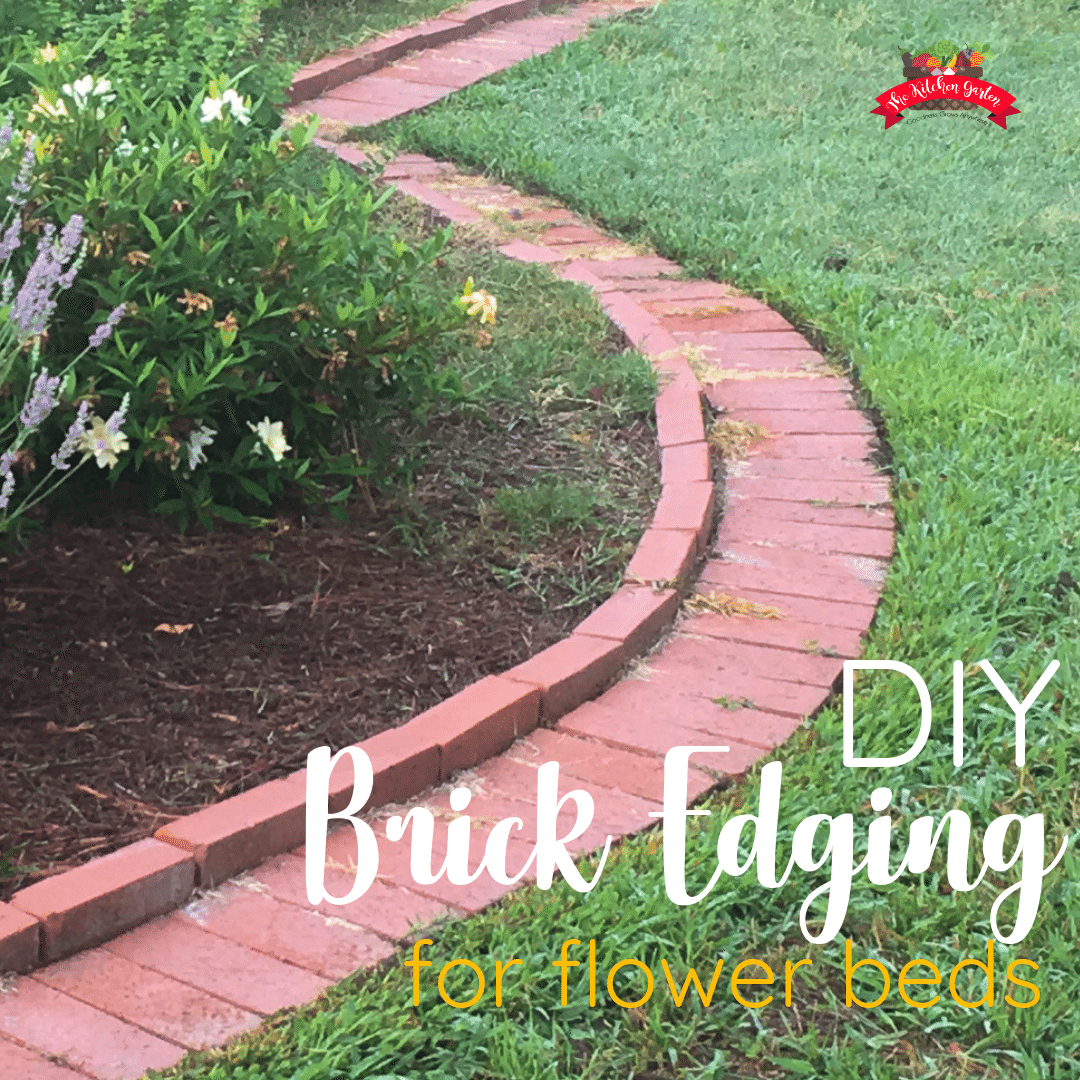
Creating a brick garden edge is an excellent way to define garden beds, prevent soil erosion, and add a classic, polished look to your outdoor space. Whether you want a neat border around flower beds, vegetable patches, or pathways, brick edging offers durability and timeless style. This guide will walk you through the essential steps to make a brick garden edge that enhances your landscape’s appeal while standing the test of time.
In this article, you’ll learn why brick is a top choice for garden edging, how to plan and prepare your project, and the detailed process of installing a brick border. We’ll also cover helpful tips on maintenance and design variations to suit your garden’s unique style. By the end, you’ll have the expertise to create a professional-quality garden edge that complements and protects your plants beautifully.
Why Choose Brick for Your Garden Edge?
Before diving into the installation process, it’s important to understand the benefits of using brick for garden edging:
- Durability: Bricks are weather-resistant and can last for decades without cracking or fading.
- Aesthetic Appeal: Their classic red tones and textured surfaces add warmth and charm.
- Versatility: Bricks can be arranged in various patterns and heights to match different garden styles.
- Low Maintenance: Unlike wood borders, bricks do not rot or attract pests.
- Eco-Friendly: Bricks are made from natural clay and can be reused or recycled.
These advantages make brick edging a smart investment for gardeners seeking a reliable, attractive boundary.
Planning Your Brick Garden Edge
1. Define the Area and Shape
Start by marking the garden bed or pathway where you want the brick edge. Use a garden hose, string line, or spray paint to outline the shape. Curved or straight lines can be created depending on your garden design.
2. Measure and Calculate Materials
Measure the length of your outlined edge to determine how many bricks you need. A standard brick size is approximately 8 inches long. For a single-row border, calculate:
- Number of bricks = Total length (in inches) ÷ 8
Add 10-15% extra bricks to account for cuts and breakage.
3. Gather Tools and Materials
You will need:
- Bricks (preferably garden or paver bricks)
- Sand or gravel for base
- Garden spade or shovel
- Rubber mallet
- Tape measure
- String and stakes
- Level
- Masonry saw or chisel (for brick cuts)
- Garden hose or spray paint (for marking)
- Optional: mortar for a fixed edge
Step-by-Step Process to Make a Brick Garden Edge
Step 1: Prepare the Ground
- Dig a trench along your marked line. The trench should be about 4-6 inches deep and as wide as one brick plus 1-2 inches for base material.
- Remove roots, stones, or debris to create a smooth base.
Step 2: Add a Base Layer
- Pour 2-3 inches of compacted gravel or coarse sand into the trench. This base ensures proper drainage and stabilizes the bricks.
- Use a tamper or the flat end of a shovel to compact the base evenly.
Step 3: Lay the Bricks
- Place the first brick at one end of the trench. Use a level to make sure it is even.
- Continue placing bricks end to end, tapping each gently with a rubber mallet to settle them into the base.
- For a tighter fit, apply a thin layer of sand between bricks before setting them.
Step 4: Check Alignment and Level
- Frequently use your level and string line to keep the bricks straight and even.
- Adjust bricks as necessary before the base sets.
Step 5: Fill Gaps and Secure
- Once all bricks are in place, sweep fine sand or polymeric sand into the gaps between bricks to lock them in position.
- Optionally, you can apply a thin mortar joint for a more permanent edge.
Step 6: Final Touches
- Water the sand-filled gaps lightly to help it settle.
- Clean any dirt or dust from the bricks’ surface.
Tips for a Professional-Looking Brick Garden Edge
- Cut Bricks for Curves: Use a masonry saw or chisel to shape bricks for smooth curves.
- Double-Row Edging: For a taller or more substantial border, lay bricks in two rows with staggered joints.
- Add Decorative Patterns: Arrange bricks in herringbone, basket weave, or soldier course patterns for visual interest.
- Incorporate Plants: Plant low-growing groundcovers or succulents alongside the edge for a lush look.
- Regular Maintenance: Remove weeds from gaps and replenish joint sand yearly to preserve stability.
Common Questions About Brick Garden Edging
Q: Can I install brick edging on a slope?
A: Yes, but you may need to create small retaining steps or terraces to keep bricks level and prevent soil runoff.
Q: Is mortar necessary for brick edging?
A: Mortar is optional. Dry-laid bricks with sand joints provide flexibility and easier repairs, while mortar offers a more permanent and stable edge.
Q: How long does brick edging last?
A: With proper installation and maintenance, brick edging can last 20 years or more.
Conclusion
Making a brick garden edge is a rewarding DIY project that combines functionality with classic beauty. By carefully planning, preparing a solid base, and laying bricks with attention to detail, you can create a durable border that enhances your garden’s design and protects your plants. Remember to consider the shape, pattern, and maintenance needs to keep your brick edging looking its best year after year.
Ready to transform your garden with a timeless brick edge? Gather your materials, follow these expert steps, and enjoy the satisfaction of a beautifully framed garden space that stands strong through seasons.
Start your brick garden edging project today and add enduring charm to your outdoor oasis!
