Creating a pallet herb garden is an innovative and budget-friendly way to grow fresh herbs right at your doorstep. Whether you have limited space or want to add a rustic charm to your backyard or balcony, a pallet herb garden offers a vertical solution that is both practical and decorative. In this guide, you will learn how to transform an ordinary wooden pallet into a thriving herb garden, perfect for anyone eager to cultivate their own fresh ingredients.
Herbs like basil, thyme, rosemary, and mint can flourish in a pallet garden, providing easy access to fresh flavors for your cooking. This article covers everything from selecting the right pallet to planting and maintaining your herb garden. By the end, you’ll have a clear, step-by-step plan to create your own sustainable, space-saving herb garden.
Why Choose a Pallet Herb Garden?
Before diving into the process, it’s important to understand why pallet herb gardens are so popular:
- Space-efficient: Vertical gardening maximizes limited space, ideal for small yards or balconies.
- Cost-effective: Wooden pallets are often inexpensive or free, reducing gardening costs.
- Eco-friendly: Reusing pallets promotes sustainability and reduces waste.
- Decorative: Adds a rustic, charming look to outdoor or indoor spaces.
- Fresh herbs anytime: Having fresh herbs at your fingertips encourages healthier cooking.
What You’ll Need to Make a Pallet Herb Garden
Gathering the right materials ensures your project runs smoothly. Here’s a list of essentials:
- Wooden pallet: Choose one in good condition without large cracks or chemical treatments.
- Landscape fabric or burlap: For lining the pallet to hold soil.
- Staple gun and staples: To attach the fabric securely.
- Potting soil: A lightweight, well-draining mix suitable for herbs.
- Herb seedlings or seeds: Popular choices include basil, parsley, cilantro, thyme, and mint.
- Sandpaper: To smooth rough edges and avoid splinters.
- Screws and drill: For stability and mounting the pallet.
- Waterproof sealant (optional): To prolong the wood’s life.
- Gardening gloves: For protection during assembly and planting.
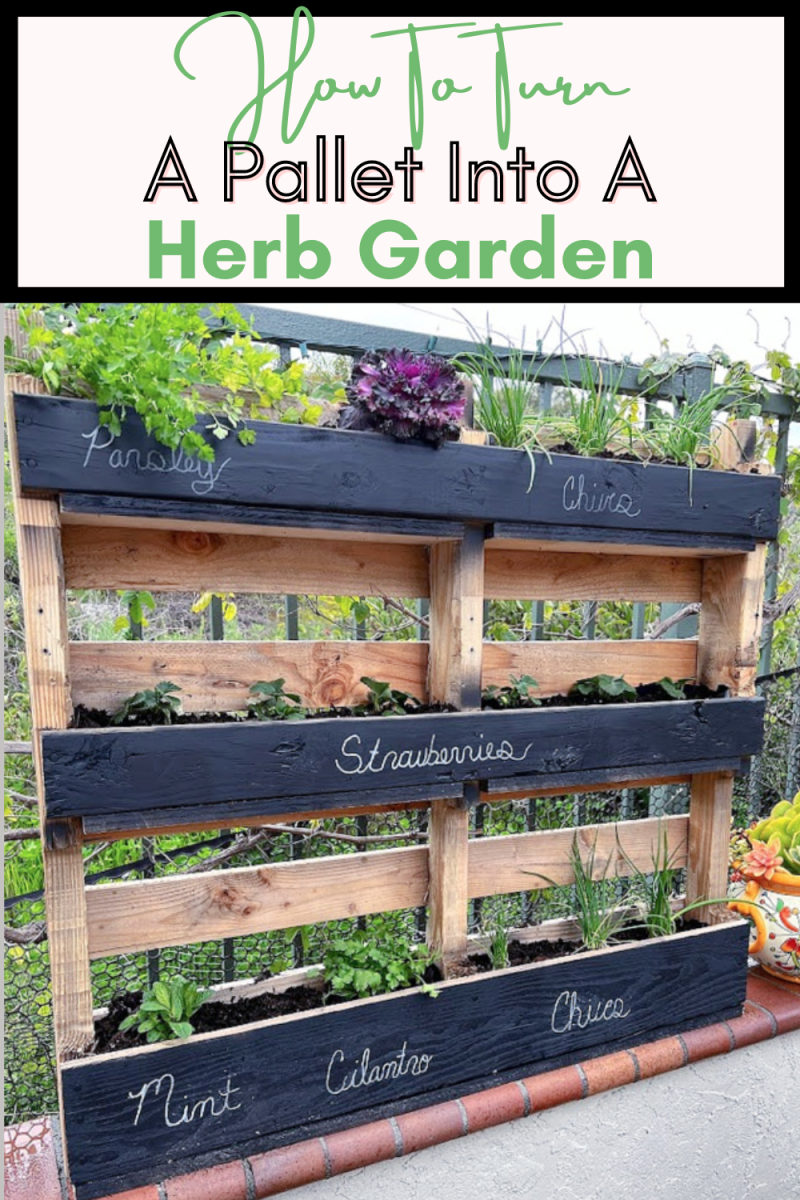
Step-by-Step Guide to Building Your Pallet Herb Garden
1. Select and Prepare Your Pallet
Start by choosing a pallet made from untreated wood to avoid harmful chemicals leaching into your soil. Check for sturdy slats and remove any nails or staples sticking out. Use sandpaper to smooth rough surfaces, which prevents injuries and helps paint or sealant adhere better if you choose to apply it.
2. Line the Pallet with Landscape Fabric
Attach landscape fabric or burlap to the back and bottom inside the pallet using a staple gun. This lining will hold the soil in place while allowing water drainage. Make sure the fabric is taut and securely fastened to prevent soil from spilling out.
3. Fill with Potting Soil
Add a generous layer of potting soil inside the lined pallet. Use a mix specifically designed for container gardening with excellent drainage to avoid root rot. Fill it to the top but leave some space for planting.
4. Plant Your Herbs
Choose herbs based on your climate and cooking preferences. Plant seedlings in the spaces between pallet slats, or sow seeds directly into the soil. Consider planting taller herbs like rosemary at the top and cascading varieties like thyme or oregano towards the bottom for an attractive, functional layout.
5. Water and Position Your Pallet Garden
Water your new herb garden thoroughly but avoid waterlogging. Position the pallet vertically against a sturdy wall or fence with the help of screws or brackets for safety. Ensure your herbs receive at least 4-6 hours of sunlight daily for optimal growth.
6. Maintain and Harvest
Regularly water your herbs, especially in warmer months, and trim them to encourage bushy growth and prevent flowering, which can reduce leaf flavor. Watch for pests and diseases and use organic treatments if necessary.
Tips for Success with Your Pallet Herb Garden
- Choose herbs suited for your climate: Mediterranean herbs like rosemary and thyme prefer dry conditions, while mint and cilantro thrive in moist soil.
- Rotate crops seasonally: Replace herbs as needed to keep your garden fresh and productive.
- Use organic fertilizers: Boost growth naturally without harmful chemicals.
- Monitor sunlight: Move the pallet if herbs show signs of too much or too little sun.
- Protect wood: Apply a non-toxic sealant to increase the pallet’s lifespan, especially if exposed to rain.
Common Questions About Pallet Herb Gardens
Can You Use Any Pallet for Gardening?
Not all pallets are safe for gardening. Look for pallets stamped with “HT” (heat treated) rather than “MB” (methyl bromide), as the latter involves chemical fumigation. Untreated pallets are best to avoid toxic substances.
How Often Should I Water My Pallet Herb Garden?
Watering frequency depends on climate and soil moisture but generally water when the top inch of soil feels dry. Vertical gardens may dry out faster, so daily checks in hot weather are advisable.
Can Pallet Gardens Be Used Indoors?
Yes, with adequate light (natural or grow lights), pallet herb gardens can thrive indoors. Make sure there is good air circulation to prevent mold and pests.
Conclusion: Grow Fresh Flavor with a Pallet Herb Garden
Building a pallet herb garden is a rewarding project that blends sustainability, creativity, and practicality. It allows you to grow fresh herbs efficiently, even in limited spaces. With minimal investment and effort, you can enjoy homegrown basil, thyme, mint, and more, enhancing your meals with fresh flavors and fragrance.
Start your pallet herb garden today — it’s an excellent way to connect with nature, save money, and add a charming vertical garden to your home. Remember, consistent care and the right herbs for your environment will ensure a lush, flavorful harvest all year round. Happy gardening!
Related Keywords: vertical herb garden, pallet garden ideas, DIY herb garden, small space gardening, sustainable gardening, container herb garden, urban gardening tips.
