Creating a hay bale garden is an innovative and eco-friendly way to grow vegetables, herbs, and flowers without traditional soil beds. This method is perfect for gardeners with limited space, poor soil quality, or those who want a quick and easy garden setup. In this guide, you’ll learn how to make a hay bale garden from scratch, the benefits of this gardening style, and expert tips to ensure a thriving harvest.
Why Choose a Hay Bale Garden?
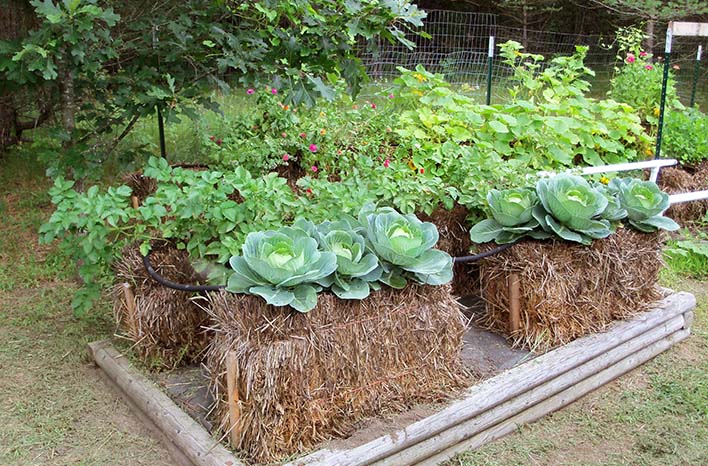
Hay bale gardening offers several advantages:
- No need for prepping soil: Ideal for poor or compacted soil.
- Quick setup: Start planting within weeks.
- Good drainage and aeration: Hay bales provide a natural medium.
- Eco-friendly: Uses biodegradable material and reduces the need for soil amendments.
- Versatility: Perfect for vegetables, herbs, and flowers alike.
Step 1: Selecting the Right Hay Bale
Choosing the right bale is crucial for success.
- Hay vs. Straw: Use hay bales, which contain seeds and nutrients, unlike straw bales that are mostly stalks.
- Freshness: Select tightly bound, fresh bales that are dry and free of mold.
- Size: Standard rectangular bales (around 14x18x36 inches) work best for easy handling and planting.
Step 2: Preparing Your Hay Bale
Preparation involves conditioning your bale to decompose and become fertile.
Conditioning Process (7-10 days)
- Place the bale in your desired garden spot with good sunlight (6-8 hours daily).
- Water the bale thoroughly twice daily for the first 3-4 days.
- Add nitrogen-rich fertilizer to kickstart decomposition. Use:
- 1 cup of ammonium nitrate or
- 1 cup of blood meal per bale.
- Continue watering daily to keep the bale moist but not soggy.
- After about 7 days, the bale will heat up and start breaking down internally.
- On days 8-10, reduce watering slightly and prepare for planting.
Expert Tip: Use a soil thermometer to monitor bale temperature; ideal is 120-140°F during conditioning.
Step 3: Planting Your Garden
Once conditioned, your bale is ready for planting.
- Add a layer of compost or potting mix (2-3 inches) on top of the bale to create a planting medium.
- Select suitable plants: Tomatoes, peppers, lettuce, beans, herbs, and flowers thrive in hay bale gardens.
- Plant seeds or seedlings directly into the compost layer, spacing according to plant needs.
- Water gently after planting to set roots.
Step 4: Caring for Your Hay Bale Garden
Maintaining your hay bale garden ensures healthy growth.
- Watering: Hay bales dry out faster than soil beds; water daily, especially during hot weather.
- Fertilizing: Feed plants every 2-3 weeks with a balanced liquid fertilizer.
- Weeding: Hay bales reduce weed growth but monitor regularly.
- Support: Use stakes or cages for tall plants like tomatoes.
Benefits Backed by Research
Studies show hay bale gardening can increase yield by improving soil structure and drainage. According to the University of Florida’s extension program, this method reduces soil-borne diseases and allows for earlier planting in spring due to the bale’s warmth.
Common Challenges and Solutions
| Challenge | Solution |
|————————-|———————————————-|
| Bale drying out quickly | Increase watering frequency; mulch the top. |
| Bale decomposing too fast | Use moderate fertilizer to balance decay. |
| Pests like rodents | Use natural repellents or physical barriers. |
Real-Life Success Story
Jane, a novice gardener from Oregon, transformed her small patio into a flourishing hay bale garden. Within two months, she harvested fresh tomatoes, herbs, and peppers, enjoying a sustainable and low-maintenance setup that saved her from poor backyard soil.
Conclusion
Hay bale gardening is an accessible, sustainable, and productive way to grow your own food, especially when traditional gardening isn’t an option. By selecting fresh hay, properly conditioning the bale, and providing consistent care, you can enjoy a vibrant garden with minimal effort. Ready to start? Gather your hay bales and let nature’s process do the work—your thriving garden awaits!
Call to Action: Try building your own hay bale garden this season and experience the joy of fresh, homegrown produce with less hassle and more fun!
