Creating a greenhouse cover for a raised garden bed is an excellent way to extend your growing season, protect plants from harsh weather, and boost productivity. Whether you’re a seasoned gardener or a beginner, a well-made greenhouse cover can transform your outdoor space into a thriving mini ecosystem. This guide will walk you through the step-by-step process of building an efficient, cost-effective greenhouse cover tailored for raised garden beds. You’ll learn the materials needed, construction tips, and maintenance advice to help your plants flourish year-round.
Building your own greenhouse cover is simpler than you might think. By customizing it to fit your raised bed’s dimensions and using readily available materials, you can create a sturdy, durable shelter that traps heat and shields plants from pests and frost. This article will cover everything from choosing the right plastic sheeting to assembling a frame that withstands wind and weather. Let’s dive into practical steps and expert insights that will empower you to build a greenhouse cover that enhances your gardening success.
Why Use a Greenhouse Cover for Raised Garden Beds?
Raised garden beds improve soil drainage and root health, but they are still vulnerable to temperature fluctuations and pests. A greenhouse cover offers several key benefits:
- Extended Growing Season: Protects plants from early frosts and late cold snaps.
- Temperature Control: Traps solar heat, creating a warmer microclimate.
- Pest Protection: Keeps out insects, birds, and small animals.
- Weather Shield: Guards against heavy rain, wind, and hail damage.
With these advantages, greenhouse covers help you grow a wider variety of plants and improve yields year-round.
Materials Needed to Make a Greenhouse Cover
Before you start, gather the following materials:
| Material | Purpose |
|—————————|———————————–|
| PVC pipes or wooden dowels | Frame structure |
| Clear polyethylene plastic sheeting (4-6 mil thickness) | Cover to trap heat and moisture |
| Zip ties, clips, or twine | Secure the plastic to the frame |
| Heavy-duty scissors or utility knife | Cutting plastic and frame materials |
| Measuring tape | Accurate sizing |
| Stakes or rebar (optional) | Anchoring frame to the ground |
| Door flap materials (optional) | Easy access to plants |
Tip: Use UV-resistant plastic sheeting for durability and longer lifespan.
Step-by-Step Guide: Building Your Greenhouse Cover
1. Measure Your Raised Garden Bed
- Measure the length, width, and height of your raised bed.
- Add 6-12 inches to the height for comfortable plant growth and airflow.
- This ensures your greenhouse cover will fit snugly over the bed without crushing plants.
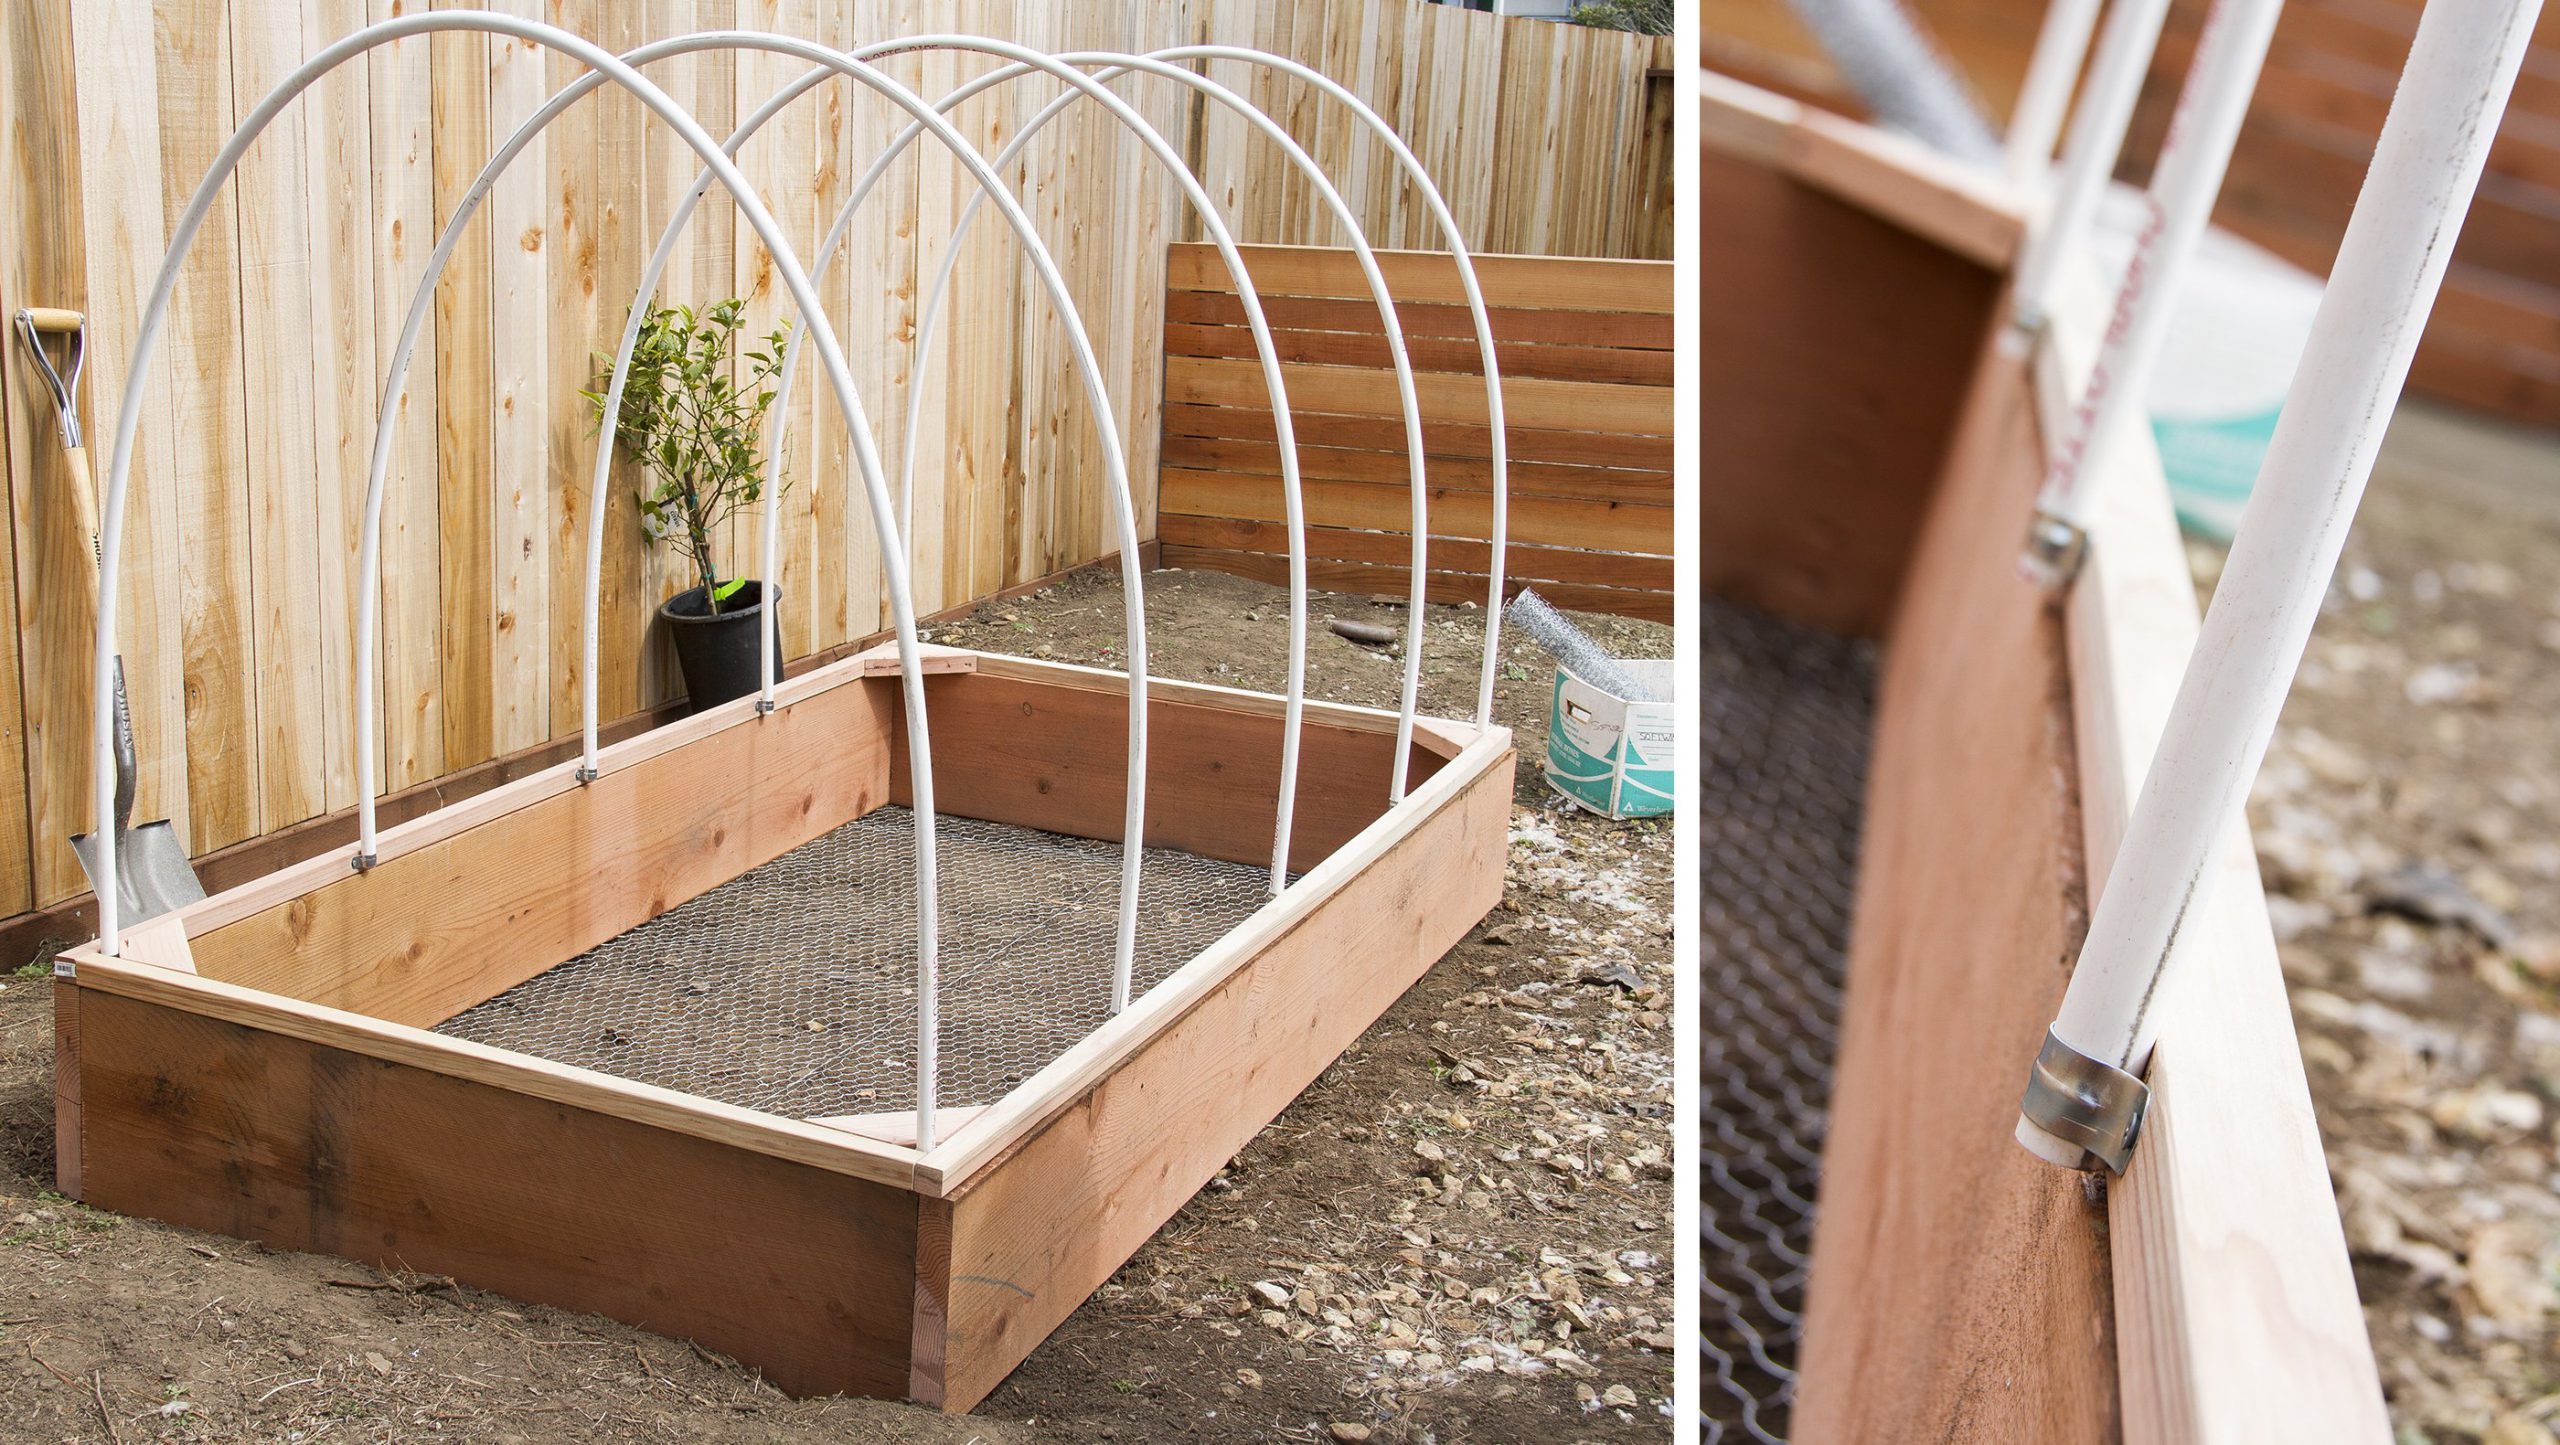
2. Build the Frame
- PVC Frame: Cut PVC pipes to length and assemble into a hoop frame by bending them into arches spanning the bed’s width.
- Secure the arches by inserting pipe ends into the soil or attaching them to the raised bed frame.
- Space arches evenly (every 18-24 inches) for stability.
Alternative: Use wooden dowels or metal rods as frame supports if PVC isn’t available.
3. Attach the Plastic Sheeting
- Drape the clear plastic sheeting over the frame, ensuring it covers all sides.
- Leave 6-12 inches of extra plastic at the bottom edges.
- Use zip ties, clips, or twine to secure the plastic to the frame arches tightly.
- Fold and staple or weigh down the excess plastic along the raised bed edges to prevent wind lift.
4. Create an Access Door (Optional)
- Cut a vertical slit or flap on one side of the plastic.
- Reinforce edges with tape.
- Use Velcro strips, clips, or ties to keep the door closed when not in use.
- This allows easy access for watering and harvesting.
Tips for Maintaining Your Greenhouse Cover
- Ventilation: Open the door flap or lift the plastic edges on warm days to prevent overheating and allow airflow.
- Regular Inspection: Check for tears or loose attachments and repair promptly.
- Cleaning: Wipe down the plastic periodically to maximize sunlight penetration.
- Seasonal Use: Remove or roll up the cover during hot summer months if overheating becomes an issue.
Real-World Example: A Success Story
Jane, an avid gardener from Oregon, built a simple PVC greenhouse cover for her raised beds. Using clear plastic sheeting and zip ties, she extended her growing season by two months. Jane reported healthier plants and higher yields of tomatoes and peppers even through early November. Her DIY cover cost under $50, demonstrating the affordability and effectiveness of this project.
FAQs About Greenhouse Covers for Raised Garden Beds
Q1: Can I use a greenhouse cover in winter?
Yes. A greenhouse cover traps heat and helps protect plants from frost, making it ideal for winter growing.
Q2: How thick should the plastic sheeting be?
Use 4-6 mil thickness polyethylene plastic for durability and insulation.
Q3: How do I prevent mold or mildew inside the cover?
Ensure proper ventilation by opening flaps or lifting edges during warm, humid days.
Conclusion
Building a greenhouse cover for your raised garden bed is a practical, cost-effective way to enhance plant growth, extend your gardening season, and protect your crops from weather and pests. By selecting the right materials and following simple construction steps, you can create a durable cover tailored to your garden’s needs. Remember to maintain proper ventilation and inspect your cover regularly for the best results.
Ready to boost your garden’s productivity? Gather your materials today and start crafting your own greenhouse cover — your plants will thank you with bountiful harvests!
Call to Action:
If you found this guide helpful, share your greenhouse cover projects and tips in the comments below. Happy gardening!
