A well-leveled garden is the foundation of a beautiful, functional outdoor space. Whether you’re planning to install a lawn, build a patio, or grow a vegetable patch, leveling your garden ensures proper drainage, prevents water pooling, and creates an even surface that enhances aesthetics and usability. This comprehensive guide will walk you through how to level a garden efficiently, whether you’re a gardening novice or a seasoned landscaper.
In this article, you’ll discover expert tips, essential tools, and practical steps to achieve a smooth, flat garden surface. By understanding the process, you’ll avoid common pitfalls and create an outdoor space that complements your home perfectly. Let’s dive into the best methods for leveling your garden with confidence and precision.
Why Is Leveling a Garden Important?
Before we get into the how-to, it’s crucial to understand why leveling your garden matters:
- Improves Drainage: A flat garden prevents water from pooling, reducing the risk of soil erosion and plant root rot.
- Enhances Aesthetics: A level surface looks tidy and professional, providing a solid base for landscaping projects.
- Facilitates Lawn Care: Even ground makes mowing and maintenance easier.
- Prepares for Construction: Leveling is essential before installing patios, decks, or garden sheds.
Tools Needed to Level a Garden
To level your garden effectively, you’ll need the right equipment. Here’s a list of essential tools:
- Spade or shovel: For digging and moving soil.
- Rake: To spread and smooth soil.
- Garden hoe: Useful for breaking up clumps.
- Spirit level or laser level: To check the flatness across the area.
- Measuring tape: To measure distances and slopes.
- String and stakes: To mark boundaries and levels.
- Wheelbarrow: For transporting soil or debris.
- Tamping tool or roller: To compact soil after leveling.
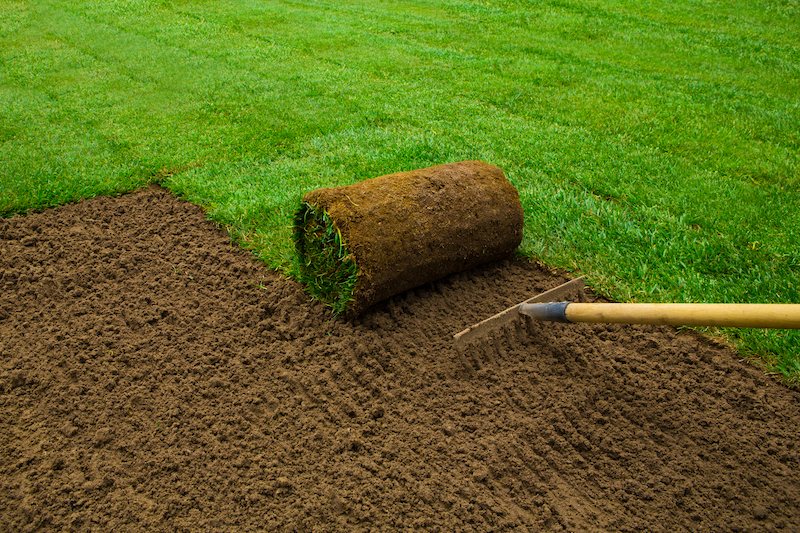
Step-by-Step Guide: How to Level a Garden
Step 1: Clear the Area
Start by removing debris, rocks, weeds, and old plants from the garden. This clears the surface and makes it easier to work with the soil.
- Use a spade or garden fork to loosen compacted soil.
- Dispose of any unwanted material properly.
Step 2: Measure and Mark the Area
- Use stakes and string to outline the garden boundaries.
- Stretch the string tightly to create straight lines.
- Use a spirit level or laser level along the string to identify high and low spots.
Step 3: Loosen the Soil
Loosen the soil with a garden hoe or spade to a depth of about 6-8 inches. This allows you to redistribute soil more easily and improves aeration.
Step 4: Identify High and Low Spots
Walk around the garden while using your level tool to spot uneven areas:
- High spots: Raised soil that needs to be removed or spread.
- Low spots: Depressions that require filling with soil.
Step 5: Move Soil to Level the Ground
- Remove soil from high spots and spread it over low areas.
- Use a rake to distribute soil evenly.
- Repeat measuring to check progress.
Step 6: Compact the Soil
- After leveling, compact the soil with a tamper or roller.
- This prevents future settling and maintains an even surface.
Step 7: Final Check and Adjustments
- Use your level once more to ensure the garden is flat.
- Adjust as necessary, adding soil or removing as needed.
- After the final check, water the soil lightly to settle it.
Tips for Effective Garden Leveling
- Work in sections: Large gardens are easier to level in smaller parts.
- Check slope for drainage: A slight slope (1-2%) away from buildings prevents water damage.
- Use quality topsoil: Adding topsoil can help fill low spots and improve soil quality.
- Avoid working in wet conditions: Wet soil compacts unevenly and can cause future settling.
- Consider professional help: For large or complex projects, hiring a landscaper ensures precision.
Common Challenges and How to Overcome Them
| Challenge | Solution |
|—————————-|———————————————–|
| Uneven settling after rain | Compact soil thoroughly; consider adding gravel base |
| Hard, compacted soil | Use a rototiller or aerator before leveling |
| Excess water pooling | Create drainage channels or slight slope |
| Large rocks or roots | Remove manually or use heavy equipment |
Expert Quote
“Leveling a garden is often overlooked but is critical for the success of any landscaping project. Taking the time to do it right ensures your outdoor space remains beautiful and functional for years to come.”
— Jane Thompson, Certified Landscape Architect
Conclusion
Leveling your garden is a vital step toward creating a beautiful, usable outdoor space. By following the steps outlined—clearing the area, measuring accurately, moving and compacting soil—you can transform uneven ground into a smooth, functional surface. This process not only improves drainage and aesthetics but also prepares your garden for future enhancements like lawns, patios, or flower beds.
Ready to get started? Grab your tools, plan carefully, and enjoy the satisfaction of a perfectly leveled garden that’s ready for whatever project you envision next!
Take Action: Start leveling your garden today and watch your outdoor space transform into a stunning, flat oasis perfect for relaxation, play, and gardening success.
