Installing a chicken wire fence around your garden is an effective way to protect your plants from pests like rabbits, deer, and other small animals. Chicken wire is affordable, easy to work with, and durable, making it a popular choice for gardeners seeking to safeguard their crops without investing in expensive fencing options. In this comprehensive guide, you’ll learn exactly how to install a chicken wire fence around your garden, from choosing the right materials to setting up the fence securely.
Whether you are a seasoned gardener or a beginner, this article will walk you through the process with clear, actionable steps, helpful tips, and expert advice to ensure your garden stays protected season after season.
Why Use Chicken Wire Fence for Your Garden?
Before diving into installation, it’s important to understand why chicken wire is a great fencing option:
- Cost-Effective: Chicken wire is generally less expensive than other fencing materials like metal mesh or wooden fences.
- Easy to Install: It’s lightweight and flexible, allowing DIY installation without heavy tools.
- Effective Barrier: The small hexagonal openings prevent most small animals from entering your garden.
- Versatile Use: Suitable for garden beds, raised planters, or enclosing larger areas.
Materials and Tools Needed for Installing Chicken Wire Fence
To install a chicken wire fence successfully, gather the following:
- Chicken wire rolls (usually 1 to 4 feet high and 50 feet long)
- Fence posts (wooden or metal, spaced 6-8 feet apart)
- Post hole digger or shovel
- Hammer and fencing staples (for wooden posts)
- Fence ties or galvanized wire (for metal posts)
- Wire cutters
- Gloves (to protect your hands)
- Measuring tape
- Level (optional but helpful)
Step-by-Step Guide: How to Install Chicken Wire Fence Around Garden
1. Plan and Measure Your Garden Perimeter
Start by measuring the total length of the garden area you want to enclose. This will help you determine how much chicken wire and how many posts you need. Mark the post locations with stakes or spray paint, spacing them approximately 6 to 8 feet apart for stability.
2. Choose and Prepare Fence Posts
Select durable posts suitable for your garden size and soil conditions:
- Wooden posts are easier to staple chicken wire onto but may rot over time.
- Metal T-posts last longer and require fence ties or wire for attachment.
Use a post hole digger to create holes about 18-24 inches deep for each post. Firmly set the posts into the ground, ensuring they are vertical by using a level.
3. Attach the Chicken Wire to the First Post
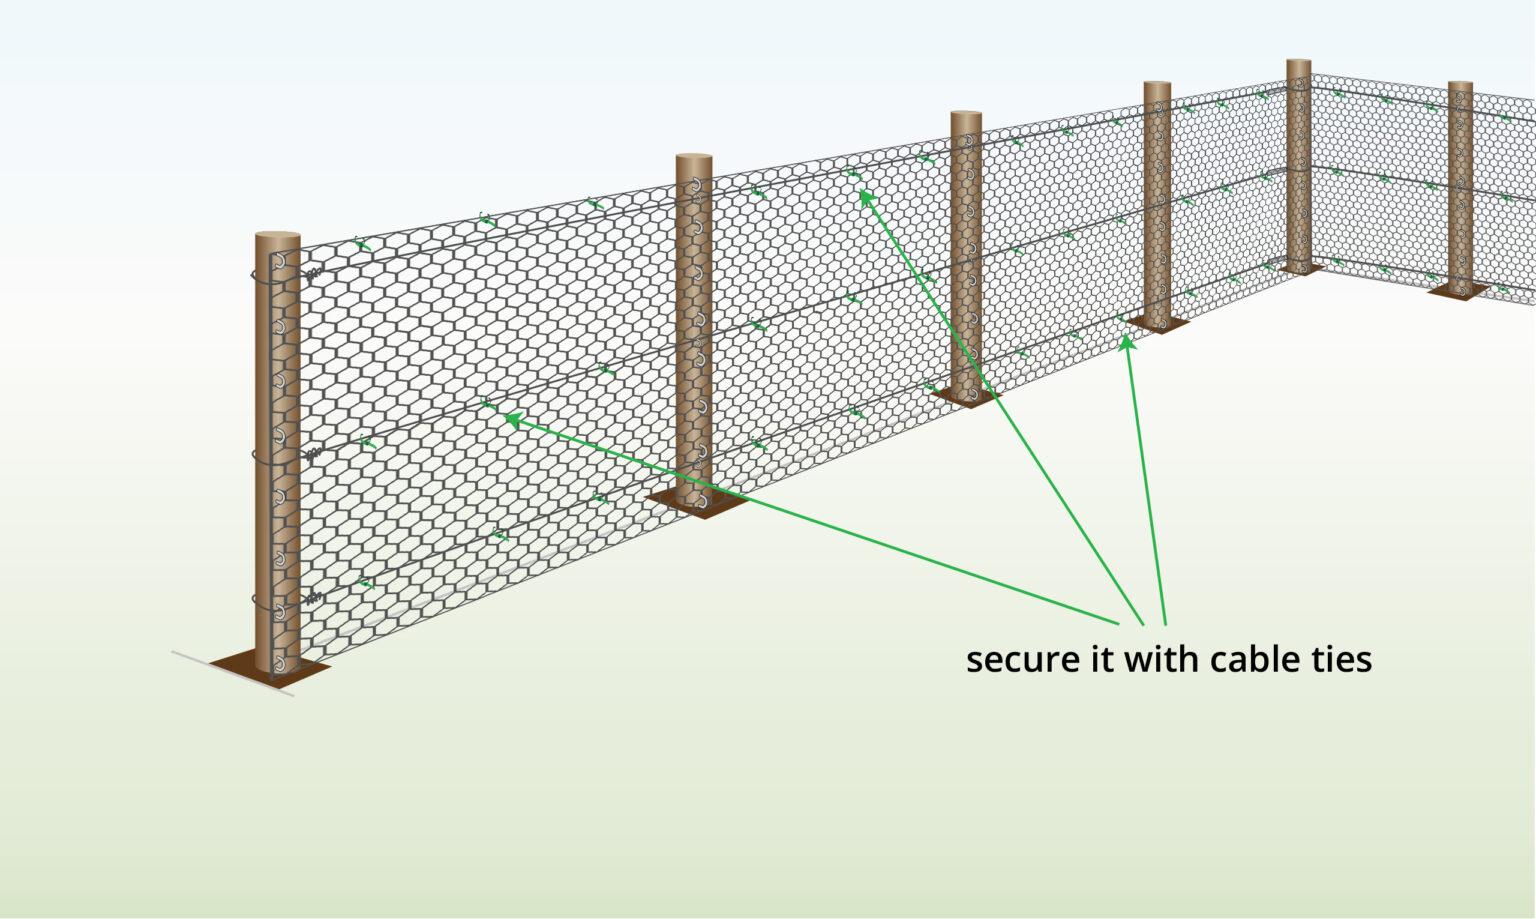
Roll out the chicken wire next to the first post. Wearing gloves, unroll the wire and stand it upright. Secure the end of the wire to the post using staples (wooden posts) or wire ties (metal posts). Start from the bottom and work upward to keep the wire taut.
4. Stretch the Wire Along the Perimeter
Walk along the line of posts, unrolling the chicken wire as you go. Pull the wire tight to avoid sagging, and attach it to each post using staples or ties. Keep the wire about 6 inches below the soil surface to prevent animals from digging underneath.
5. Secure the Bottom Edge
For added protection, bury the bottom edge of the chicken wire 4 to 6 inches into the soil or bend it outward at a 90-degree angle to create a “skirt.” This prevents animals from digging under the fence.
6. Trim Excess Wire and Check Stability
Once the entire perimeter is covered, use wire cutters to trim any excess chicken wire. Walk around the fence, checking for loose sections or gaps. Tighten any loose areas by adding extra staples or ties.
Tips for a Durable and Effective Chicken Wire Fence
- Use galvanized chicken wire to prevent rust and extend longevity.
- Double-layer the wire if you have persistent pests or larger animals.
- Add a top rail or brace to wooden posts for extra stability in windy areas.
- Inspect your fence regularly for damage or wear and repair promptly.
- Consider adding a gate for easy access to your garden.
Common Questions About Installing Chicken Wire Fences
How tall should my chicken wire fence be?
For most garden pests, a fence height of 3 to 4 feet is sufficient. If deer are common in your area, consider fencing at least 6 feet tall or using additional deterrents.
Can chicken wire keep out all garden pests?
Chicken wire effectively blocks small animals like rabbits and squirrels but may not deter larger animals or burrowing pests unless properly secured at the base.
How long does a chicken wire fence last?
With proper installation and maintenance, galvanized chicken wire fences can last 5 to 10 years or more.
Real-World Example: Protecting a Vegetable Garden
Jane, an avid gardener from Oregon, successfully protected her vegetable garden from rabbits by installing a 4-foot-tall galvanized chicken wire fence. She spaced wooden posts 7 feet apart and buried the wire 6 inches underground, preventing rabbits from digging under. After two seasons, her garden remained free from pest damage, and she credited the fence’s tight installation and regular maintenance for her success.
Conclusion
Installing a chicken wire fence around your garden is a practical, affordable, and effective way to protect your plants from unwanted animals. By following the step-by-step process outlined above, you can ensure a strong, durable fence that keeps pests out and your garden thriving.
Take action today by planning your fence layout, gathering quality materials, and confidently installing your chicken wire fence. With proper care and maintenance, your garden will enjoy a safer growing environment season after season.
Protect your plants, save time on pest control, and enjoy a bountiful garden by installing a chicken wire fence today!
