A punctured garden hose can quickly turn your watering routine into a frustrating experience. Whether you’re tending to your lawn or watering your flower beds, leaks disrupt water flow and waste precious resources. Fortunately, fixing a punctured garden hose is a straightforward task that anyone can master with a few simple tools and techniques. In this comprehensive guide, we’ll walk you through the most effective methods to repair your garden hose quickly and reliably.
From identifying the exact location of the puncture to choosing the best repair method, this article covers everything you need to know. We’ll explore temporary fixes for a quick patch-up and more durable solutions to extend the life of your hose. Whether you’re a gardening novice or an experienced green thumb, these tips will save you time, money, and water. Let’s dive into how to fix a punctured garden hose and get your watering system back in top shape.
How to Identify a Puncture in Your Garden Hose
Before repairing, you need to find the exact spot where water leaks. Here’s how to do it efficiently:
- Visual inspection: Check the hose for visible cracks, holes, or wet spots.
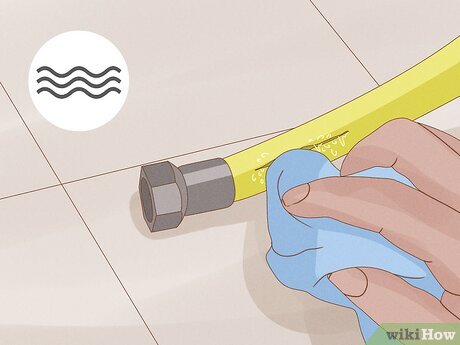
- Feel for moisture: Run your hand along the hose’s length to detect damp areas.
- Pressure test: Turn on the water and observe where water sprays or drips.
- Listen closely: Sometimes you can hear a hissing sound near the puncture.
Pro Tip: Mark the leak area with a piece of tape or a waterproof marker to avoid losing track during repair.
Quick and Easy Temporary Fixes for a Punctured Garden Hose
If you need an immediate solution, these temporary fixes will help you keep watering without delay:
1. Use Waterproof Tape or Duct Tape
- Dry the hose surface thoroughly.
- Wrap waterproof or duct tape tightly around the punctured area.
- Overlap the tape multiple times for better sealing.
Note: This is a short-term fix best suited for small punctures.
2. Apply a Hose Repair Patch
- Purchase a garden hose repair patch from a hardware store.
- Clean and dry the hose area.
- Stick the patch firmly over the hole.
- Press down and hold for a few minutes to ensure adhesion.
3. Use a Hose Mender Clamp
- Cut out the damaged section if the hole is large or irregular.
- Insert a hose mender (a small metal or plastic connector).
- Secure it with hose clamps on both sides.
This method restores the hose functionality quickly and is more durable than tape.
Permanent Solutions: How to Properly Repair a Punctured Garden Hose
For a lasting repair, consider these professional-grade methods:
Step 1: Cut Out the Damaged Section
- Use sharp garden scissors or a utility knife.
- Cut a clean, straight section around the puncture (about 2-3 inches).
Step 2: Choose the Right Hose Repair Kit
- Hose repair kits typically include connectors and clamps.
- Select a kit compatible with your hose diameter (usually 5/8 inch or 3/4 inch).
Step 3: Attach the Hose Repair Connector
- Insert one end of the connector into the cut end of the hose.
- Tighten the hose clamp securely.
- Repeat on the other side with the other hose piece.
Step 4: Test for Leaks
- Turn on the water and check if the repair holds.
- Tighten clamps further if necessary.
Tips for Preventing Future Hose Punctures
Avoiding future leaks will save you time and hassle. Incorporate these tips into your garden care routine:
- Store your hose properly: Coil it without kinks and store in a shaded area.
- Avoid dragging over rough surfaces: Pavement or sharp edges can cause punctures.
- Use hose reels: Prevent tangling and accidental damage.
- Check for pressure surges: Use a pressure regulator if your water pressure is high.
- Inspect regularly: Early detection of wear and tear helps prevent bigger problems.
Expert Insights: Why Repairing Your Garden Hose Matters
Garden hoses are often overlooked but play a critical role in maintaining healthy plants and conserving water. According to horticulture experts, even small leaks can waste up to 20 gallons of water per day. Timely repairs not only reduce water bills but also contribute to sustainable gardening practices.
John Green, a professional landscaper with 15 years of experience, advises:
“A well-maintained hose ensures efficient watering and prevents frustration. Invest a few minutes in repairs, and you’ll save hours in the long run.”
Frequently Asked Questions (FAQs)
Q1: Can I use glue to fix a punctured garden hose?
While some glues can temporarily seal small holes, they often fail under water pressure. It’s better to use hose repair kits or clamps for durability.
Q2: How long does a hose repair last?
With proper repair kits and clamps, a fix can last several seasons. Temporary patches may only hold for a few days.
Q3: What if my hose has multiple punctures?
If leaks are widespread, consider replacing the hose. Multiple repairs can weaken the hose’s structure.
Conclusion
Fixing a punctured garden hose is a manageable task that restores your watering system’s efficiency and saves water. By accurately locating the leak and selecting the right repair method—whether a quick patch or a permanent connector—you can extend your hose’s lifespan significantly. Remember to maintain and store your hose properly to avoid future damage.
Next time you spot a leak, don’t rush to replace your hose. With these expert tips and easy-to-follow steps, you can confidently fix a punctured garden hose and keep your garden flourishing. Ready to tackle that leak? Grab your tools and get started today!
Optimize your garden care by mastering hose repairs—your plants and wallet will thank you!
