If you’re looking to protect your garden from pests, pets, and wildlife, building a chicken wire fence is a practical and cost-effective solution. Chicken wire fences are lightweight, easy to install, and provide excellent protection for your plants. Whether you want to keep rabbits out or prevent chickens from wandering, this guide will walk you through everything you need to know.
In this article, you will learn how to build a chicken wire fence for your garden from start to finish. We’ll cover the materials needed, step-by-step installation instructions, tips for durability, and common pitfalls to avoid. By the end, you’ll have a strong, reliable fence that keeps your garden safe and thriving.
Why Use Chicken Wire for Your Garden Fence?
Chicken wire, also known as poultry netting, is made from thin, flexible galvanized steel wire woven into hexagonal patterns. It’s a popular choice for garden fencing because of its:
- Affordability: Chicken wire is cheaper than many other fencing materials.
- Flexibility: Easily cut and shaped to fit different garden layouts.
- Visibility: Allows sunlight and air to pass through while keeping animals out.
- Durability: Galvanized wire resists rust and weather damage for several years.
- Lightweight: Easy to handle and install without heavy equipment.
This makes chicken wire an ideal option for gardeners seeking a balance of protection, visibility, and budget-friendliness.
What You Need: Materials and Tools for Building a Chicken Wire Fence
Before starting, gather the following materials and tools:
Materials:
- Chicken wire (usually sold in rolls 3-4 feet tall)
- Fence posts (wooden or metal, spaced 6-8 feet apart)
- Fence staples (for wooden posts) or U-nails
- Galvanized wire ties or zip ties
- Wooden stakes (optional, for extra support)
- Concrete mix (optional, for setting posts)
Tools:
- Wire cutters or tin snips
- Hammer or mallet
- Post driver (for metal posts) or shovel (for wooden posts)
- Measuring tape
- Level
- Gloves (to protect hands from sharp wire)
- Pliers
Step-by-Step Instructions to Build a Chicken Wire Fence
Step 1: Plan Your Fence Layout
- Measure the perimeter of the garden area you want to protect.
- Decide on the fence height. A typical chicken wire fence is 3-4 feet tall, but taller fences may be required to keep out larger animals.
- Mark post locations every 6-8 feet around the perimeter with stakes.
Step 2: Install Fence Posts
- Dig holes about 12-18 inches deep for wooden posts or use a post driver for metal posts.
- For added stability, set wooden posts in concrete and let dry for 24 hours.
- Use a level to ensure posts are vertically straight.
- Space posts evenly to maintain fence tension.
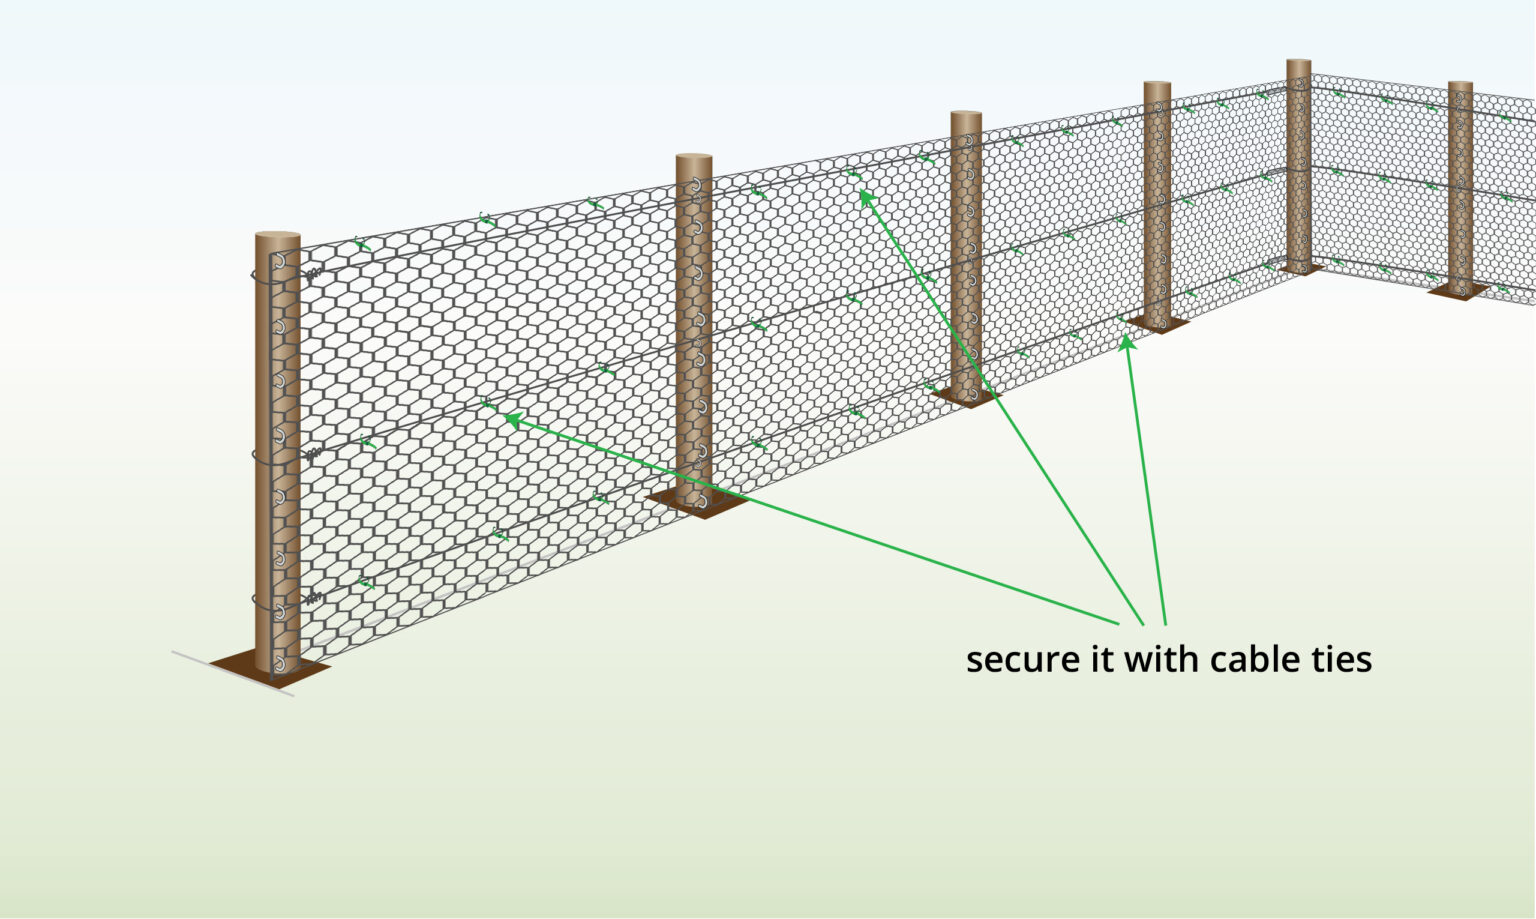
Step 3: Attach Chicken Wire to the Posts
- Unroll the chicken wire along the fence line.
- Starting at one corner post, attach the wire with fence staples or U-nails. Hammer staples every 6-8 inches vertically along the post.
- Use gloves and pliers to pull the wire taut as you move from post to post.
- At each post, secure the wire tightly with staples or wire ties.
- Overlap wire ends by at least 6 inches when joining rolls.
Step 4: Secure the Bottom Edge
- To prevent animals from pushing under the fence, bury the bottom edge of the wire 4-6 inches into the ground or bend it outward in an L-shape.
- Alternatively, attach a strip of hardware cloth or bury a trench filled with stones along the fence base for reinforcement.
Step 5: Add Top Supports (Optional)
- For taller fences or added strength, attach horizontal wooden rails or wire strands at the top.
- This helps maintain fence shape and prevents sagging.
Tips for Building a Durable Chicken Wire Fence
- Use galvanized or PVC-coated chicken wire to prevent rust and extend fence life.
- Tighten the wire properly to avoid sagging and gaps where animals can enter.
- Inspect the fence regularly for holes, loose staples, or damage.
- Trim nearby vegetation to reduce pressure and moisture buildup on the wire.
- Consider electric wire additions if you need extra protection from persistent wildlife.
Common Questions About Chicken Wire Garden Fences
Can chicken wire keep all animals out of my garden?
Chicken wire is effective against small animals like rabbits and chickens. However, larger animals such as deer or raccoons may require stronger fencing materials or additional deterrents.
How tall should my chicken wire fence be?
A height of 3 to 4 feet is typical for most garden fences. For rabbits and small wildlife, 2-3 feet may suffice. For larger pests, consider fences 5 feet or higher.
How long does a chicken wire fence last?
With proper maintenance and galvanized coating, chicken wire fences can last up to 5-7 years. Weather conditions and usage may affect longevity.
Real-World Example: Protecting a Vegetable Garden
A gardener in Oregon used a 4-foot high chicken wire fence with wooden posts spaced 7 feet apart to protect her vegetable patch from rabbits and neighborhood dogs. By burying the bottom edge 6 inches underground and tightening the wire every season, she maintained a pest-free zone that boosted her harvest yield by 30%.
Conclusion
Building a chicken wire fence for your garden is a straightforward and cost-effective way to protect your plants from unwanted animals. By carefully planning your layout, installing sturdy posts, and securing the chicken wire tightly, you create a durable barrier that keeps your garden safe. Regular maintenance and smart design choices will extend your fence’s lifespan and effectiveness.
Ready to protect your garden? Gather your materials and start building today — your plants will thank you with healthier growth and better yields!
Call to Action:
If you found this guide helpful, share it with fellow gardeners or subscribe to our newsletter for more expert gardening tips and DIY projects. Happy gardening!
