Creating an L shaped raised garden bed is an excellent way to maximize your gardening space while adding structure and style to your outdoor area. This design fits perfectly into corners, making it ideal for small yards, patios, or balconies. Whether you’re a seasoned gardener or a beginner, building an L shaped raised garden bed can enhance your planting options and improve soil quality.
In this comprehensive guide, you’ll learn how to plan, build, and maintain your L shaped raised garden bed. We’ll cover everything from choosing the right materials to planting tips, ensuring your garden thrives for seasons to come. Let’s dig in and transform your gardening experience with this functional and attractive raised bed design.
Why Choose an L Shaped Raised Garden Bed?
An L shaped raised bed offers several unique advantages:
- Space Efficiency: Fits snugly into corners, making the most of limited space.
- Accessibility: Easier to reach all parts of the garden without stepping into the bed.
- Soil Control: Elevated beds allow for better soil drainage and quality management.
- Aesthetic Appeal: Adds architectural interest and can be customized to your landscape.
Understanding these benefits helps you appreciate why this design is popular among urban gardeners and hobbyists alike.
What Materials Do You Need to Build an L Shaped Raised Garden Bed?
Before you start building, gather the following materials:
- Lumber: Rot-resistant wood like cedar or redwood is ideal. Common dimensions are 2×6 or 2×8 boards.
- Corner Brackets or Metal Anchors: For sturdy L-shaped joints.
- Wood Screws: Exterior-grade, rust-resistant screws (3” recommended).
- Drill and Screwdriver: For assembling the boards.
- Measuring Tape and Carpenter’s Square: To ensure precise cuts and right angles.
- Level: To keep the bed even.
- Landscape Fabric: To prevent weeds.
- Soil and Compost: High-quality, well-draining mix for planting.
Optional tools and supplies include a saw for cutting lumber, gardening gloves, and a hose or watering system.
Step-by-Step Guide: How to Build an L Shaped Raised Garden Bed
Step 1: Plan and Measure Your Garden Bed
- Choose the Location: Select a corner with at least 6-8 hours of sunlight daily.
- Measure the Space: Decide the dimensions of each leg of the “L.” A common size is 4 feet by 8 feet, but customize based on your space.
- Sketch the Design: Draw a simple plan to visualize the project and calculate material needs.
Step 2: Cut and Prepare the Lumber
- Cut the Boards: Use a saw to cut your lumber to the desired lengths.
- Sand Edges: Smooth any rough edges to avoid splinters.
- Pre-Drill Holes: Prevent wood splitting by drilling pilot holes for screws.
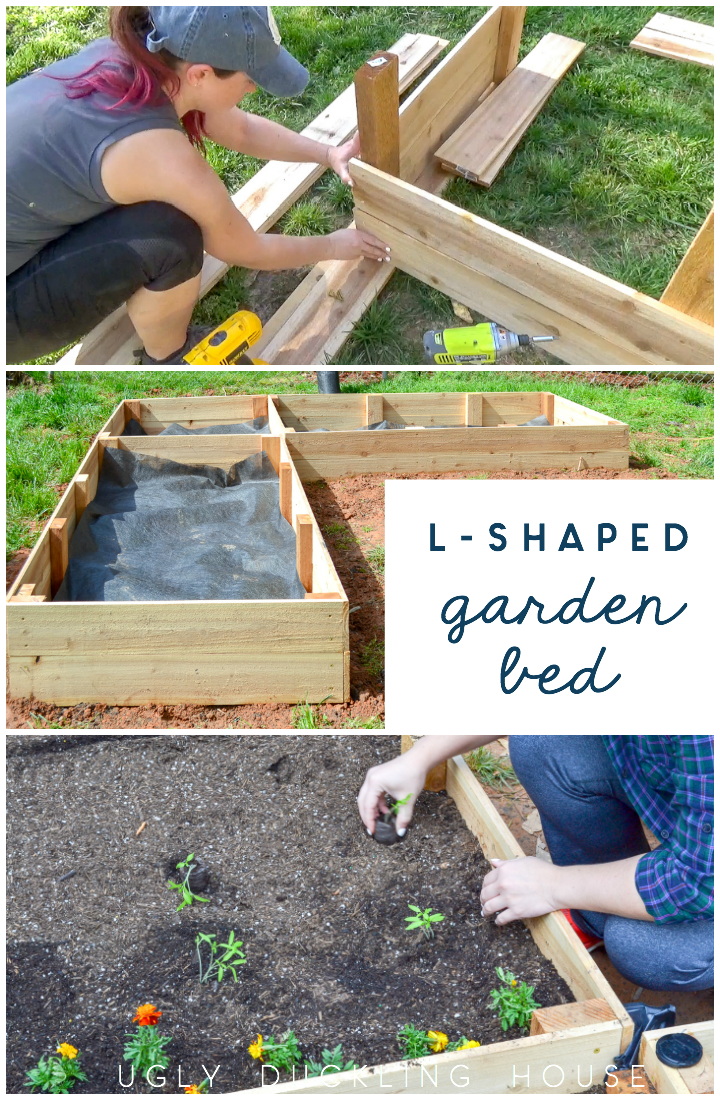
Step 3: Assemble the Frame
- Build Each Leg: Screw the boards together to form two rectangular boxes.
- Join the Legs: Connect the two boxes at a right angle using corner brackets or by screwing the boards directly.
- Check for Squareness: Use a carpenter’s square to ensure the angle is a true 90 degrees.
- Level the Frame: Place the frame in your garden spot and adjust to make it level.
Step 4: Prepare the Ground
- Clear the Area: Remove grass, rocks, and debris.
- Lay Landscape Fabric: This prevents weed growth while allowing water drainage.
- Optional: Add a layer of gravel for improved drainage.
Step 5: Position the Raised Bed Frame
- Place the assembled frame onto the prepared ground.
- Secure it with stakes if necessary to prevent shifting.
Step 6: Fill the Bed With Soil
- Use a mix of garden soil, compost, and organic matter.
- Leave a few inches at the top for mulch or additional soil amendments.
Step 7: Plant Your Garden
- Choose plants suited for raised beds and your climate.
- Consider companion planting to maximize space and reduce pests.
Tips for Maintaining Your L Shaped Raised Garden Bed
- Water Regularly: Raised beds dry out faster; consistent watering is crucial.
- Add Mulch: Helps retain moisture and suppress weeds.
- Rotate Crops: Prevent soil depletion by changing plant types each season.
- Inspect Wood: Check for rot or damage annually and replace boards as needed.
- Fertilize Appropriately: Use organic fertilizers to keep plants healthy.
Real-World Example: Successful L Shaped Raised Bed Garden
Jane, a gardener in Portland, Oregon, transformed her small backyard corner into a lush vegetable garden using an L shaped raised bed. She reported a 30% increase in yield compared to her traditional garden plot and appreciated how the design made planting and harvesting easier on her back. Her choice of cedar wood extended the life of the bed to over 10 years with minimal maintenance.
Frequently Asked Questions About L Shaped Raised Garden Beds
Q: Can I build an L shaped raised garden bed on concrete?
A: Yes, but use a liner or add drainage holes to prevent waterlogging.
Q: How deep should the raised bed be?
A: A minimum of 12 inches deep is recommended for most vegetables.
Q: What plants grow best in raised beds?
A: Leafy greens, root vegetables, herbs, and compact fruiting plants thrive in raised beds.
Conclusion
Building an L shaped raised garden bed combines functionality, efficiency, and style, making it an excellent choice for gardeners with limited space or looking to optimize corner areas. By following the step-by-step instructions and maintaining your garden thoughtfully, you’ll enjoy abundant harvests and a beautiful outdoor space.
Ready to start your gardening journey? Gather your materials, plan your layout, and build your L shaped raised bed today. With patience and care, you’ll soon reap the rewards of a flourishing garden right at your doorstep. Happy gardening!
