Creating a raised garden bed is one of the most effective ways to grow healthy plants, improve soil drainage, and add aesthetic appeal to your outdoor space. Using corrugated metal for your raised garden adds durability, a modern industrial look, and resistance to weather and pests. This guide will walk you through how to build a raised garden with corrugated metal, covering everything from materials to installation tips.
Whether you are a beginner or a seasoned gardener, this article will provide you with expert advice and practical steps to construct a sturdy, long-lasting raised bed that enhances your gardening experience.
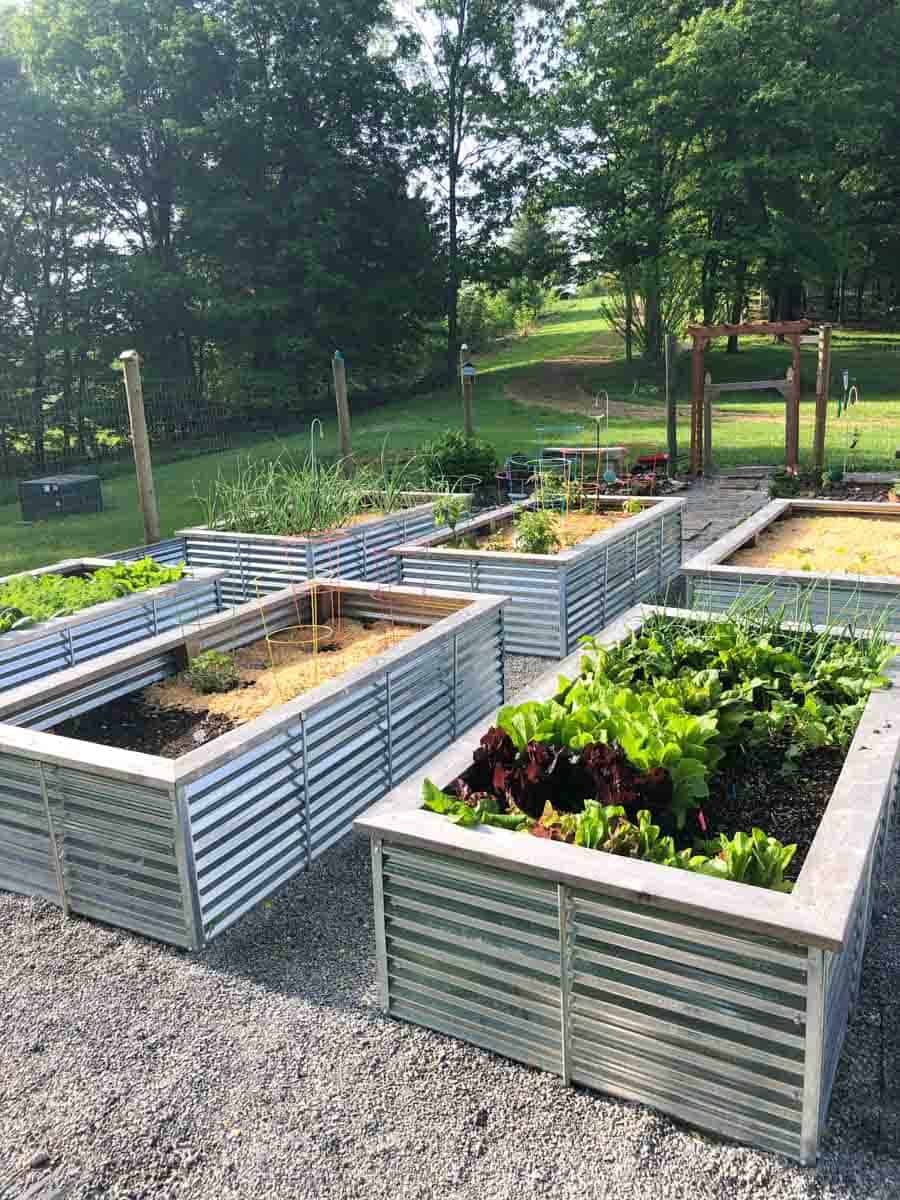
Why Choose Corrugated Metal for Raised Garden Beds?
Before diving into the building process, let’s explore the benefits of using corrugated metal:
- Durability: Corrugated metal resists rot, insects, and extreme weather better than wood.
- Modern aesthetic: Its sleek, industrial look fits well with contemporary garden designs.
- Longevity: Metal beds can last 10-20 years with minimal maintenance.
- Recyclable and eco-friendly: Many corrugated metal panels are made from recycled materials.
- Lightweight yet sturdy: Easy to handle and assemble without compromising strength.
These advantages make corrugated metal an excellent choice for both urban and suburban gardeners seeking a reliable and attractive gardening solution.
Materials and Tools Needed for Building a Corrugated Metal Raised Garden
To build your raised garden bed, gather the following materials and tools:
Materials
- Corrugated metal panels (galvanized steel or aluminum recommended)
- Wooden corner posts (cedar or treated lumber for durability)
- Metal screws or bolts with washers (rust-resistant)
- Landscape fabric (optional, for weed control)
- Soil mix (garden soil, compost, and organic matter)
Tools
- Power drill with screwdriver bits
- Measuring tape
- Tin snips or metal cutting saw
- Level
- Work gloves and safety glasses
- Shovel and rake
Step-by-Step Instructions to Build Your Raised Garden Bed
1. Plan and Measure Your Garden Bed
- Choose a sunny location with good drainage.
- Decide on the dimensions of your raised bed. Common sizes are 4 feet by 8 feet with a height of 12-18 inches.
- Mark the perimeter using stakes and string or spray paint.
2. Prepare the Site
- Clear grass, weeds, and debris from the marked area.
- Loosen the soil to allow roots to grow freely.
- Optionally, lay down landscape fabric to prevent weed growth.
3. Cut and Prepare Corrugated Metal Panels
- Measure and cut the corrugated metal panels to the desired lengths using tin snips or a saw.
- Wear gloves to avoid cuts from sharp edges.
- Smooth any sharp edges with a metal file if necessary.
4. Install Corner Posts
- Place wooden posts at each corner of the bed.
- Ensure they are level and firmly anchored into the ground (at least 12 inches deep).
- These posts will support the metal panels and keep the structure sturdy.
5. Attach Corrugated Metal Panels to Posts
- Align the metal panels with the wooden posts.
- Use metal screws or bolts with washers to secure the panels to the posts.
- Pre-drill holes in the metal to prevent bending or warping.
- Tighten screws evenly to maintain panel shape and stability.
6. Fill Your Raised Bed with Soil
- Mix garden soil with compost and organic matter to create nutrient-rich soil.
- Fill the bed evenly, leaving about an inch from the top to prevent soil spillover.
- Level the soil using a rake.
7. Plant and Maintain Your Raised Garden
- Choose plants suited to your climate and season.
- Water regularly and add mulch to retain moisture.
- Monitor for pests and diseases.
Tips for Success and Maintenance
- Choose galvanized or aluminum metal panels to avoid rust and corrosion.
- Seal the inside edges with a non-toxic sealant if you plan to grow edible plants, to prevent potential metal contamination.
- Add a liner such as landscape fabric or weed barrier to improve soil retention.
- Regularly inspect the screws and posts to ensure the structure remains tight and secure.
- Consider installing drip irrigation for efficient watering.
Real-World Example: Urban Gardener’s Raised Bed Success
Jessica, an urban gardener in Denver, built a 4×8-foot raised bed using corrugated metal panels and cedar posts. Within the first season, her vegetable yield increased by 30% thanks to improved soil drainage and reduced weed pressure. Jessica credits the durability of corrugated metal for withstanding harsh weather and maintaining her garden’s clean, modern look year-round.
Frequently Asked Questions (FAQs)
Q1: Is corrugated metal safe for growing vegetables?
Yes, galvanized steel and aluminum panels are generally safe. Avoid panels coated with lead-based paint or harmful chemicals.
Q2: Can I build a raised bed without wooden posts?
While possible by bending and fastening metal panels, posts provide essential structural support for larger beds.
Q3: How deep should the raised bed be?
A depth of 12-18 inches is ideal for most vegetables and flowers to allow sufficient root growth.
Conclusion
Building a raised garden with corrugated metal is a smart, stylish, and sustainable way to boost your gardening efforts. Its durability and modern appeal make it an excellent choice for gardeners seeking longevity and minimal maintenance. By following the step-by-step instructions, you can create a raised bed that supports healthy plant growth and enhances your outdoor space.
Ready to start your gardening project? Gather your materials, plan your space, and enjoy the rewarding experience of building a raised garden bed that will serve you for years to come.
Start building your raised garden today and watch your plants thrive with the strength and style of corrugated metal!
