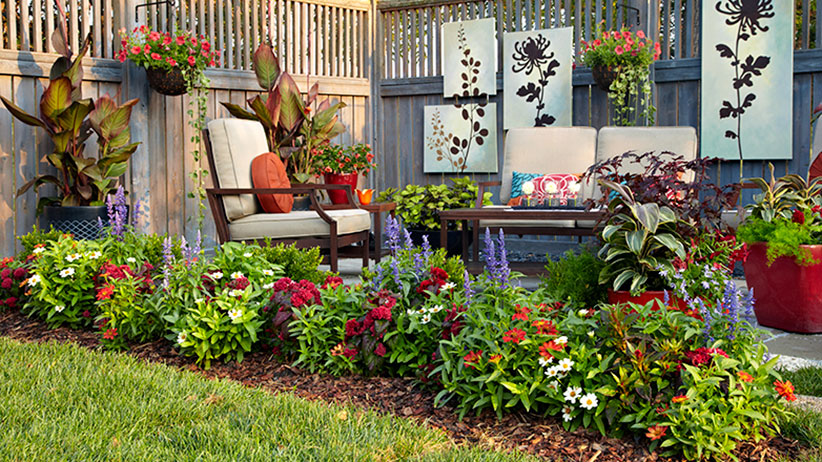
Creating a garden border is one of the most effective ways to enhance your outdoor space. Whether you want to define flower beds, separate different garden zones, or add visual interest, a well-built garden border can transform your yard into a stunning oasis. But how do you build a garden border that’s both functional and attractive? This guide will walk you through everything you need to know—from choosing materials to installation tips—so you can create a garden border that complements your landscape perfectly.
In this article, we’ll explore the benefits of garden borders, the best materials to use, and a detailed step-by-step process for building your own. You’ll also find expert tips, common mistakes to avoid, and creative ideas to inspire your project. Whether you’re a gardening novice or an experienced landscaper, this guide will provide clear, actionable advice to help you build a garden border that stands the test of time.
Why Build a Garden Border? Understanding the Benefits
Garden borders are more than just decorative elements. They serve multiple practical purposes:
- Define garden spaces: Clearly separate flower beds, pathways, lawns, and vegetable patches.
- Prevent soil erosion: Help keep soil and mulch contained within planting areas.
- Control weed growth: Act as a barrier to minimize weed intrusion.
- Add visual appeal: Create structure and balance in your garden layout.
- Protect plants: Shield delicate plants from foot traffic and lawn mower damage.
Understanding these benefits will help you select the right border style and materials to suit your garden’s specific needs.
Choosing the Best Materials for Your Garden Border
One of the first decisions in building a garden border is selecting the material. Your choice will impact the durability, maintenance, and appearance of the border.
Common Garden Border Materials:
- Wood
- Pros: Natural look, easy to install, relatively inexpensive.
- Cons: Prone to rot and insect damage unless treated.
Best for: Rustic or cottage-style gardens.
Stone
- Pros: Durable, weather-resistant, timeless aesthetic.
- Cons: Can be heavy and costly; requires more labor.
Best for: Formal gardens and rock gardens.
Brick
- Pros: Classic look, sturdy, low maintenance.
- Cons: More expensive, requires solid foundation.
Best for: Traditional and Victorian-style gardens.
- Pros: Sleek modern appearance, long-lasting, flexible shapes.
- Cons: Can be pricey, may rust if untreated.
Best for: Contemporary gardens.
Plastic or Composite
- Pros: Affordable, easy to install, rot-resistant.
- Cons: Less natural appearance, can fade over time.
- Best for: Budget-conscious and low-maintenance gardens.
Tip: Consider your garden’s style, climate, and budget when choosing materials.
Step-by-Step Guide: How to Build a Garden Border
Follow these detailed steps to build a sturdy and attractive garden border that suits your space:
Step 1: Plan Your Border Layout
- Measure the area: Use a tape measure to mark the length and width of your intended border.
- Mark the outline: Use garden hoses or string to outline the border shape. This helps visualize the final look.
Step 2: Prepare the Ground
- Clear the area: Remove grass, weeds, and debris along the border line.
- Dig a trench: Excavate a shallow trench (4-6 inches deep) to set your border materials firmly.
Step 3: Level the Base
- Add a base layer: For stone or brick borders, lay a 2-inch layer of sand or gravel to improve drainage and stability.
- Compact the base: Use a tamper to press the base firmly.
Step 4: Install the Border Material
- Wood: Place wooden edging into the trench, securing with stakes or spikes as needed.
- Stone or Brick: Lay stones or bricks in the trench, ensuring they fit tightly together. Use mortar for bricks if desired.
- Metal or Plastic: Position edging strips and secure them with spikes or anchors.
Step 5: Backfill and Secure
- Fill the trench: Backfill with soil or gravel behind the border to hold it in place.
- Compact soil: Firm the soil to prevent shifting.
Step 6: Finish the Border
- Add mulch or decorative stones inside the bordered area to enhance appearance and reduce weed growth.
- Water the area lightly to settle the soil.
Expert Tips for Building Long-Lasting Garden Borders
- Use treated wood for increased longevity in outdoor conditions.
- Level each section carefully to avoid uneven borders.
- Include a root barrier if you want to prevent invasive plants from crossing borders.
- Consider drainage: Ensure your border does not block water flow, which can cause pooling or erosion.
- Regular maintenance: Check your borders seasonally for damage or shifting, and repair as needed.
Creative Ideas to Enhance Your Garden Border
- Incorporate lighting: Solar or low-voltage lights along the border add ambiance and safety.
- Plant low-growing flowers or herbs along the border for added color and fragrance.
- Use recycled materials: Old bricks, wine bottles, or driftwood can make unique, eco-friendly borders.
- Mix materials: Combine stone and metal for a modern yet natural look.
Common Mistakes to Avoid When Building Garden Borders
- Skipping soil preparation: Poorly prepared soil leads to unstable borders.
- Choosing wrong material for climate: For example, untreated wood in wet climates can rot quickly.
- Ignoring garden style: Mismatched borders can detract from your garden’s overall aesthetic.
- Overcomplicating design: Simple, clean lines often look best and are easier to maintain.
Conclusion: Transform Your Garden with a Thoughtfully Built Border
Building a garden border is a straightforward yet impactful way to upgrade your outdoor space. By choosing the right materials and following proper installation steps, you can create a border that not only looks great but also protects your plants and defines your garden’s layout. Remember to plan carefully, prepare your ground properly, and maintain your borders regularly for lasting beauty.
Ready to get started? Grab your tools, select the perfect material, and watch your garden flourish with a new, customized border that reflects your style and enhances your landscape.
Frequently Asked Questions (FAQs)
Q: How deep should I dig for a garden border?
A: Typically, dig 4-6 inches deep to ensure stability, but depth can vary depending on material and soil conditions.
Q: Can I build a garden border myself?
A: Yes, with basic tools and materials, most DIYers can build sturdy garden borders by following simple steps.
Q: What’s the best material for a low-maintenance garden border?
A: Stone, brick, or metal edging require minimal upkeep and last for many years.
By following this guide, you’ll have expert knowledge and practical tips to build a garden border that enhances your outdoor space beautifully and functionally. Happy gardening!
